


33
7
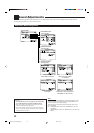
TEST TONE
You can emit the test tone to adjust the speaker output level.
CAUTION:
The test tone is automatically fixed to 0 dB, but this level will be
louder than you would expect.
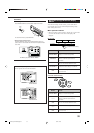
Select one of the following.
• The test tone will be heard for about three seconds after you
select “AUTO” or “MANUAL.”
AUTO : When this is selected, the test tone comes out of all
the activated speakers in the following sequence:
Left front speaker
=
Center speaker
=
Right front speaker
=
Right surround speaker
=
Right surround back speaker
=
Left surround back speaker
=
Left surround speaker
=
Subwoofer
=
(Back to the beginning)
MANUAL: When this is selected, the test tone comes out of
only the speaker you select.
OFF : Select this to stop the test tone.
Notes:
• Test tone is not available when a pair of headphones is
connected to the PHONES jack.
• If “NO” or “NONE” is selected for a speaker on the SPEAKER
SETTING submenu (see page 32), test tone does not come out
of the speaker.
7
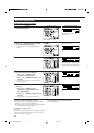
Adjusting the speaker channel output levels
Select and adjust the following speaker output levels within the
range of –10 dB to +10 dB.
FRONT L LEVEL : Select to adjust the left front speaker
output level.
FRONT R LEVEL : Select to adjust the right front speaker
output level.
CENTER LEVEL : Select to adjust the center speaker
output level.
SURR L LEVEL : Select to adjust the left surround
speaker output level.
SURR R LEVEL : Select to adjust the right surround
speaker output level.
SBACK L LEVEL* : Select to adjust the left surround back
speaker output level.
SBACK R LEVEL* : Select to adjust the right surround back
speaker output level.
SUBWOOFER : Select to adjust the subwoofer output
level.
Note:
*
When “SURR BACK OUT” is set to “1SPK” on the SPEAKER
SETTING submenu, “SBACK LEVEL” will appear instead of
these two level settings.
To adjust the sound output levels using the 10 keys
You can also use the 10 keys on the remote control to adjust the
sound output levels. Once you adjust the sound output levels
using the following procedure, the adjustments you have done on
the Setup menu will be also changed.
• If you do not emit the test tone, the adjustments you make will
be applied temporarily to the current Surround/THX/DSP
mode, but cannot be stored in memory.
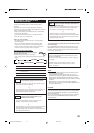
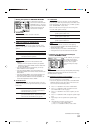
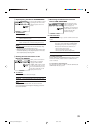
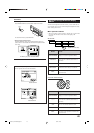
From the remote control ONLY:
1. Press SOUND.
The 10 keys are activated for sound
adjustments.
2. Press TEST once to check the speaker
output balance.
The test tone comes out of all the activated
speakers in sequence.
• The CHANNEL LEVEL submenu (see page 32) appears
on the TV screen.
3. Select the speaker you want to adjust.
The selected speaker name appears on the
remote’s display for a while.
• To select the left front speaker, press
FRONT•L.
• To select the center speaker, press
CENTER.
• To select the right front speaker, press
FRONT•R.
• To select the right surround speaker, press SURR•R.
• To select the right surround back speaker, press
SURR BK•R.
• To select the left surround back speaker, press
SURR BK•L.
• To select the left surround speaker, press SURR•L.
• To select the subwoofer, press SUBWFR.
4. Press LEVEL +/– to adjust the speaker
output levels.
The speaker name selected in the above step
and its level appear on the unit’s display.
• You can adjust the levels within the range
of –10 dB to +10 dB.
5. Repeat steps 3 and 4 to adjust the other speaker output
levels.
6. Press TEST again to stop the test tone.
Note:
When Analog Direct is in use, you cannot adjust the speaker
output levels without emitting the test tone.
EFFECT
LIVENESS
FM MODE
RETURN
100
+
123
456
7
/P
89
10
+
100
100
+
9
+
10
SOUND
TEST
TEST
EN29-38_RX-DP20VSL[B]f.pm5 03.5.21, 18:5333