


13
DIGITAL AUTO: Select for the digital input mode. The
receiver automatically detects the incoming
signal format, then the digital signal format
indicator (LINEAR PCM,
, , or
96/24) for the detected signal lights up.
DOLBY DIGITAL*
2
:Select to play back software encoded with
Dolby Digital.
DTS*
2
: Select to play back software encoded with
DTS.
ANALOG: Select for the analog input mode. The
ANALOG indicator lights up on the display.
Initial setting: DIGITAL AUTO
*
2
If the following symptoms occur while playing Dolby Digital or
DTS software with “DIGITAL AUTO” selected, select “DOLBY
DIGITAL” or “DTS.”
• Sound does not come out at the beginning of playback.
• Noise comes out while searching for or skipping chapters or
tracks.
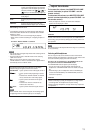
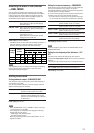
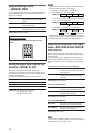
Ex.: When “DOLBY DIGITAL” is selected
NOTES
• You cannot select the digital input mode when selecting “FM” or
“AM” as the source.
• The input mode is fixed to “DIGITAL AUTO” when selecting
“USB” as the source.
• When you turn off the power or select another source,
“DOLBY DIGITAL” or “DTS” is canceled and the digital mode is
automatically reset to “DIGITAL AUTO.”
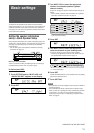
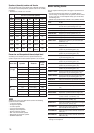
The following digital signal format indicators on the display
indicate what type of signal comes into the receiver.
LINEAR PCM: Lights up when Linear PCM signal comes in.
: • Lights up when Dolby Digital signal comes
in.
• Flashes when “DOLBY DIGITAL” is selected
for any software other than Dolby Digital.
: • Lights up when conventional DTS signal
comes in.
• Flashes when “DTS” is selected for any
software other than DTS.
96/24: Lights up when DTS 96/24 signal comes in.
NOTE
When “DIGITAL AUTO” cannot recognize the incoming signal,
no digital signal format indicator lights up on the display.
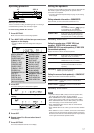
3
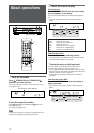
Adjust the volume
To increase the volume, turn MASTER VOLUME
control clockwise (or press VOLUME + on the
remote control).
To decrease the volume, turn MASTER VOLUME
control counterclockwise (or press VOLUME – on
the remote control).
• When you adjust the volume, the volume level indication
appears on the display for a while.
CAUTION:
Always set the volume to the minimum before starting any
sources. If the volume is set at its high level, the sudden blast of
sound energy can permanently damage your hearing and/or ruin
your speakers.
NOTE
The volume level can be adjusted within the range of “0” (minimum)
to “50” (maximum).
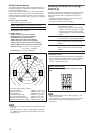
Listening with headphones
You can enjoy not only stereo software but also multi-channel
software through the headphones. (Sounds are down-mixed to the
front channels while playing multi-channel software.)
Connect a pair of headphones to the PHONES jack on the
front panel to activate the HEADPHONE mode.
The HEADPHONE indicator lights up on the display.
• You can also enjoy the Surround/DSP mode through the
headphones—3D HEADPHONE mode. For details, see page
28.
• Disconnecting a pair of headphones from the PHONES jack
cancels the HEADPHONE (or 3D HEADPHONE) mode and
activates the speakers.
CAUTION:
Be sure to turn down the volume:
• Before connecting or putting on headphones, as high volume
can damage both the headphones and your hearing.
• Before removing headphones, as high volume may output from
the speakers.
L
S.WFR
R
AUTO SURR
ANALOG
L
LS RS
S.WFR LFE
CR
AUTO SURR
DIGITAL
DIGITAL AUTO