– 10 –
English
Turning On or Off the Power
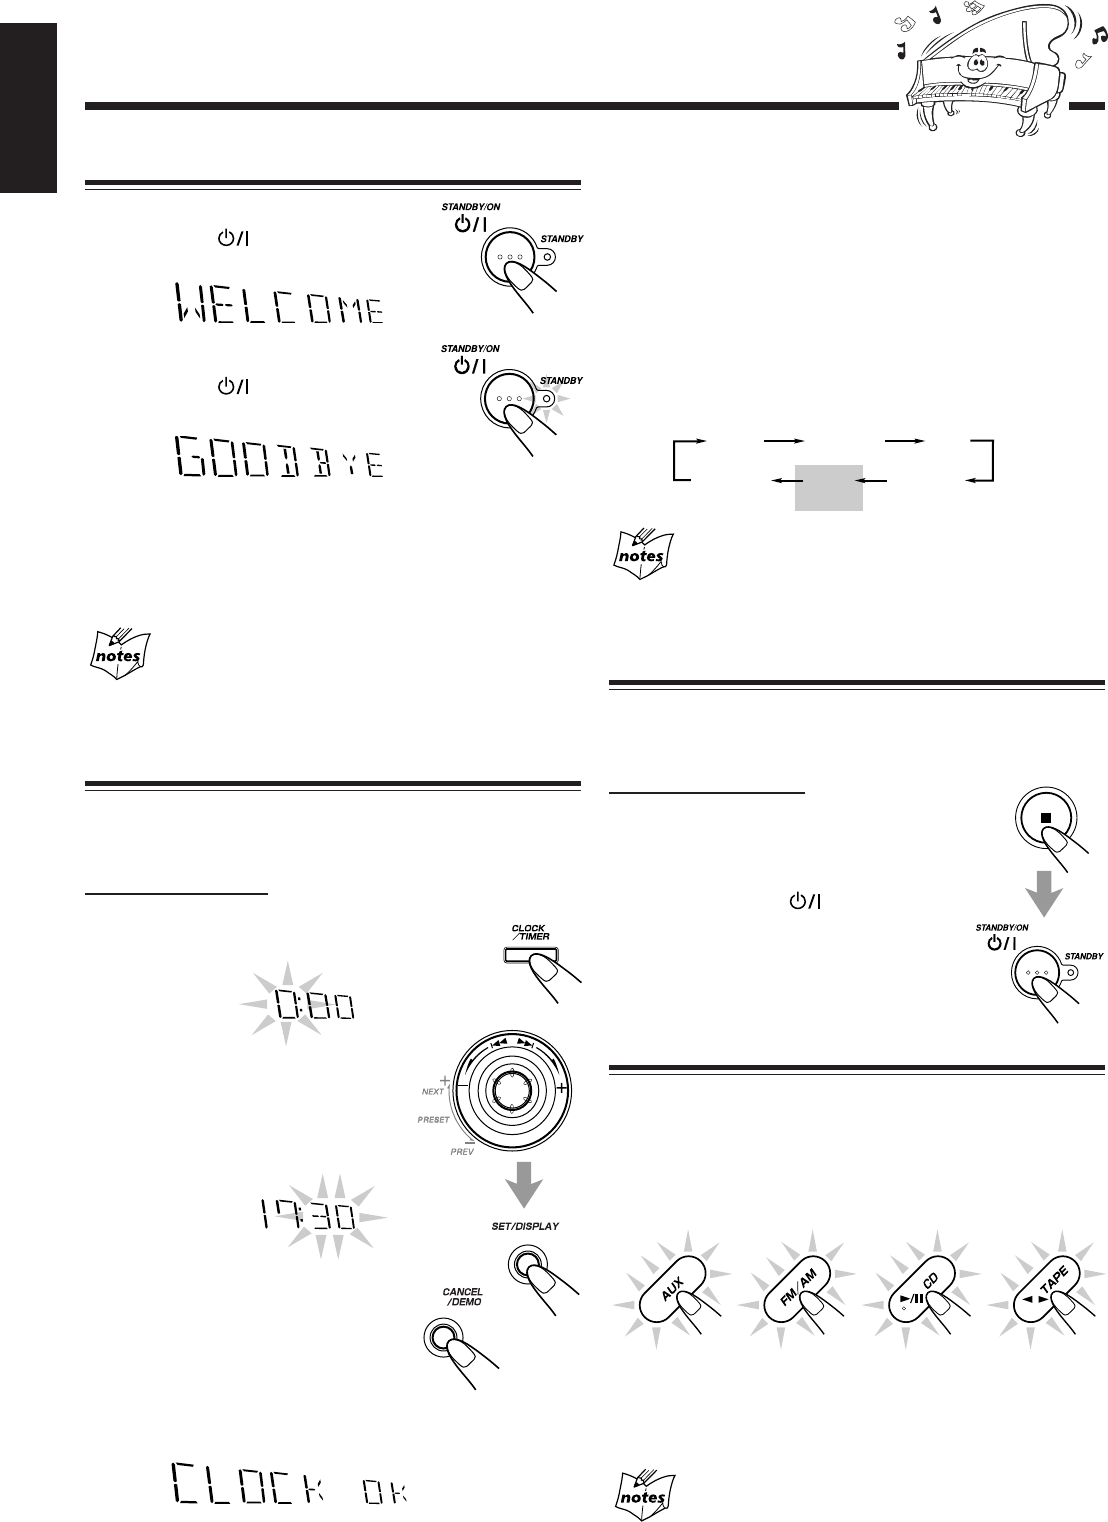
To turn on the unit, press
STANDBY/ON
so that the STANDBY
lamp goes off.
To turn off the unit (on standby), press
STANDBY/ON again so that the
STANDBY lamp lights up.
• A little power is always consumed even while the unit is on
standby.
To switch off the power supply completely, unplug the AC
power cord from the AC outlet.
When you unplug the AC power cord or if a power
failure occurs
The clock is reset to “0:00” right away, while the tuner preset
stations (see page 13) will be erased in a few days.
Setting the Clock
Before operating the unit any further, first set the built in clock.
You can set the clock whether the unit is on or off.
On the unit ONLY:
1
Press CLOCK/TIMER.
The hour digits start flashing on the display.
2
Turn 4/¢ to adjust the
hour, then press SET/
DISPLAY.
The minute digits start flashing on
the display.
• If you want to correct the hour
after pressing SET/DISPLAY,
press CANCEL/DEMO.
The hour digits start flashing again.
3
Turn 4/¢ to adjust the minute, then
press SET/DISPLAY.
To check the clock time
Press and hold SET/DISPLAY while playing any source.
• Each time you press and hold the button, the source
indication and the clock time alternate on the display.
To adjust the clock again
If you have adjusted the clock before, you need to press
CLOCK/TIMER repeatedly until the clock setting mode is
selected.
• Each time you press the button, the clock/timer setting
modes change as follows:
When you unplug the AC power cord or if a power
failure occurs
The clock loses the setting and is reset to “0:00.” You need to set the
clock again.
Setting the AM Tuner Interval Spacing
Some countries space AM stations 9 kHz apart, and some
countries use 10 kHz spacing.
On the unit ONLY:
You can only change the AM tuner interval
spacing while tuning into an AM station. (See
page 13.)
Press STANDBY/ON while holding down 7.
• Each time you press these buttons, the AM
tuner interval spacing alternates between
9 kHz and 10 kHz.
Selecting the Sources
To listen to the FM/AM broadcasts, press FM/AM.
(See page 13.)
To playback CDs, press CD 3¥8 SELECT. (See pages 14 –
17.)
To playback tapes, press TAPE 2 3. (See page 23.)
To select the external equipment as the source, press AUX.
When you press the play button for a particular source
(FM/AM, CD 3/8 SELECT, TAPE 2 3 and AUX), the unit
turns on (and the unit starts playing the source if it is ready —
COMPU PLAY CONTROL).
About the audio level indicator
All the audio level indicators light up when no signals come in.
Common Operations
DAILY
ON TIME
ON TIME
Clock
setting
(The hour digits start flashing.)
Cancelled
REC
EN01-13.CA-MXGA9V/8V/7V 7/4/03, 3:29 PM10


