


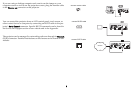


7
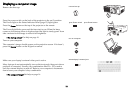
Positioning the projector
To determine where to position the projector, consider the size and shape of
your screen, the location of your power outlets, and the distance between
the projector and the rest of your equipment. Here are some general guide-
lines:
• Position the projector on a flat surface at a
ri
ght angle to the screen. The
projector must be at least 3 feet (0.9m) from the projection screen.
• Position the projector within 10 feet (3m) of your power source and
within 6 feet (1.8m) of your video device (unless you purchase exten-
sion cables). To ensure adequate cable access, do not place the projector
within 6 inches (.15m) of a wall or other object.
• If you are installing the projector on the ceiling, refer to the installation
guide that comes with the Ceiling Mount Kit for more information. To
turn the image upside down, see “Ceiling” on page 33. We recommend
using an authorized ceiling mount. The Ceiling Mount Kit is sold sepa-
rately; visit our website for more infor
mation.
• Position the projector the desired distance from the screen. The dis-
tance from the lens of the projector to the screen, the zoom setting, and
the video format determine the size of the projected image. For infor-
mation about image sizes at different di
stances, see “Projected image
size” on page 41.
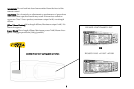
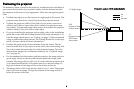
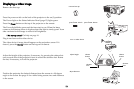
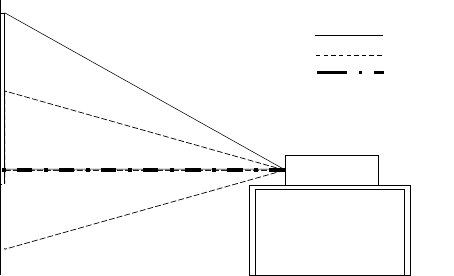
• For the standard lens that comes with the projector,
the image exits at a
given angle. However, the lens shift feature makes the image offset
variable. The image offset is 100% at a 10:1 ratio when the projector is in
16:10 mode (default mode). This means that if you have an image 10’
high, the bottom of the image will be at the center of the lens.
• The image offset is 50% when the lens shift is at a
1:1 ratio. This means
that if you have an image 10’ high, the bottom of the image will be 5’
below the center of the lens.
10:0
1:1
lens cente
r
10’ high image
Projection angle in 16:10 mode (default)
10:0
bottom of image
at lens center
1:1
bottom of image
50% below
lens center