


28
OPERATION
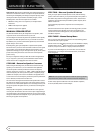
RDS Display Options
The RDS system is capable of transmitting a wide variety of information
in addition to the initial station call sign that appears when a station is
first tuned. In normal RDS operation the display will indicate the station
name, broadcast network or call letters. Pressing the RDS Button on the
Remote enables you to cycle through the various data types in the following
sequence:
The station’s call letters (PS) (with some private stations other information
•
too).
The station’s frequency (FREQ MODE), which is always shown on the TV
•
On-Screen Display, is shown in the Message Display.
The Program Type (PTY).
•
NOTE
: Many stations do not transmit a specific PTY. The display will show
NONE, when such a station is selected and PTY is active.
A “text” message (Radiotext, RT) containing special information from the
•
broadcast station. Note that this message may scroll across the display to
permit messages longer than the eight positions in the display. Radiotext
is not shown on the TV On-Screen Display.
The current time of day (CT). Note that it may take up to two minutes
•
for the time to appear, in that time the letters CT are shown in the
information display when CT is selected. Please note that the accuracy of
the time data is dependent on the radio station, not the AVR.
Some RDS stations may not include some of these additional features. If the
data required for the selected mode is not being transmitted, the Message
Display will show a NO TYPE, NO TEXT or NO TIME message after the
individual time out.
In any FM mode the RDS function requires a strong enough signal for proper
operation.
Program Search (PTY)
An important feature of RDS is its capability of encoding broadcasts with
Program Type (PTY) codes that indicate the type of material being broadcast.
You may search for a specific Program Type (PTY) by following these steps:
Press the RDS button until PTY is shown in the Main Information Display.1.
While PTY is shown, press the Preset Up/Down Buttons or hold them 2.
pressed to scroll through the list of available PTY types.
Press either of the Tuning 3.
KL
Buttons. The tuner begins to scan the FM
band upwards or downwards for the first station that has RDS data that
matches the desired selection, and acceptable signal strength for quality
reception.
The tuner will make up to one complete scan of the entire FM band for 4.
the next station that matches the desired PTY type and has acceptable
reception quality. If no such station is found, the display will read NONE
for some seconds and the tuner will return to the last FM station in use
before the search.
RECORDING
Two-channel analog and digital audio signals, as well as composite signals,
are normally available at the appropriate recording outputs. To make a
recording, connect your audio or video recorder to the appropriate output
jacks, as described in the Installation section, insert blank media and make
sure the recorder is turned on and recording while the source is playing.
NOTES
:
Analog and digital audio signals are not converted to the other format. 1.
Only PCM digital audio signals are available for recording. Proprietary 2.
formats such as Dolby Digital and DTS may not be recorded using the
digital audio connections. Use the analog audio connections to make an
analog recording.
HDMI and component video sources that are HDCP-copyprotected are 3.
not available for recording.
Please make certain that you are aware of any copyright restrictions 4.
on any material you record. Unauthorized duplication of copyrighted
materials is prohibited.
AUX INPUT
Enjoy the full power and resolution of your Harman Kardon system, including
a variety of analog surround modes, while listening to content stored on your
portable device.
The Auxiliary Audio Input mini jack is provided on the AVR’s rear panel for
convenient connection of portable players, such as CD players and the iPod
(iPod and cable not included). Purchase a stereo cable with a 1/8" (3,5 mm)
plug on at least one end for connection to the Auxiliary Audio Input. Plug
the other end of the cable into the portable device’s headphone output,
and operate the device using its own controls. You may also use a cable
with separate left and right audio plugs at one end for connection to any
component equipped with analog audio outputs.
No video connection is available with the AUX input. However, the AVR will
use the last-selected analog video input when the AUX source is selected.