


Using the Projector on a Network
Follow the instructions in these sections to set up your projector for use on a network.
Wireless Network Projection
Setting Up Projector Network E-Mail Alerts
Setting Up Monitoring Using SNMP
Controlling a Networked Projector Using a Web Browser
Wireless Network Projection
You can send images to your projector through a wireless network. To do this, you must install the
Epson 802.11b/g/n wireless LAN module, and then set up your projector and computer for wireless
projection.
Note: The wireless LAN module is not included with your projector and is optional.
There are two ways to connect the projector to your wireless network:
• Using the optional Quick Wireless Connection USB Key (Windows only)
• Configuring the connection manually using the projector's Network menus
After installing the module and setting up the projector, install the network software. You can download
the latest software and documentation from the Epson web site. Go to epson.com/support (U.S.) or
epson.ca/support (Canada) and select your projector.
Use the following software and documentation to set up, control, and monitor wireless projection:
• EasyMP Network Projection software sets up your computer for wireless network projection.
• EasyMP Monitor software (Windows only) lets you monitor and control your projector through the
network.
• Projection from iOS or Android devices with the wireless LAN module and free Epson iProjection app;
visit epson.com/projectorapp (U.S.) or epson.ca/projectorapp (Canada) for more information.
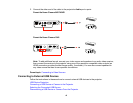
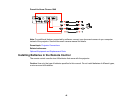
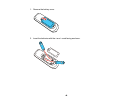
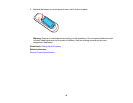
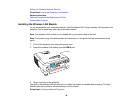
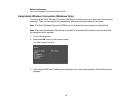
Installing the Wireless LAN Module
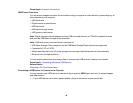
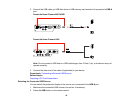
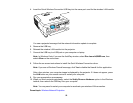
Using Quick Wireless Connection (Windows Only)
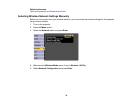
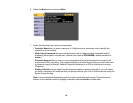
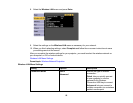
Selecting Wireless Network Settings Manually
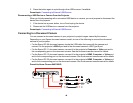
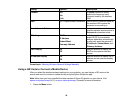
Using a QR Code to Connect a Mobile Device
Selecting Wireless Network Settings in Windows
Selecting Wireless Network Settings in OS X
49