Basic Operations
13
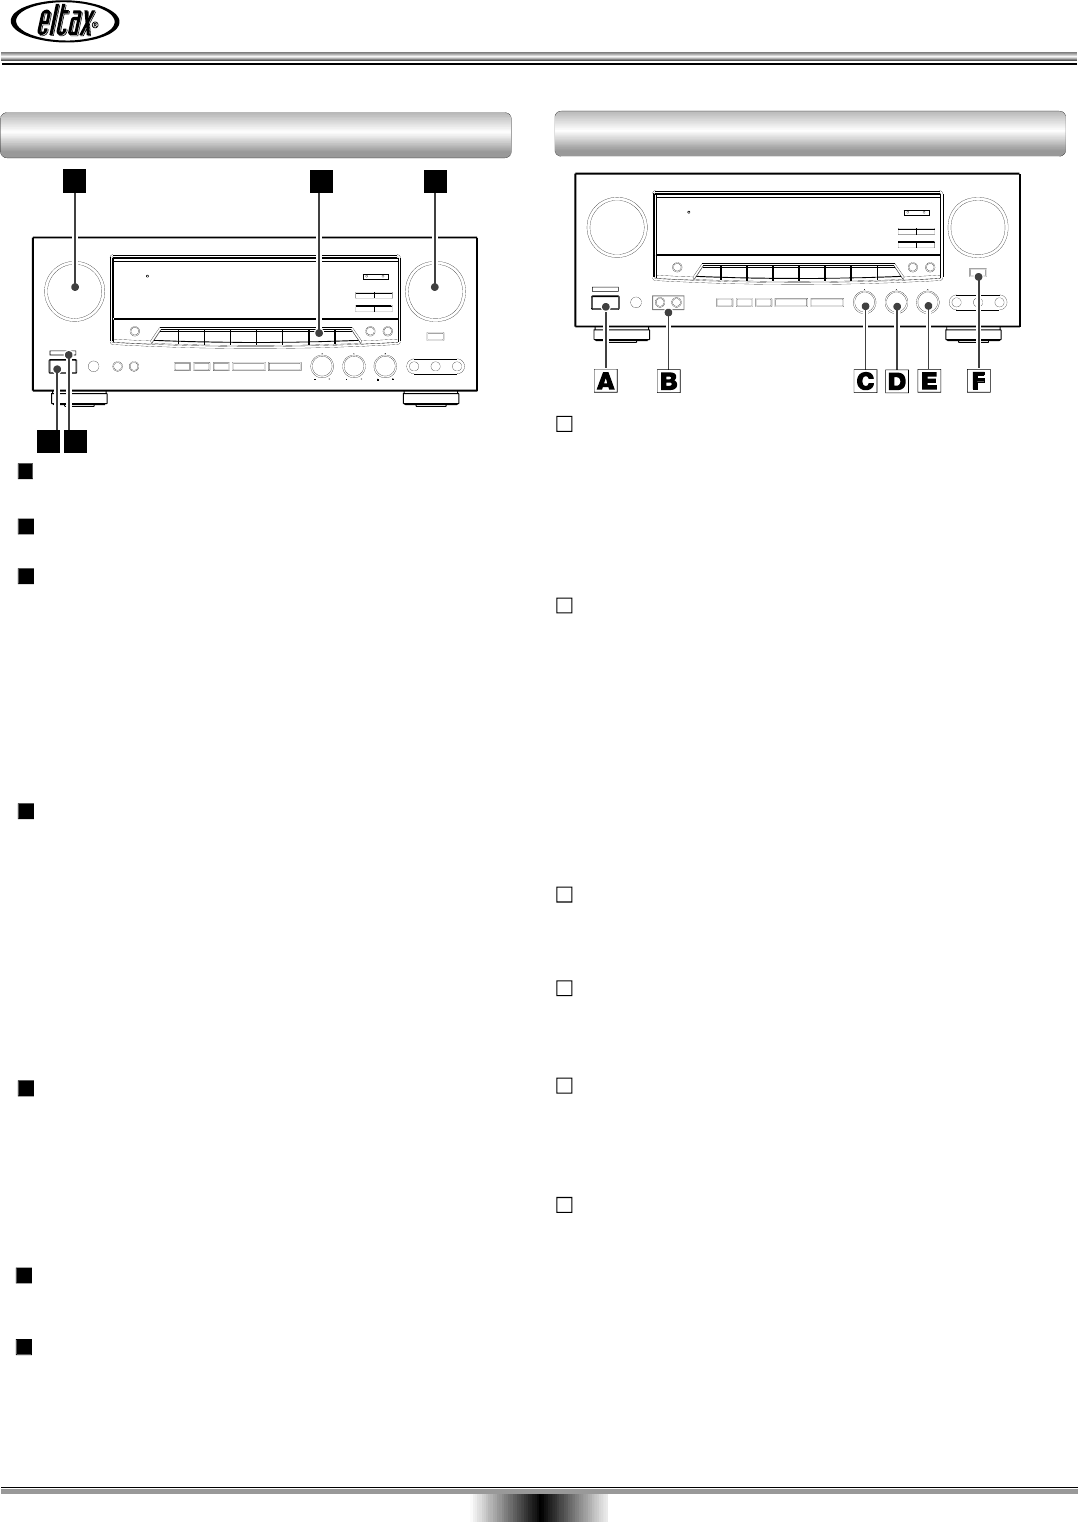
BALANCE Control
This control is used to adjust the balance of the front
speakers.
Normally set to the center position.
E
BASS BOOST Switch
Bass frequencies (lows) can be increased by pressing
the bass boost switch. However, do not use the bass
boost feature at high volume levels or permanent
damage may occur to your speakers.
F
Bass Control
This control is used for adjusting the level of the low
frequency sound range.
Treble Control
This control is used for adjusting the level of the high
frequency sound range.
D
C
STANDBY/ON Button
When the POWER button is "ON", Press this button to
turn the power on.
Press it again to turn the system off (power standby
mode).
The STANDBY indicator lights up in power standby mode
and goes out when this unit is turned on.
SPEAKER Select Button
With the unit in the STEREO mode or the SURROUND
MODEs (DTS, DOLBY DIGITAL, DOLBY PRO LOGICII, 3
STEREO, other SURROUND MODES) SPEAKERS A and B
can be selected simultaneously.
Notes:
When the speaker A and B is selected simultaneously,
You must connect certainly speaker both A and B.
Otherwise speaker is not operate.
B
A
Press the POWER button to ON.
Press the STANDBY/ON button to ON.
Select the desired source with the FUNCTION (source)
selector.
3
2
1
VCR/VID 1
TV/ VID 2 (OPT 1, OPT 2, COAX)
AUX/ VID 3 (OPT 1, OPT 2, COAX)
DVD/ CD (OPT 1, OPT 2, COAX)
TAPE
CD/ (OPT 1, OPT 2, COAX)
TUNER (frequency)
6CH IN
Play the source, and gradually turn up the volume to the
required level with the MASTER VOLUME control.
5
You can record a source such as a Compact Disc onto a
cassette tape connected to the TAPE REC jacks.
Turn the FUNCTION (source) selector corresponding to
the source to be recorded.
Start recording.
2
1
If "DIGITAL" blinks on the display:
A digital input souce(OPT 1, 2, COAX) has been selected,
but the source isn't connected or is not switched on.
In that case, connect and switch the source on, or select
ANALOG by pressing the DIGITAL INPUT button.
When TV, DVD, AUX or CD is selected, press the
DI GI TAL INPUT button and select "OPTI CAL-1",
"OPTICAL-2", "COAXIAL" or "ANALOG" in accordance
with your connection.
4
5
3
4
2 1
Basic Operations (1) Basic Operations (2)
Recording a Source


