


6
Getting Started
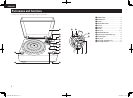
Part names
and functions
Connections
Preparations
Operations Troubleshooting Specifications
ENGLISH
Connections
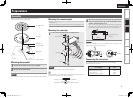
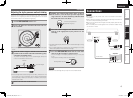
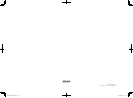
Adjusting the stylus pressure and anti-skating
Adjust the stylus pressure for the cartridge to be used. Anti-skating
adjustment is for negating the affect of centrifugal force on the stylus
tip caused by rotation of a record during playing.
1
Set the ANTI-SKATING knob to “0”.
2
Lower the lifter lever and move the tone arm over
the turntable.
• For a cartridge with a removable stylus cover, remove the stylus
cover.
3
Turn the counterweight so that the tone arm will be
parallel to the turntable when the head shell is gently
released from holding status.
To protect the stylus tip, turn the counterweight slowly and
move it in the direction of the arrow.
Parallel
Counterweight
• If the cartridge to be used is too light or too heavy, the tone arm will
not be level. For such a cartridge, use an optional counterweight
(sold separately) made by our company. For details, consult your
nearest repair outlet.
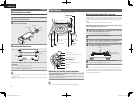
4
Return the tone arm to the armrest.
5
Holding the counterweight with a nger so that it
does not move, turn the stylus pressure adjustment
ring so that it’s “0” mark is lined up with the black
line of the tone arm's rear shaft.
Turn the stylus pressure
adjustment ring only.
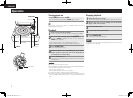
6
Turn the counterweight in the direction of arrow
and set to the appropriate stylus pressure for the
cartridge.
• The appropriate stylus pressure for the included cartridge is 2.5 g.
Set to “2.5”.
• For the appropriate stylus pressure for the cartridge to be used,
refer to the operation manual for the cartridge.
7
Turn the ANTI-SKATING knob and set to the same
value as for the cartridge’s stylus pressure.
For the cartridge of the stylus pressure of 3.0 g or more, set
to “3”.
The proper anti-skating value can be achieved.
A
N
T
I
-
S
K
A
T
I
N
G
0
1
2
3
Setting reference point
NOTE
Take care not to damage the stylus tip with the turntable sheet.
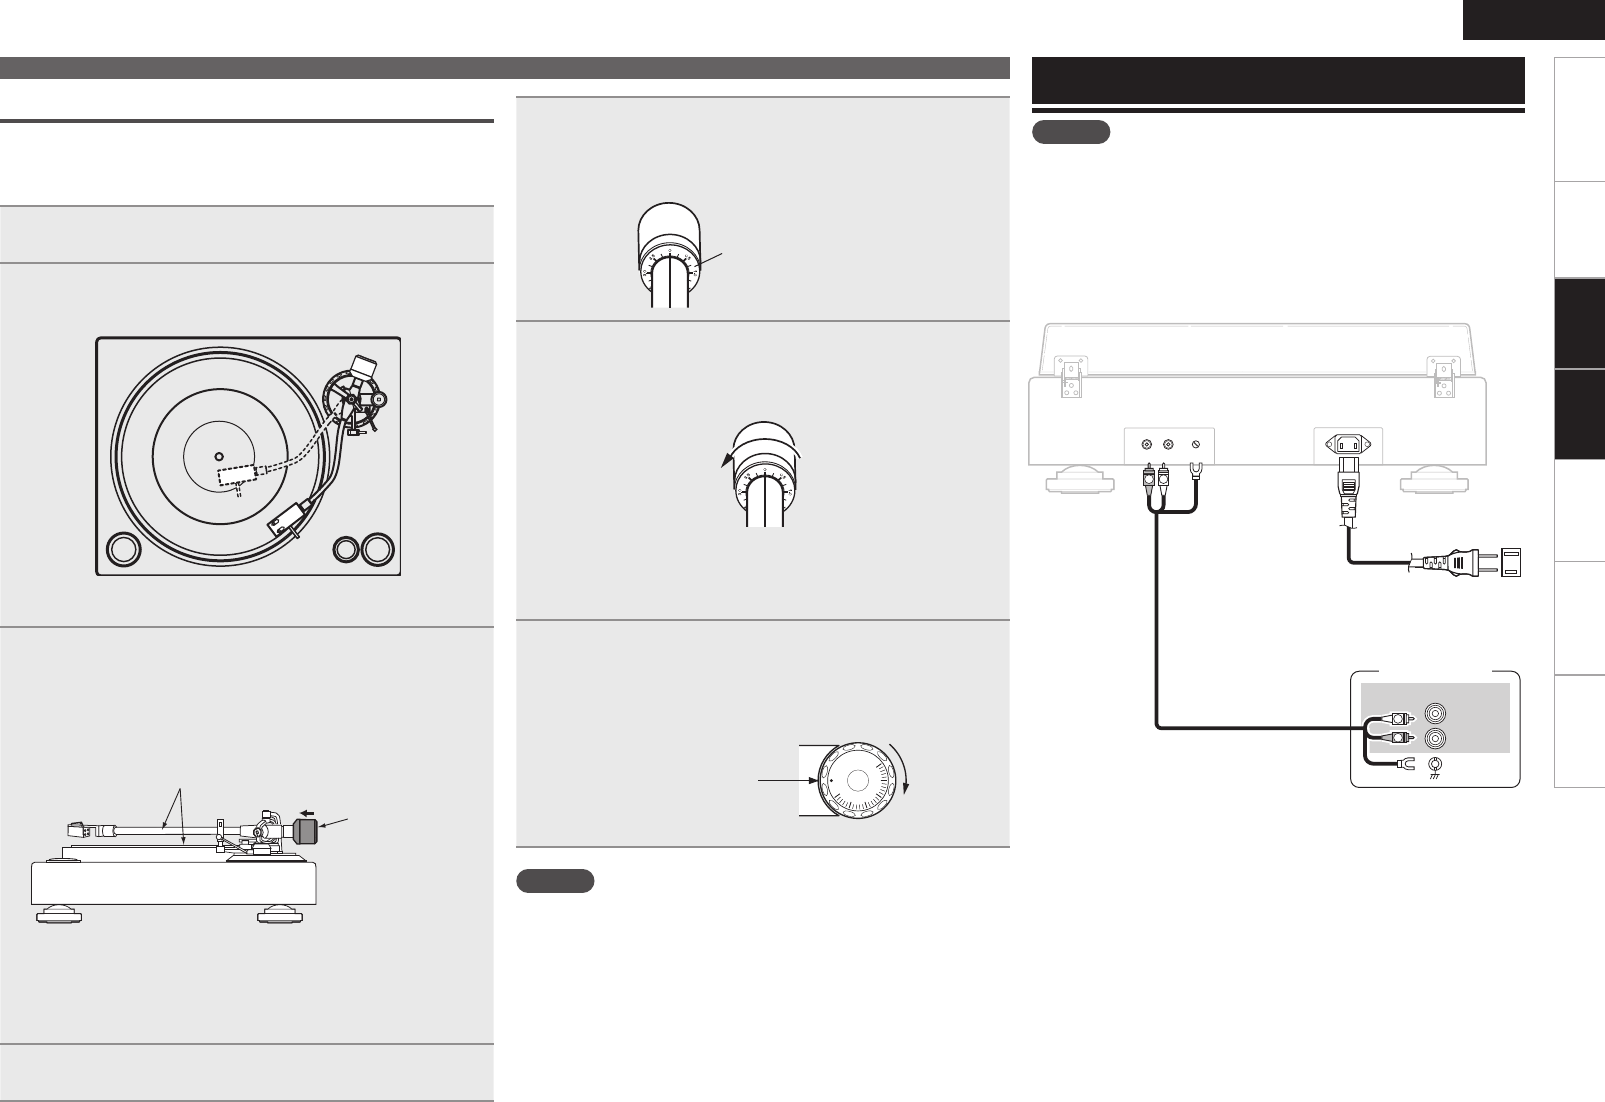
Connections
NOTE
• Do not plug in the power cord until all connections have been
completed.
• When making connections, also refer to the operating instructions of
the other components being connected.
• Be sure to connect the left and right channels properly (left with left,
right with right).
• Do not bundle power cords together with connection cables. Doing
so can result in noise.
R L GND
PHONO OUT
AC IN
AC IN
R
SIGNAL
GND
L
PHONO IN
R
L
R
L
Amplifier
Audio cable
Power supply outlet
(AC 120 V, 60 Hz)
Preparations
Adjustments
1.DP-A100E3_ENG_004_0825.indd 6 2010/08/26 8:59:09