


4
Getting Started
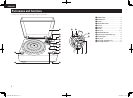
Part names
and functions
Connections
Preparations
Operations Troubleshooting Specifications
ENGLISH
Preparations
Preparations
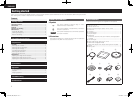
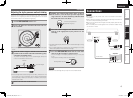
Assembly
Before use, attach the included parts to the main unit.
Turn the power off when assembling.
Turntable sheet
Turntable
Counterweight
Head shell
Center spindle
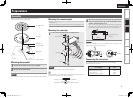
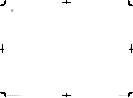
Mounting the turntable
1
Mount the turntable on the Center spindle.
2
Mount the turntable sheet.
NOTE
Take care not to scratch the magnet ring on the rear of the turntable.
Mounting the counterweight
Insert the counterweight onto the shaft at the back of the tone arm
and screw it in.
• Mount with the stylus pressure adjustment ring towards the front.
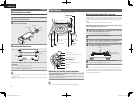
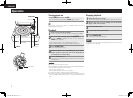
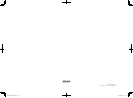
Mounting the cartridge
1
Attach the head shell to the cartridge loosely.
Nut
Nylon washer
Screw
Terminal
Red(R)
Green(ER)
White(L)
Blue(EL)
Cartridge
Tip
NOTE
Use the included screws, nuts, and nylon washers.
If the lead wire on the head shell is disconnected, connect the tip of
the lead wire to the terminal, as shown below.
Red (R)
Green (ER)
White (L)
Blue (EL)
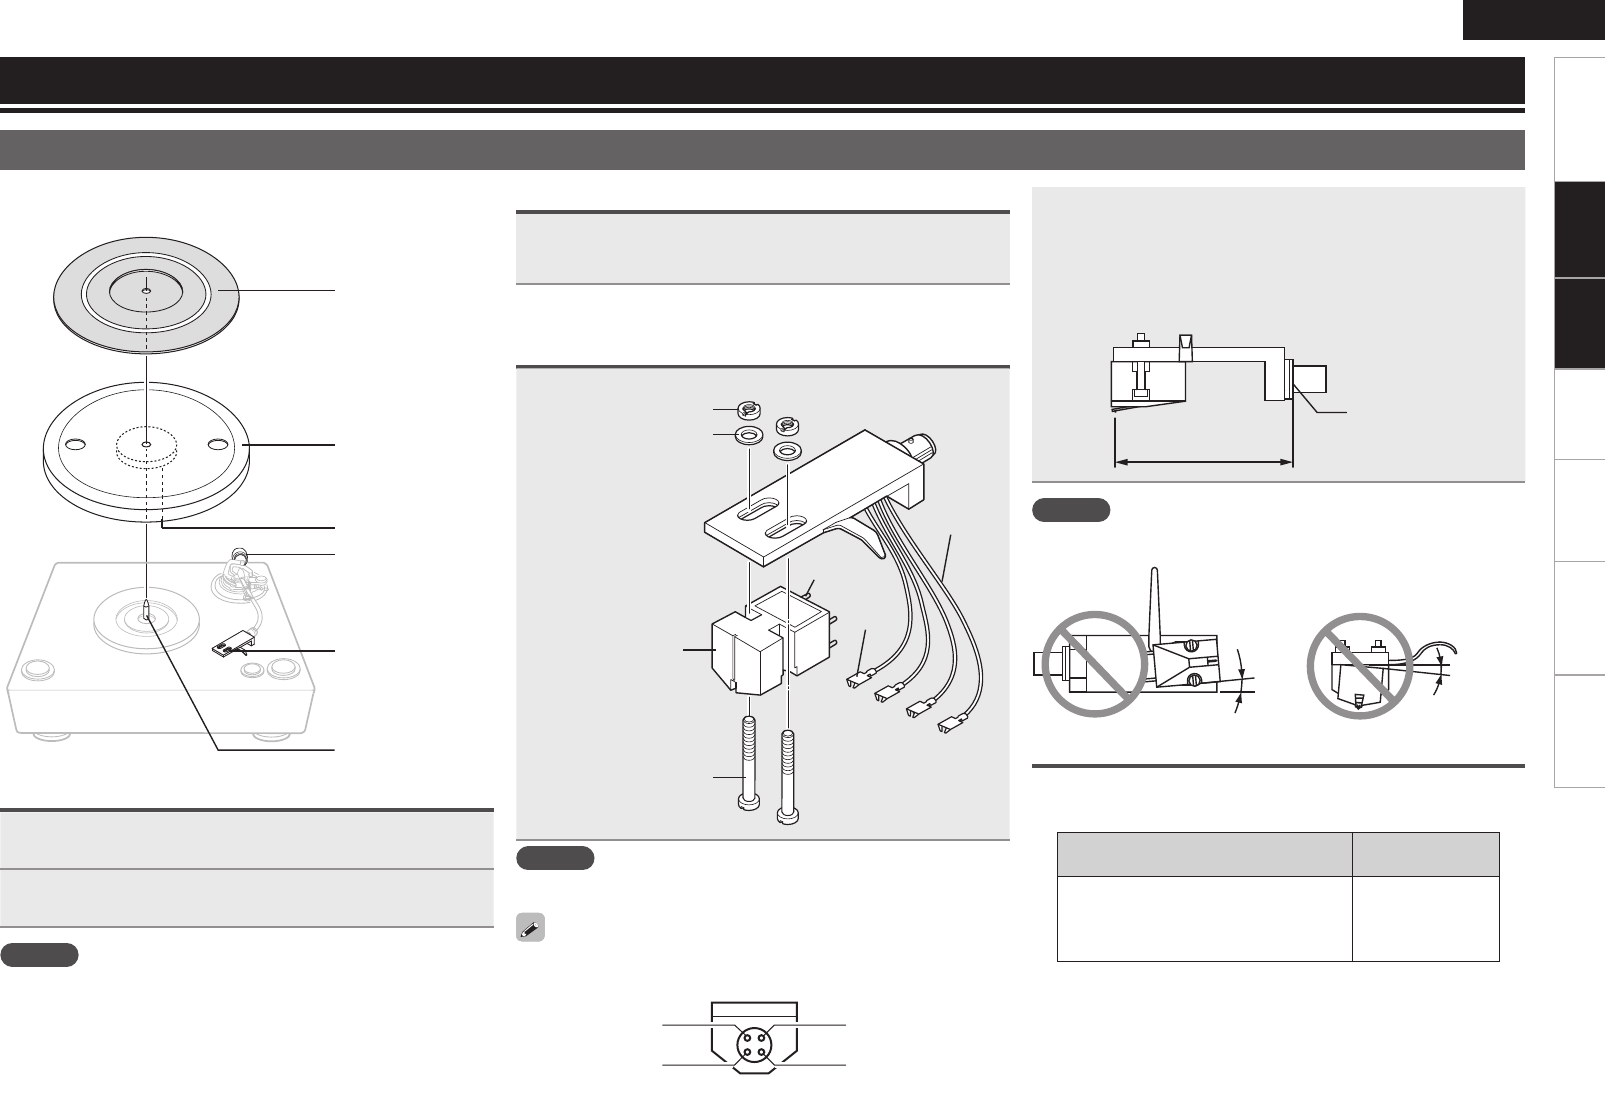
2
Mount the head shell so that the stylus tip is positioned
about 54 mm from the edge of the head shell’s mount
surface, and fasten the screw.
54mm: This is the distance at which the stylus tip traces the
left and right channels with optimum balance according to the
positioning of the turntable and tone arm. (overhang value)
54mm
Head shell mount
surface
NOTE
Mount the cartridge with no tilt or floating so that the stylus tip can
trace the groove on a record correctly.
54mm
tilt
floating
Connecting the lead wires
• Connect the lead wires to the terminals on the cartridge.
• Use tweezers for this task.
Name of terminals
of a cartridge
Color of the lead
wire
L (left channel)
EL (left-channel grounding)
R (right channel)
ER (right-channel grounding)
White
Blue
Red
Green
Magnet ring
Lead wire
Part names
and functions
1.DP-A100E3_ENG_004_0825.indd 4 2010/08/26 8:59:07