ENGLISH
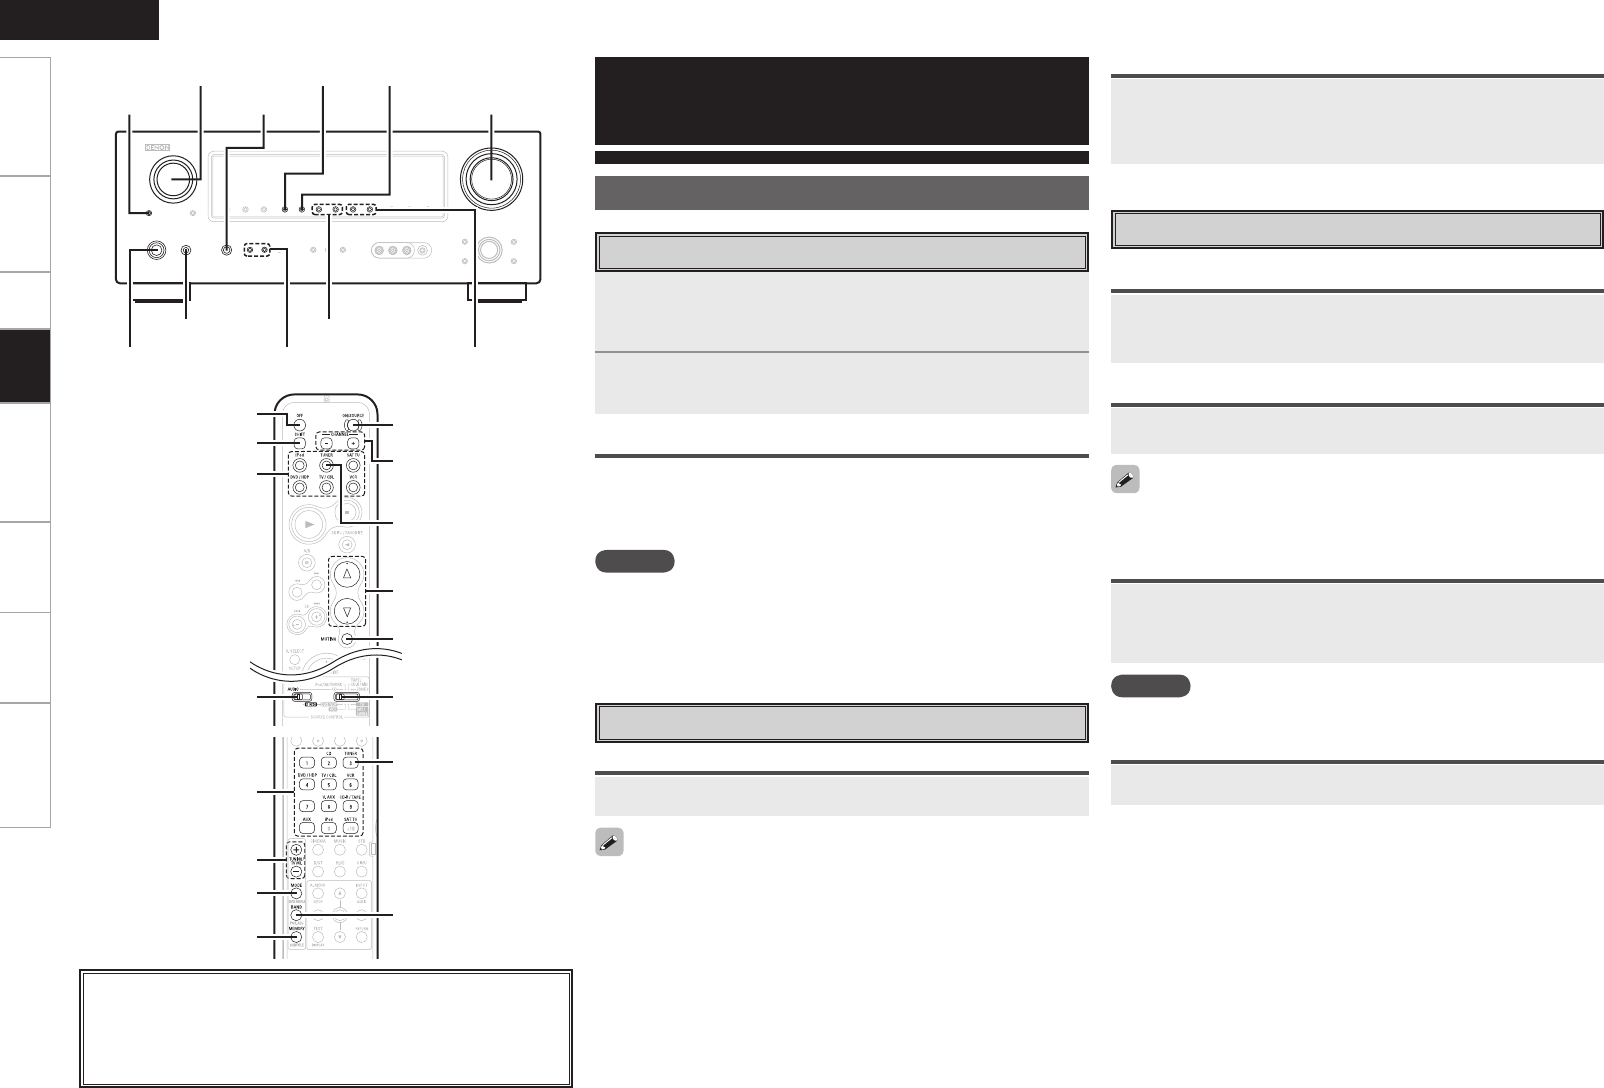
Set [MODE SELECTOR 1] to “AUDIO” then press
[SOURCE SELECT].
The desired input source can be selected directly.
<ON/STANDBY>
<POWER>
<SPEAKER>
PRESET CHANNEL
TUNING
<SOURCE>
SOURCE SELECT SHIFTBAND
MASTER VOLUME<PHONES>
Playback
About the button names in these explanations
< > : Buttons on the main unit
[ ] : Buttons on the remote control unit
Button name only:
Buttons on the main unit and remote control unit
Preparations
1
Press <POWER>.
The power indicator lights red and the power is set to the standby
mode.
2
Press <ON/STANDBY> or [ON/SOURCE].
The power indicator flashes green and the power turns on.
Turning the Power Off
q Press <ON/STANDBY> or [OFF].
The power is set to the standby mode.
w Press <POWER>.
The power indicator turns off, and so does the power.
NOTE
Power continues to be supplied to some of the circuitry even when
the power is in the standby mode. When leaving home for long periods
of time or when traveling, either press <POWER> to turn off the power,
or unplug the power cord from the power outlet.
Turning the Power On
Either turn <MASTER VOLUME> or press [MASTER
VOLUME].
Operations During Playback
Adjusting the Master Volume
Press [MUTING].
To cancel, press [MUTING] again. Muting can also be canceled by
adjusting the master volume.
Plug the headphones into <PHONES>.
The sound from the speakers and pre-out connectors is automatically
cut.
NOTE
Be careful not to set the volume too high when using headphones.
Turning Off the Sound Temporarily (Muting)
Listening with Headphones
Selecting the input source
Operation on the main unit
Turn <SOURCE SELECT>.
If “Rec Select” is selected for the input source, press <SOURCE> before
turning <SOURCE SELECT>.
Operation on the remote control unit
[OFF]
SOURCE SELECT
SHIFT
[MODE
SELECTOR 1]
[ON/SOURCE]
PRESET
CHANNEL
MASTER VOLUME
[MUTING]
[TUNER]
[MODE
SELECTOR 2]
Getting Started Connections Setup Playback Remote Control Multi-Zone Information Troubleshooting
Press <SPEAKER>.
Switching the front speakers
SOURCE SELECT
TUNING
[MODE]
[MEMORY]
[TUNER]
BAND
[Front]
[Rear]
1.AVR788E3_ENG_108.indd 44 2007/10/05 16:22:28


