


Advanced Operation Advanced Operation
ENGLISH
ENGLISH
35
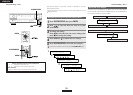
Viewing still pictures and videos
(only for iPods equipped with the slideshow /
video function)
Press [MODE] for at least 2 seconds to switch from the
Browse mode to the Remote mode.
• “Remote iPod” is displayed on the AVR-1707’s display.
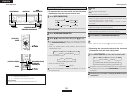
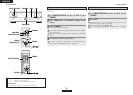
Watching the iPod’s screen, press [
DD HH
] to select
“Photos” or “Video”, then press [ENTER] or [
GG
].
• The iPod’s photo and video data are displayed on the monitor.
Use this procedure to view photo and video data stored on the iPod
on a monitor.
1
2
•To output photo or video data recorded on the iPod to the monitor,
the iPod’s “TV Out” setting (under “Video Settings”) must be set to
“ON”.
For details, refer to the iPod’s operating instructions.
Disconnecting the iPod
Press
<
ON/STANDBY
>
or [OFF] and set the AVR-1707’s
power to the standby mode.
The iPod can be disconnected after switching to a function other
than the one to which the iPod input is assigned.
¢Last function memory
The various settings set when the AVR-1707’s power is switched to
standby are stored in the memory. When the power is turned back on,
the settings made when the power was switched to standby are
recalled.
About the memory functions
Recording the program source (recording the
source currently being monitored)
¢Backup memory
The various settings are stored in the memory for about 1 week, even
when the power is turned off or the power cord is unplugged.
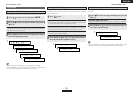
Initialization of the microprocessor
If the indication on the display is not normal or if the operation of the
unit is not correct, then the microprocessor should be reset by the
following procedure.
Switch off the unit using
<
POWER
>
.
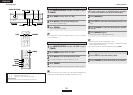
1
Check that the entire display is flashing at 1-second
intervals and release the buttons.
• The microprocessor will be initialized.
3
Keep both
<
SPEAKER
>
(A and B) depressed and turn
on the unit by pressing
<
POWER
>
.
2
• If step 3 does not work, start over from step 1.
• If the microprocessor has been reset, all the button settings are
reset to the default values (the values set upon shipment from the
factory).
Select the input source to be played.
1
Start recording on the tape or video deck.
For instructions, refer to the component’s operating instructions.
3
Select the input mode and play (surround) mode.
2
• The AUDIO IN’s signal selected with INPUT SELECTOR are output to
the CD-R/TAPE and VCR AUDIO OUT terminals.
• Digital signals are not output to the audio output terminals.
¢Simultaneous recording
The signals of the source selected with INPUT SELECTOR are output
simultaneously to the CD-R/TAPE and VCR REC OUT terminals. If a
total of two tape and/or video decks are connected and set to the
recording mode, the same source can be recorded simultaneously on
every decks.