


7
SUPER-X PRO CX3400
2.1 Before you begin
Your BEHRINGER SUPER-X PRO CX3400 was carefully packed in the factory and the packaging is designed
to protect the unit from rough handling. Nevertheless, we recommend that you carefully examine the packaging
and its contents for any signs of physical damage, which may have occurred during transit.
+ If the unit is damaged, please do not return it to BEHRINGER, but notify your dealer and the
shipping company immediately, otherwise claims for damage or replacement may not be granted.
Shipping claims must be made by the consignee.
Your BEHRINGER SUPER-X PRO requires 1 height unit of rack space (1 HU). Please allow for an additional
10 cm of rack depth for the rear-panel connectors.
Be sure that there is enough space around the unit for cooling and please do not place the CX3400 on
high-temperature devices such as radiators etc. to avoid overheating.
+ Before you connect your SUPER-X PRO to the mains, please make sure that your local voltage
matches the voltage required by the unit!
The mains connection of the CX3400 is made by using the enclosed mains cable and a standard IEC
receptacle. It meets all of the international safety certification requirements.
+ Please make sure that all units have a proper ground connection. For your own safety, never
remove or disable the ground conductor of the unit or of the AC power cable.
As a standard, the BEHRINGER SUPER-X PRO is equipped with electronically servo-balanced inputs and
outputs. The circuit design features automatic hum and noise reduction for balanced signals and thus allows
for trouble-free operation, even at high operating levels. Externally induced mains hum, etc. will be effectively
suppressed. The automatic servo-function recognizes the presence of unbalanced connectors and adjusts
the nominal level internally to avoid level differences between the input and output signals (6-dB correction).
Further information can be found in chapter 4 INSTALLATION.
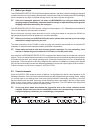
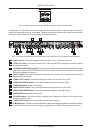
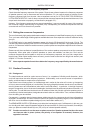
2.2 Control elements
Since the SUPER-X PRO boasts a variety of features, we highlighted the active control elements in the
following illustrations. On the unit itself, these active elements are equipped with light-emitting diodes, helping
you to keep track of your settings even under poor lighting conditions. Additionally, all buttons on the front
panel are backlit when activated. Above the control elements there are two labels in the form of strips which
refers to mono 4-way (upper) or stereo 2/3-way (lower) configuration. The LEDs below these strips show
which controls are active in the respective operating mode.
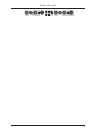
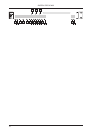
+ On the rear panel, labels above/below the connectors refer to the various crossover modes
available. Please make sure that the two MODE switches and corresponding connectors are
configured properly; otherwise, you could damage your speakers.