


4
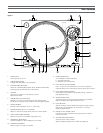
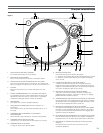
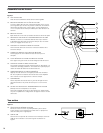
Tone Arm Assembly Diagram
Figure 3
18. HEADSHELL
Standard, interchangeable stereo cartridge headshell.
19. HEADSHELL LOCKING RING
Rotate counter-clockwise (to the left) to draw the inserted
headshell firmly into its seated, locked position. Rotate the ring
a full turn to the right to permit removal of the headshell.
20. TONE ARM
S-shaped tone arm geometry reduces tracking error.
21. TONE ARM ASSEMBLY HEIGHT ADJUST
Raises and lowers the entire tone arm assembly to allow the tone
arm to remain parallel to the record surface. (The proper setting
is “0” for the included cartridge.)
22. TONE ARM LIFT
Elevates tone arm above record surface.
23. TONE ARM REST WITH LOCKING CLAMP
Locking clamp secures tone arm during transport.
24. TONE ARM LIFT ADJUST SCREW
Used to set the amount of tone arm lift.
25. TONE ARM LIFT CONTROL LEVER (“Cueing Lever”)
Controls action of tone arm lift. (Note: Lift mechanism is
hydraulically damped to slow tone arm descent.)
26. ANTI-SKATE CONTROL
Applies a small outward force to the tone arm, counteracting the
tendency of the tone arm to move inward toward the center of
the record.
27. COUNTERWEIGHT
Balances the tone arm and provides adjustment for proper
downward tracking force on the stylus.
28. TONE ARM ASSEMBLY HEIGHT LOCK
(Hidden under counterweight in drawing)
Locks the tone arm height setting. (Always fully unlock
before attempting to make a height adjustment.)
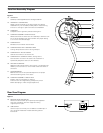
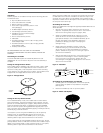
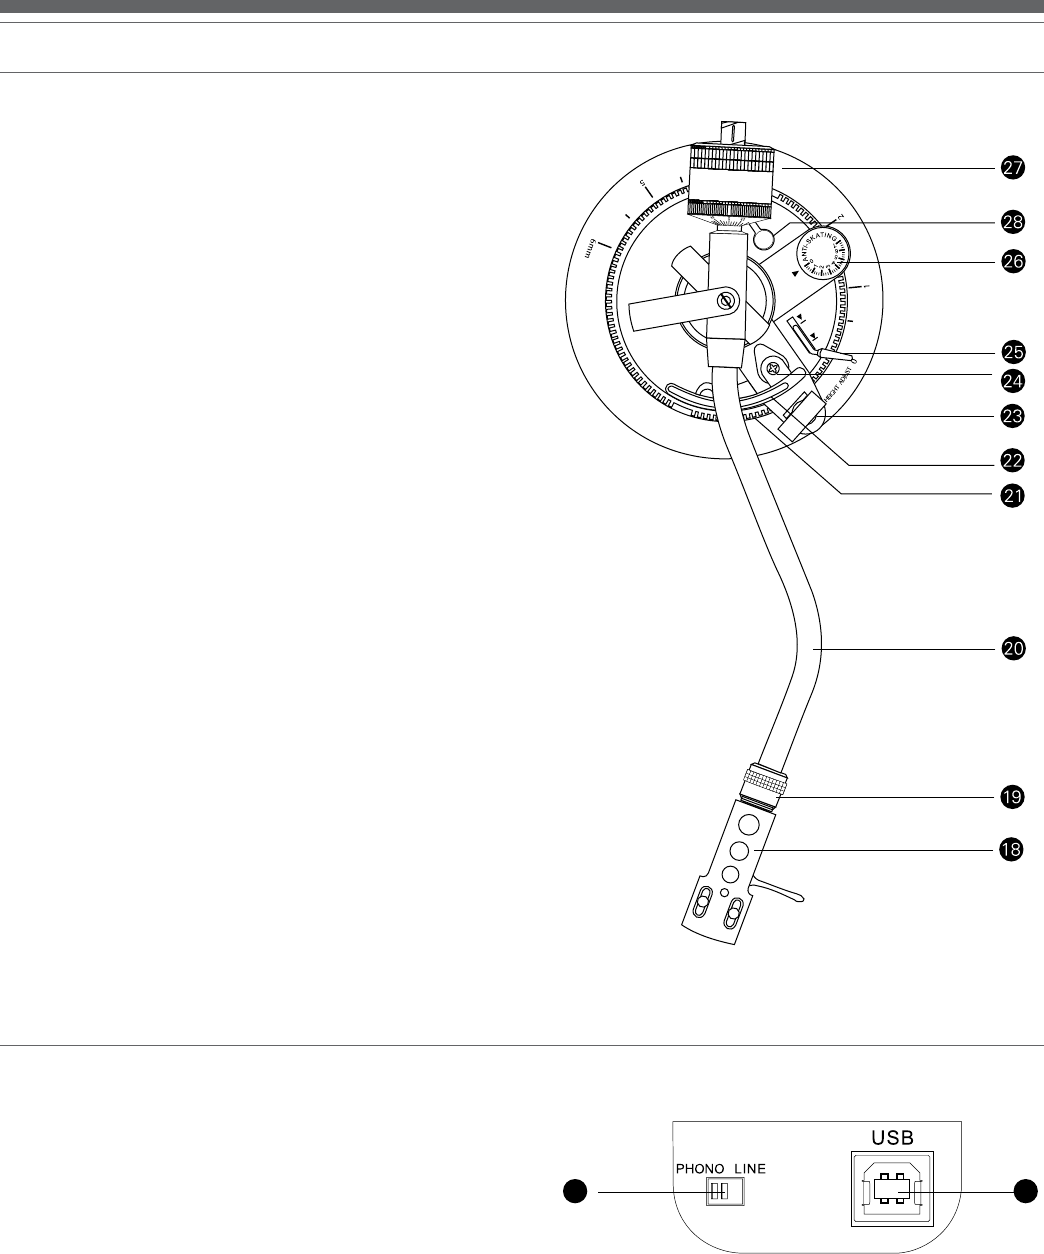
Figure 2
29. PRE-AMP SELECTOR SWITCH
Allows the internal stereo phono pre-amp to be bypassed
when the turntable is used with equipment having
magnetic phono inputs.
30. USB OUTPUT
Use this output to connect your turntable to the USB input of
your computer. Please see included software guide for
instructions.
3029
Rear View Diagram