


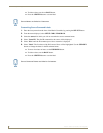

Installing the Flush-Mount LCD Keypad (DAS-KP-LCD-G)
5
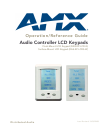
Matrix Audio Controller LCD Keypads
Installing the Flush-Mount LCD Keypad
(DAS-KP-LCD-G)
Overview
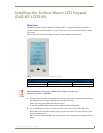
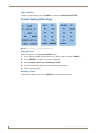
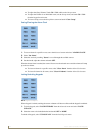
The DAS-KP-LCD-G Flush Mount LCD Keypad (FIG. 1) is shipped completely assembled.
1. Using the cut-out template provided, center the template on the desired location on the wall and
mark the hole to be cut.
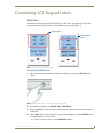
2. Connect the appropriate speaker & controller cables to the back of the DAS-KP-LCD-G.
The speaker connector is located on the right-hand side
The controller connector is located on the left-hand side.
3. Remove the bezel from the front, and insert the LCD Keypad and housing into the hole in the wall.
4. Press the housing firmly against the wall and tighten the 4 mounting screws (black Phillips head)
located in each corner of the housing. This will cause the doglegs to extend and press against the
drywall and will secure the Keypad to the drywall.
Be sure not to over-tighten these screws.
5. Remove the protective film from the front of the LCD Touch-screen.
FIG. 1 DAS-KP-LCD-G Flush Mount LCD Keypad (Flushmount)
Parts List
• Front Bezel
• LCD Touch-screen & Housing
Before installing the LCD Keypads, POWER OFF the Matrix Controller (and
Expansion Controllers, if applicable).