


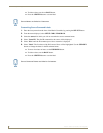

Installing the Surface-Mount LCD Keypad (DAS-KP-LCDS-W)
3
Matrix Audio Controller LCD Keypads
Installing the Surface-Mount LCD Keypad
(DAS-KP-LCDS-W)
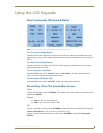
Overview
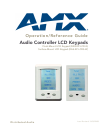
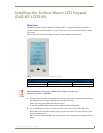
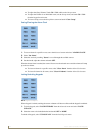
The DAS-KP-LCDS-W Surface Mount LCD Keypad (FIG. 1) is shipped completely assembled. To
correctly install the DAS-KP-LCDS-W (retrofit) in the wall, you must remove the Front Bezel and the
LCD screen.
Please follow these instructions carefully to ensure correct installation and operation.
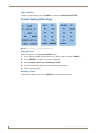
1. To remove the Front Bezel, firmly hold the rear connector board with one hand while squeezing the
top and bottom near one edge of the front bezel with the other hand.
While squeezing, gently pull the bezel back and down.
A soft click should be heard when the bezel is freed from the mounting plate.
2. Use a small Phillips screwdriver to remove the four screws in the corners of the LCD board.
Once all the screws have been removed, gently grip each side of the LCD screen and rock it away
from the mounting plate.
This will slowly release the LCD screen from the bank of pins connecting it to the Keypad Control
Board.
FIG. 1 DAS-KP-LCDS-W Surface Mount (Retrofit) LCD Keypad
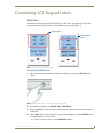
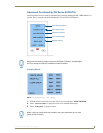
Parts List
• Front Bezel • Keypad Control Board • Mounting Plate
• LCD Touch-screen • Keypad Connector Board • Mounting Screws x 2
Before installing the LCD Keypads, POWER OFF the Matrix Controller (and
Expansion Controllers, if applicable).