


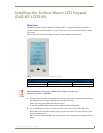


Installing the Flush-Mount LCD Keypad (DAS-KP-LCD-G)
6
Matrix Audio Controller LCD Keypads
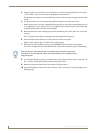
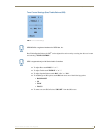
6. Carefully place the keypad bezel on the front of the Keypad.
Start on one side making sure the volume button fits through the appropriate volume hole, and
gently squeeze the cover to secure it to the other side of the housing.
The second volume button may need to be pressed in order to fit through the appropriate volume
hole.
7. POWER ON the controller (and Expansion Controllers, if applicable). The DAS-KP-LCD-G will
start the initialization process immediately.
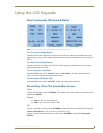
8. If everything initialized correctly you should see the source listing at the top of the screen and
“All-On”, “All-Off” and the time displayed at the bottom of the screen.
9. To remove the cover, gently pry from the top corner until all four clips release from the housing.
When the System is first powered ON, it could take up to 4 minutes to load all the
information to the LCD keypads. Please wait until initialization has completed before
using the keypad.