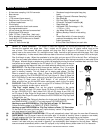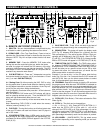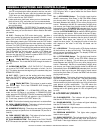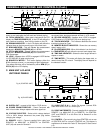
loops cue point. (Fig. 16). This disengages the SEAMLESS LOOP mode
and allows you to edit the loops ending point.
(2) Press OUT/EXIT BUTTON (18) again for a new loop ending point (Fig. 16).
(3) FOR A SHORTER LOOP: Press the OUT/EXIT BUTTON (16) at sooner point in the track.
(4) FOR LONGER LOOP: Press the OUT/EXIT BUTTON (16) at later point in the track.
12. TIME DISPLAY
• During normal playback, pressing the TIME BUTTON (9), will change the display time display information (47) to one
of the following settings:
(1) ELAPSED playing time (45).
(2) REMAINing time of a track (36).
(3) TOTAL remaining time of the disc (35).
13. PITCH BENDING
• This function momentarily increases or decreases the playback speed of a CD respectively when the + PITCH BEND
(28) or - PITCH BEND (26) button is pressed. The extent to which the speed changes is proportionate to the amount
of time the button is pressed. For example, if the + PITCH BEND BUTTON (28) is held down continuously, the CD’s
speed increases and will continue to increase until reaches a maximum of 16% gain in speed. When you release the
+ PITCH BEND BUTTON (28) the speed of the CD will automatically return to it’s previous speed.
• The pitch can be changed from +/- 8%, +/- 12% or +/- 16% range. See changing PITCH PERCENTAGE (Page 7/29) .
• The jog wheel will temporarily bend the pitch if a track is in play mode. Rotating the wheel clockwise will speed up
your track and rotating the wheel counter-clockwise will slow the track down. The speed that you rotate the JOG
WHEEL (13) determines the percentage (%) of the PITCH BEND.
14. TRACK PROGRAM PLAY
• This function allows you to program up to 20 tracks and have them replayed in any order.
• To program a track in to memory:
(1) Be sure the drive is in PAUSE or CUE MODE.
(2) Press the PROG. BUTTON (10) to activate the units program mode. The program indicator LED above the
PROG BUTTON (10) will light and the PROGRAM INDICATOR (33) in the LCD DISPLAY (27) will turn on
indicating that PROGRAM MODE has been activated.
(3) Select a Track by using the NUMBER BUTTONS (23), and again press PROG. BUTTON (10) this will enter the
track into memory.
(4) Repeat this up to 19 times (ie. up to 20 tracks can be programmed). If you keep pressing the PROG. BUTTON
(10) the LCD DISPLAY (27) will indicate which tracks have been programmed.
(4) Press the PLAY BUTTON (25) to begin playing programmed tracks.
(5) To cancel the program press and hold down the PROG. BUTTON (10) for more than two (2) seconds.
15. SETTING A CUE POINT:
• A cue point is a starting point for a song. You may set a cue point anywhere in a CD or song.
* You may set up to seven independent cue points per disk.
* Cue points are stored in the CUE BUTTONS 1-6 (4) and the IN R./CUE BUTTON (17).
* There are two (2) ways to set a CUE point:
1) You may press the IN R./CUE BUTTON (17) on the fly (when the CD is playing). This will set a CUE Point
without interruption of music. Pressing the CUE BUTTON (15) will now return you to the point in the song at
which you pressed the IN R./CUE BUTTON (17). You may now store this CUE Point into one of the available
CUE BUTTONS 1-6
- After you have set your cue point by pressing the IN/R. CUE BUTTON(17) press the MEMORY CUE BUTTON
(3). The red Memory Cue LED will come on. You may now press one of the six (6) CUE BUTTONS (4) to store
your cue point into memory. After pressing one of the CUE BUTTONS (4), the button you selected will flash
briefly and the red Memory Cue LED will shut off and the Cue button will light.
2) You may also use the JOG SHUTTLE (13) to set a cue point.
- While the CD is in PAUSE mode, use the JOG WHEEL (13) forward or reverse to find your desired starting
beat. Once you have found your desired position hit the PLAY BUTTON (25) to set your cue point. Once you
have set your CUE Point press the MEMORY CUE BUTTON (3). The red Memory Cue LED will come on,
indicating that memory is ready to set. You may now press one of the six (6) CUE BUTTONS (4) to store your
cue point into memory. After pressing one of the CUE BUTTONS (4), the button you selected will flash briefly
American DJ® AUDIO • DCD-PRO500™ INSTRUCTION MANUAL • PAGE 11
BASIC OPERATIONS (CONT.)


