SETTING THE SLEEP TIMER
The unit can be turned off automatically at a specified time.
Use the remote control.
1
Press the SLEEP button.
2 Within 4
seconds, press the -4-4 or FF button
to specify the time until the power is turned
off.
Each time the button is pressed, the time changes between
10 and 240 minutes in 10-minute steps,
Specified time
To check the time remaining until the power is turned off
Press the SLEEP button once. The remaining time is displayed
for 4 seconds.
To cancel the sleep timer
Press the SLEEP button twice so that “SLEEP on the display
disappears.
CONNECTING OPTIONAL
EQUIPMENT
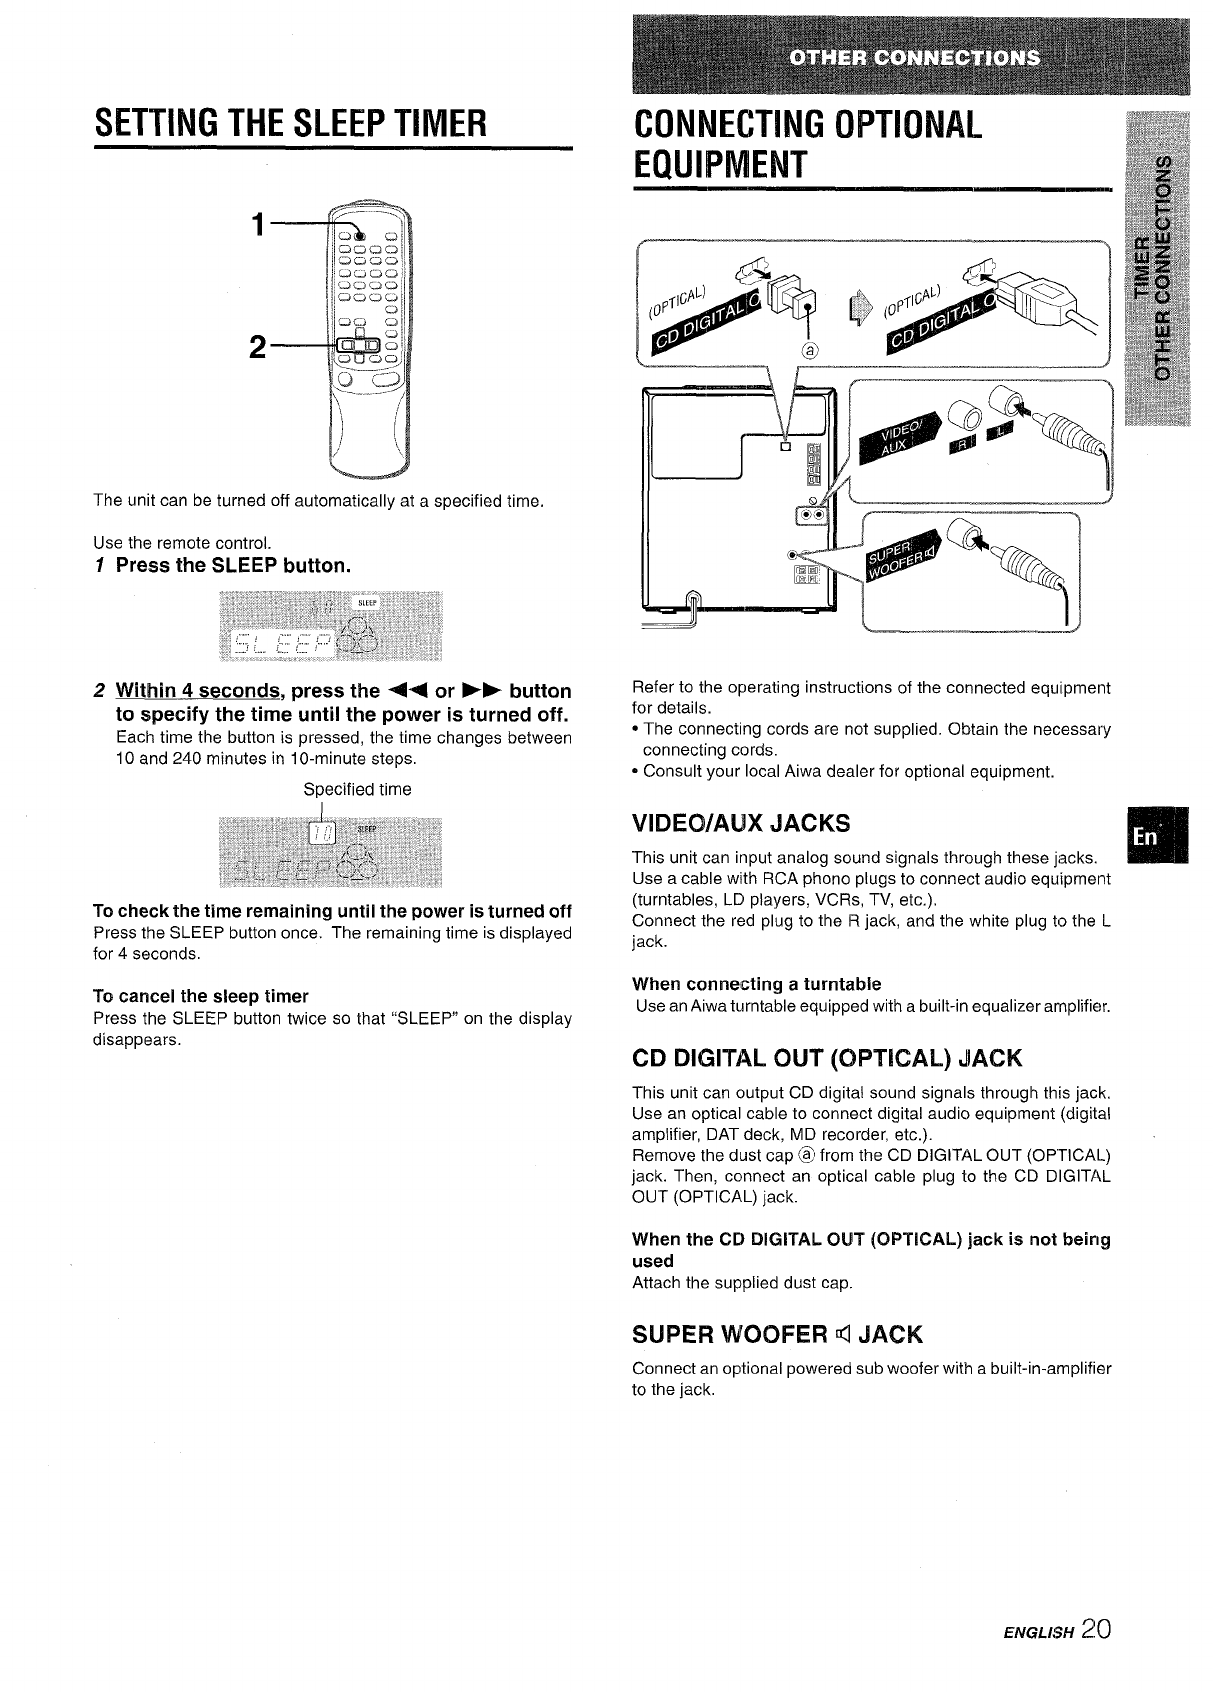
Refer to the operating instructions of the connected equ~pment
for details.
● The connecting cords are not supplied, Obtain the necessary
connecting cords.
* Consult your local Aiwa dealer for optional equipment.
VIDEO/AUX JACKS
This unit can input analog sound signals through these jacks.
m
Use a cable with RCA phono plugs to connect audio equipmel~t
(turntables, Li3 players, VCRs, TV, etc.).
Connect the red plug to the R jack, and the white plug to the L
jack.
When connecting a turntable
Use an Aiwa turntable equipped with a built-in equalizer amplifier.
CD DIGITAL, OUT (OPTICAL) JACK
This unit can output CD digital sound signals through this jack.
Use an optical cable to connect digital audio equipment (digital
amplifier, DAT deck, MD recorder, etc.).
Remove the dust cap @ from the CD DIGITAL OUT (OPTICAL)
jack. Then, connect an optical cable plug to the CD DIGITAL
OUT (OPTICAL) jack.
When the CD DIGITAL OUT (OPTICAL) jack is not being
used
Attach the supplied dust cap.
SUPER WOOFER d JACK
Connect an optional powered sub woofer with a built-in-amplifier
to the jack.
ENGLISH
20


