EPSON Stylus Color 900 Revision C
Troubleshooting Overview 86
Table 3-10. Remedies for No I/C and Ink Out Errors (continued) Table 3-11. Remedies for No I/C and Ink Out Errors (continued)
Step Check Point Actions
3 Is the micro switch fixed
improperly?
Is the connector (green)
disconnected?
If the micro switch is not properly attached, the
actuators possibly fail to touch the micro switch.
Therefore, check that the micro switch is
securely attached to the carriage by the hooks.
4 Is the connector (green,
3-pin) disconnected form
the small board which is
directly attached to the
head surface side?
Remove the printhead and check if the connector
(green, 3-pin) is disconnected from the small
board at the bottom of the printhead.
Note: The green 4-pin is irrelevant as it is for the
encoder.
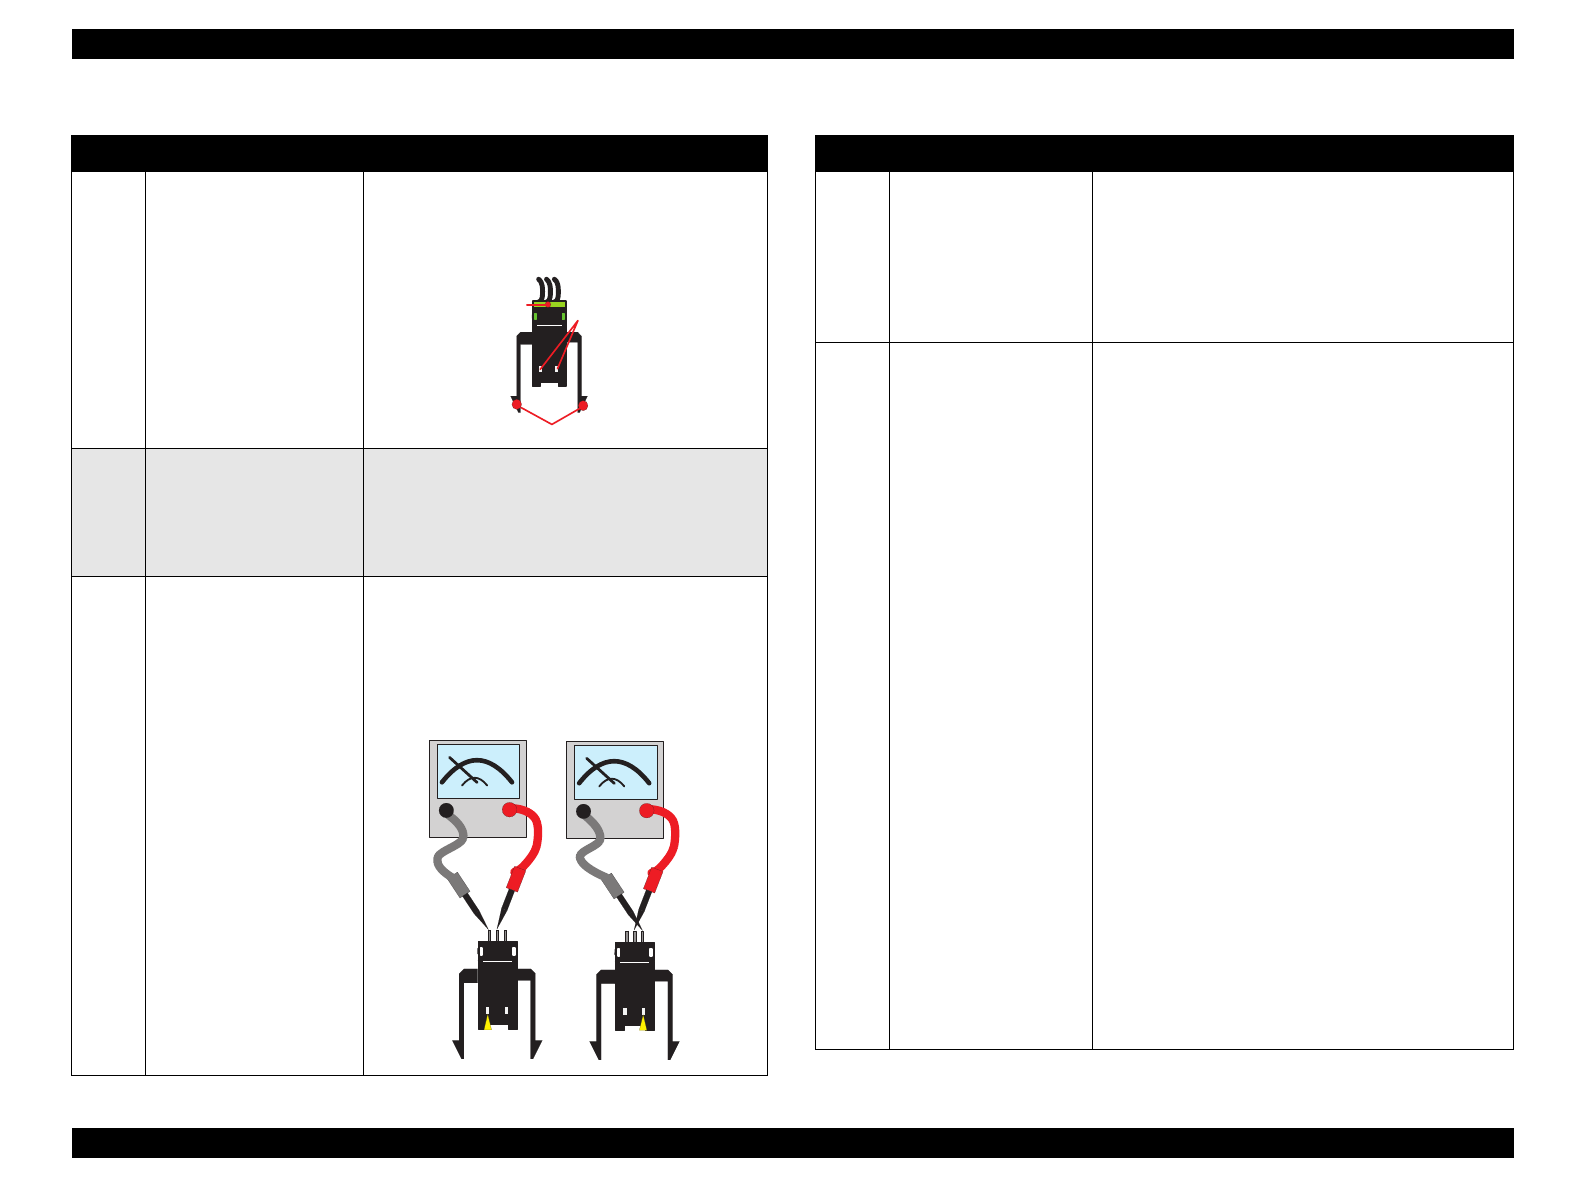
5 Is the micro switch
defective?
1. Keeping the left micro switch pressed down,
place the probes of the tester to the middle
and left pins to check for electrical continuity.
2. Keeping the right micro switch pressed down,
place the probes of the tester to the middle
and right pins to check for electrical continuity.
Hooks
Connector
M icro Switches
Step1
Step2
Push 1
Push 2
Step Check Point Actions
6 Is data in the EEPROM
destroyed?
If the address for the ink consumption information
in the EEPROM is garbled and the printer shows
the Ink Out (Ink End) error constantly, the printer
sets the interface signal “BUSY” to High and stops
communication with any other peripheral devices.
Therefore, it is effective to replace the I/C with a
new one to forcibly overwrite the address with 00H.
7 Is the abnormal
temperature detection
circuit working?
Since the Stylus Color 900 drives a large number
of PZT with a high drive frequency, if the printhead
is driven without any ink filled in it, the printhead
abnormally heats up and may be damaged as the
result. Therefore, this printer monitors and controls
the temperature around the printhead more strictly
than any other printers do. In case the printer
detects abnormal rise in head temperature during
printing, it generates the I/C replacement
command after the sequence described below.
1. Detects an abnormal temperature during
printing.
2. Stops printing and begins a head cleaning. (This
operation solves the nozzle clogging problem in
most cases.)
3. Resumes printing.
4. If detects an abnormal rise in the head
temperature again, sets a flag and generates
the I/C replacement command. (The Ink LED
comes on.)
The printer mostly enters this sequence under the
following two conditions:
• Ink around the nozzles is severely viscous. (due
to removal and reinstallation of the I/C)
• Ink is leaking from the printhead because of a
large impact.
The temperature in the printhead actually rises
abnormally when half the nozzles in any nozzle
row are clogged, or 48 nozzles in any 96-nozzle
row are clogged.


