


18 – TUTORIAL – Setting up the input level, attenuation and delay
YDP2006
Setting up the input level, attenuation and delay
I. Input level and input attenuation
There are two operations on the YDP2006 that affect the input level—the input level control
in the analog domain (pre A/D converters), and the attenuation parameter (INP.ATT) in the
digital domain (post A/D converters).
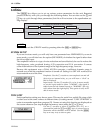
The input level control (on the front panel) should be set so that the level meters register the
highest possible level without the CLIP indicator lighting.
The input attenuation parameter is provided to compensate for equalizer settings that alter
the overall gain of the sound. e.g. If the equalizer settings result in an overall gain increase
of 4dB (for example), internal clipping may occur even if the level meters do not indicate
clipping.
As a guide to input attenuation level, adjust it so that the output volume is the same as
when the bypass function is used. The attenuation can be set from 0dB to infinity (∞), with
the highest numerical value being shown as 50 (see instructions below).
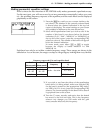
II. Delay
In sound reinforcement situations, it is often desirable for the sound from various loud-
speakers to be delayed, to compensate for phase delay caused by speaker placement. Due to
its position in the signal chain, the equalization stage is a good place to add this delay.
The YDP2006 can delay signals by up to 714 milliseconds (242m, about 800ft) in stereo
mode, or 1428 milliseconds (485m, about 1593ft) in mono mode. You can input this informa-
tion either directly as milliseconds, or as a distance in feet or meters (set your preference in
the “Utilities”). You can make individual settings for both channels, or for both channels at
the same time by linking L and R. These settings are stored in the memory area along with
the equalization settings.
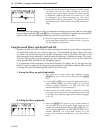
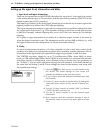
1
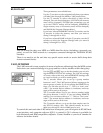
Press the [PEQ] key until you see a screen similar to the
one shown. The actual settings on your screen will
probably be different to the ones shown here.
2 If you wish to alter both channels simultaneously, link
the channels.
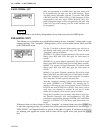
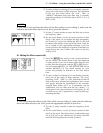
3 Use the F rotary encoder to set the delay. To change the
units used (msec, meters or feet), see the “Utilities” sec-
tion.
4 Use the G rotary encoder to enable (“ON”) or disable
(“OFF”) the delay you have set.
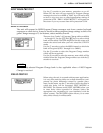
5 Use the Q rotary encoder to set the channel input
attenuation.
6 Don’t forget to store the completed settings in one of
the memory areas, so you can use them again at a later
time.