


86
MANUAL SETUP
Zone 3 amplifier ZONE3 AMP
Use to select how the ZONE 3 speakers will be amplified.
Choices: EXT, SUR, PRNS, BOTH
• Select EXT if you want to connect your Zone 3
speakers through an external amplifier connected to the
ZONE 3 OUTPUT jacks on the rear panel of this unit.
• Select SUR to use the internal surround amplifier of
this unit if you want to connect your Zone 3 speakers
directly to the PRESENCE/ZONE 2(3) speaker
terminals on the rear panel of this unit.
• Select PRNS to use the internal surround back
amplifier of this unit if you want to connect your Zone
3 speakers directly to the PRESENCE/ZONE 2(3)
speaker terminals on the rear panel of this unit.
• Select BOTH to use the internal surround and surround
back amplifiers of this unit if you want to connect your
Zone 3 speakers directly to both the PRESENCE/
ZONE 2(3) and the SURROUND/ZONE 2(3) speaker
terminals on the rear panel of this unit.
• If BI-AMP is set to ON in the ADVANCED SETUP menu,
SUR, PRNS and BOTH cannot be selected.
• Zone 2 and Zone 3 cannot use the same amplifier at the same
time. If BOTH is selected for ZONE2 AMP, for instance, only
EXT can be selected for ZONE3 AMP and vice versa.
• The Intelligent Power AMP Assign feature of this unit becomes
in effect in the following cases so that the surround and
surround back amplifiers of this unit are automatically assigned
to the main room for the use of the surround back speakers
connected to the SURROUND BACK speaker terminals in the
7.1-channel system.
– When ZONE2 AMP and ZONE3 AMP are set to PRNS and
EXT respectively and Zone 2 is turned off
– When ZONE2 AMP and ZONE3 AMP are set to EXT and
PRNS respectively and Zone 3 is turned off
• If either ZONE2 AMP or ZONE3 AMP is set to SUR or PRNS,
the speaker system of the main room is limited to 3.1 or
2.1-channel playback no matter when Zone 2 or Zone 3 is
turned off because the SURROUND/ZONE 2(3) speaker
terminals are used for the zone connection.
■ XM Satellite Radio set G)XM RADIO SET
Use this feature to adjust the XM Satellite Radio settings.
Display DISPLAY
Use this feature if you want to display the XM Satellite
Radio information in the OSD for a certain amount of
time.
Choices: ON, 10S, 30S, OFF
• Select ON to display the XM Satellite Radio
information in the OSD.
• Select 10S to set the amount of time for the XM
Satellite Radio information to be displayed for 10
seconds.
• Select 30S to set the amount of time for the XM
Satellite Radio information to be displayed for 30
seconds.
• Select OFF not to display the XM Satellite Radio
information in the OSD.
Antenna ANTENNA
Use this feature if you want to display the XM Satellite
Radio reception level.
Display status: NONE, 0 to 100%
• If the displayed percentage of the reception level is
below the average (approximately 60%), you need to
adjust the orientation of the XM Satellite Radio
antenna for a better percentage of the reception level.
• If NONE is displayed, the XM Satellite Radio antenna
may not be firmly connected to the XM jack on the rear
panel of this unit. Check the XM Satellite Radio
connection.
The ANTENNA parameter cannot be adjusted by using the
remote control. Instead, you need to adjust the orientation of the
XM Satellite Radio antenna for a better percentage of the
reception level.
Notes
Note
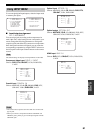
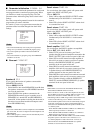
. XM DISPLAY;;;10S
XM ANTENNA;;NONE
G)XM RADIO SET
[]/[]:Up/Down
[<]/[>]:Adjust
p
p