2
0A B C
Rear Panel
Installation and Connections
Before attempting to use your REV500, make sure that you have carefully read and understood the
precautions inside the front cover of this manual.
Mount the REV500 in a rack, or place it in a location where it is safe and stable. Make sure that the POWER
switch is off before making any connections. Plug in the power cord, and connect the REV500’s input and
output connectors to your mixer, multitrack recorder, or other audio equipment using appropriate cables.
Press the POWER switch to turn the REV500 on.
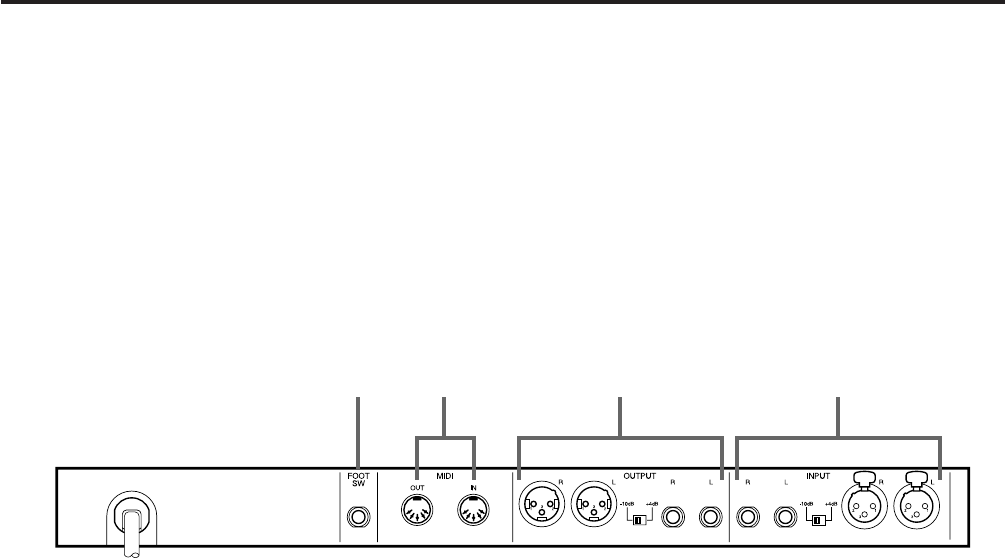
0 FOOT SW connector
This 1/4" phone jack allows you to connect a Yamaha
FC5 footswitch, for hands-free remote control of your
REV500. You can use the FC5 footswitch either to mute
the REV500’s effect output, or to advance the current
program selection.
A MIDI terminals
The REV500 sends and receives MIDI data via these
connectors.
B OUTPUT connectors and output level switch
These are balanced output jacks that output the analog
return signal from the REV500 to your mixer, multitrack
recorder, or other audio equipment. A pair of XLR
connectors and a pair of 1/4" phone jacks are provided. If
you desire monophonic output, insert the plug in the left
(L) connector only. The output level switch selects either
–10 dB or +4 dB as the nominal output level.
C INPUT connectors and input level switch
These are balanced input jacks that receive the analog
signal from your mixer, multitrack recorder, or other
audio equipment. A pair of XLR connectors and a pair of
1/4" phone jacks are provided. If the sound source to be
processed is monophonic, insert the plug in the left (L)
connector only. Also, be sure to set the REV500 to use
mono input (refer to page 14). The input level switch
selects either –10 dB or +4 dB as the nominal input level.
Do not connect jacks to both the XLR and 1/4" phone
INPUT connectors, as doing so may adversely affect the
performance of the REV500.
8 UTILITY key and LED
This key lets you access the REV500’s utility functions,
which include MIDI settings and system-related
functions. The LED above this key will light when a
utility function is being used. See page 18 for a summary
of the functions that can be accessed using this key.
9 POWER switch
This switch turns the REV500 on and off.
7 AUDITION key
This key causes the REV500’s internal tone generator to
play a sound, allowing you to check the effect of the
currently selected program. A utility function (see page
15) allows you to select one of two sounds for this key to
play, and to set the REV500 to play this sound once or
repeatedly when the AUDITION key is pressed.


