


35
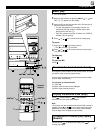
Editing and titling an MD
Ⅵ Erase
This function lets you erase the entire disc, a track or part of a
track quickly and easily.
You can also erase the title of a disc, or the titles of tracks on a
disc.
Please note that once erased, the data can be recovered by
using the Undo function.
To clear out the MD
This operation lets you erase all audio and title (character)
data to create a blank MD.
1 Press to stop the MD recorder.
2 Press MD EDIT repeatedly to display “Disc Erase ?”,
then press ENTER.
* “DiscEraseOK?” appears on the display.
3 Press ENTER again.
* When all audio, name and title data has been erased,
“Complete” appears momentarily.
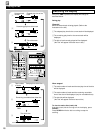
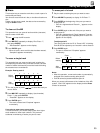
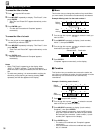
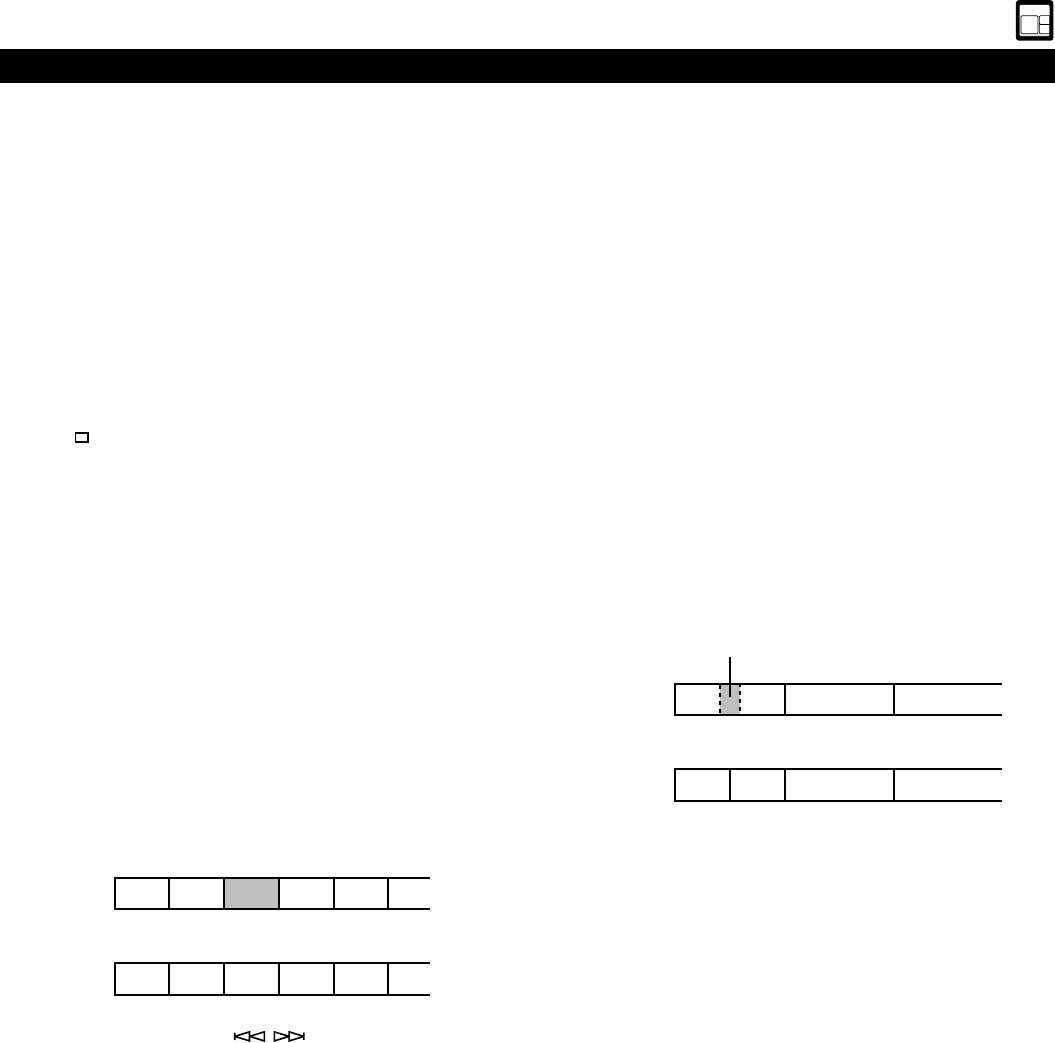
To erase a single track
This operation lets you erase a single track including the
corresponding title data. After you erase the track, the total
number of tracks decreases by one and all tracks following
the erased one are renumbered.
Example: Erasing track 3
1 Turn the jog dial or press / to select the track you
want to erase.
2 Press MD EDIT repeatedly to display “(track number)
Erase ?”, then press ENTER.
* “EraseOK?” appears on the display.
3 Press ENTER again.
* The track is erased and “Complete” appears
momentarily.
If you plan to erase two or more tracks
To avoid confusion, you should always erase from higher
track numbers to lower track numbers. This prevents
accidental renumbering of tracks you plan to erase.
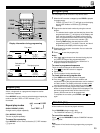
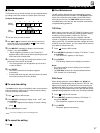
To erase part of a track
1 Play the track containing the part you want to erase.
2 Press MD EDIT repeatedly to display “A–B Erase ?”.
3 Press ENTER at the beginning of the part you want to
erase (point A).
* Point A is registered and “Erase A–_” appears on the
display.
4 Press ENTER again at the end of the part you want to
erase (point B).
* Point B is registered and “Check” appears. Then the
part you specified plays repeatedly and “Erase A–B?”
appears on the display.
To adjust point B
Turn the jog dial while the “B” of “Erase A–B?” is blinking.
Point B can be adjusted up to 2 second in either direction.
5 Press ENTER again.
* The part is erased and “Complete” appears
momentarily.
Notes
• After this operation, a new track number is automatically
assigned to the section starting after point B.
• Point B cannot be positioned before point A.
When you cannot edit because of the limitations of the MD
system, “Can’t Edit” appears on the display and the Erase
function is canceled.
After
erasing
Before
erasing
Erase
a
1
a
2
b
c
1324
123
a
b
c
AB
ADEBC
ABD FE
1
23456
1
23456
After
erasing
Before
erasing