Installation
This section gives a step-by-step guide to installing the CRW8824S drive. Make
sure you have all the necessary tools.
First Steps
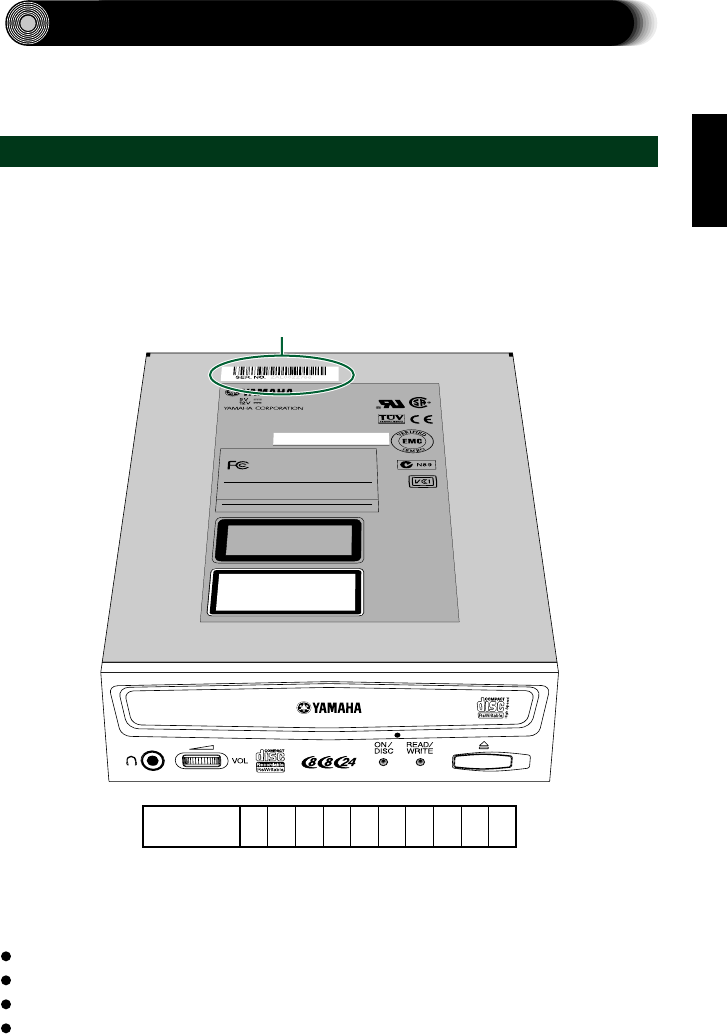
Once you have taken the CRW8824S drive out of its packaging, you should
immediately note down the serial number shown on the top of the drive together
with a barcode. You may need to refer to this number when requesting User
Support services. In the box below the following diagram, write down the 10-
character serial number (consisting of 3 letters followed by 7 digits).
CLASS 1 LASER PRODUCT
LASER KLASSE 1 PRODUKT
LUOKAN 1 LASERLAITE
KLASS 1 LASER APPARAT
PRODUIT LASER DE CLASSE 1
CAUTION - VISIBLE AND / OR INVISIBLE LASER RADIATION WHEN OPEN.
AVOID EXPOSURE TO BEAM.
VARNING - SYNLIG OCH / ELLER OSYNLIG LASERSTRÅLNING NÄR DENNA
DEL ÄR ÖPPNAD. STRÅLEN ÄR FARLIG.
VARO ! AVATTAESSA OLET ALTTIINA NÄKYVÄLLE JA / TAI
NÄKYMÄTÖMÄLLE LASERSÄTEILYLLE. ÄLÄ KATSO SÄTEESEEN.
VARNING-SYNLIG OCH / ELLER OSYNLIG LASERSTRÅLNING NÄR DENNA DEL
ÄR ÖPPNAD. BETRAKTA EJ STRÅLEN.
VORSICHT ! SICHTBARE UND / ODER UNSICHTBARE LASERSTRAHLUNG
WENN ABDECKUNG GEÖFFNET. NICHT DEM STRAHL AUSSETZEN.
ATTENTION-RADIATION VISIBLE ET / OU INVISIBLE LORSQUE L’APPAREIL EST OUVERT.
EVITEZ TOUTE EXPOSITION AU FAISCEAU.
MADE IN MALAYSIA
V561580-1 F
COMPLIES WITH 21 CFR CHAPTER 1, SUBCHAPTER J.
YAMAHA CORPORATION
10-1 NAKAZAWA-CHO, HAMAMATSU-SHI,
SHIZUOKA-KEN 430-8650, JAPAN
MANUFACTURED;
CD-REWRITABLE DRIVE
MODEL NO. CRW8824S
YAMAHA
CRW8824S
Tested To Comply
With FCC Standards
FOR HOME OR OFFICE USE
MAY 2000
Drive’s serial number
(3 letters + 7 digits)
This device complies with Part 15 of the FCC Rules.
Operation is subject to the following two conditions:
(1) This device may not cause harmful interference, and
(2) this device must accept any interference received,
including interference that may cause undesired operation.
This Class B digital apparatus complies with Canadian ICES-003.
Cet appareil numérique de la classe B est conforme á la norme
NMB-003 du Canada.
Serial No.
Before fitting the CRW8824S drive into the computer, you need to set up the drive
using the jumper switches located at the rear of the unit. You’ll need to set the
following:
SCSI ID number
Parity check
Termination
Block size
8


