PREPARATIONS ➤ Connecting the power cable En 38
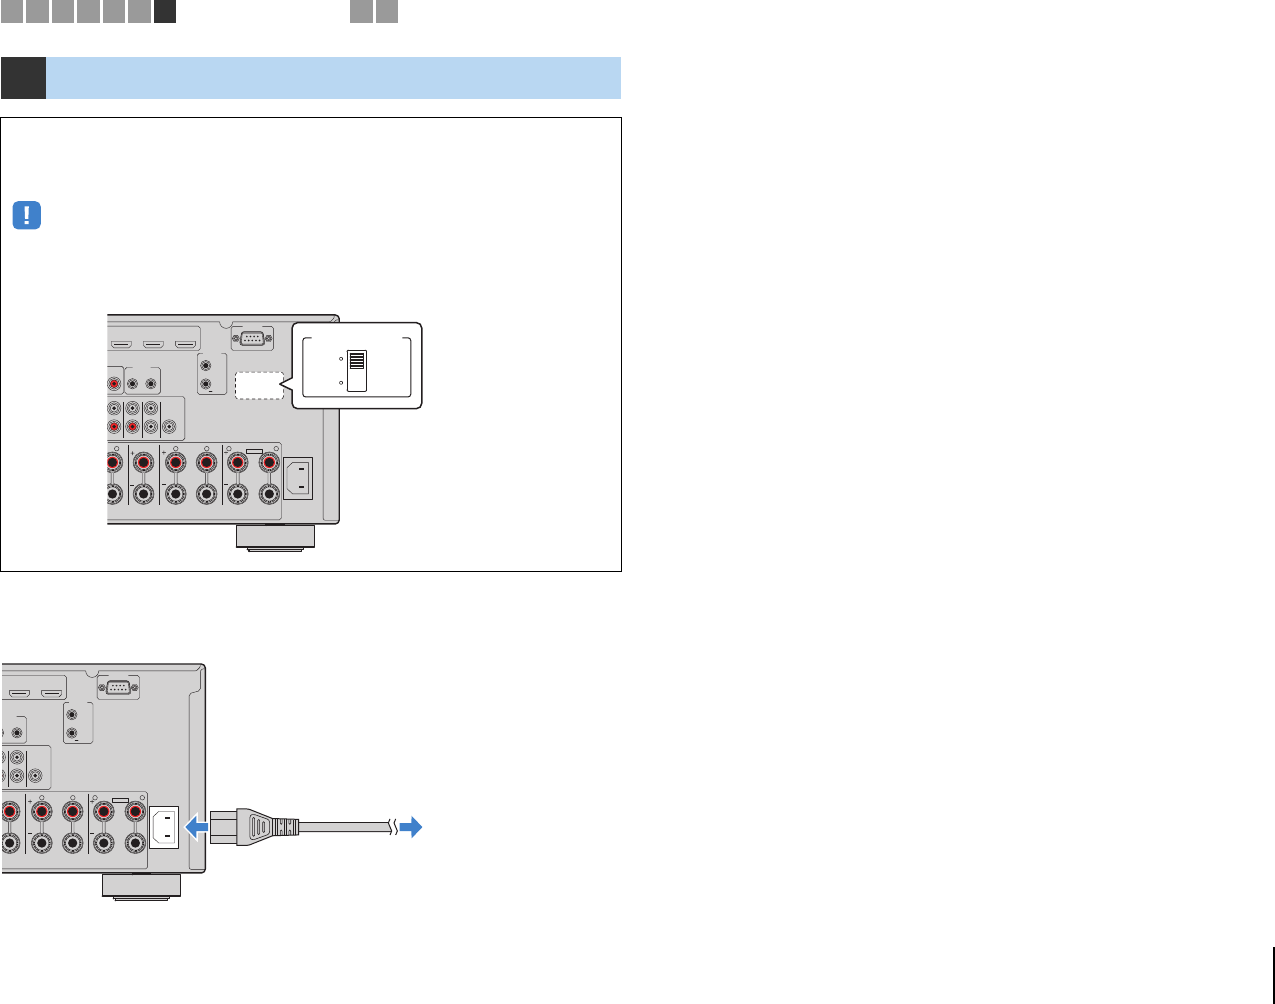
After all the connections are complete, connect the supplied power cable to the unit
and then to an AC wall outlet.
7 Connecting the power cable
Before connecting the power cable (General model only)
Set the switch position of VOLTAGE SELECTOR according to your local voltage.
Voltages are AC 110–120/220–240 V, 50/60 Hz.
• Make sure you set VOLTAGE SELECTOR of the unit BEFORE plugging the power cable into an AC
wall outlet. Improper setting of VOLTAGE SELECTOR may cause damage to the unit and create a
potential fire hazard.
AV 5 AV 6 AV 7
TRIGGER
OUT
1
2
RS-232C
PR
OUT
IN OUT
REMOTE
AC IN
1
2
CENTER FRONTCK
BI–AMP
ZONE 2/F.PRESENCE/
R RL L L
SINGLE
PRE OUT
SUBWOOFER
CENTER
SURROUND SUR. BACK
(SINGLE)
EXTRA SP
12V 0.1A
VOLTAGE SELECTOR
220V-
240V
110V-
120V
The unit (rear)
VOLTAGE SELECTOR
AV 6 AV 7
TRIGGER
OUT
1
2
RS-232C
OUT
REMOTE
AC IN
1
2
CENTER FRONT
BI–AMP
ZONE 2/F.PRESENCE/
R RL L
SUBWOOFER
CENTER
CK
LE)
EXTRA SP
12V 0.1A
To an AC wall outlet
The unit (rear)
1 2 3 4 5 6 7
Power cable connection
8 9


