


Page 12 Model PA4100X
© 2003 Xantech Corporation
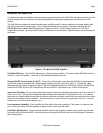
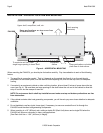
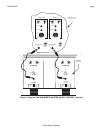
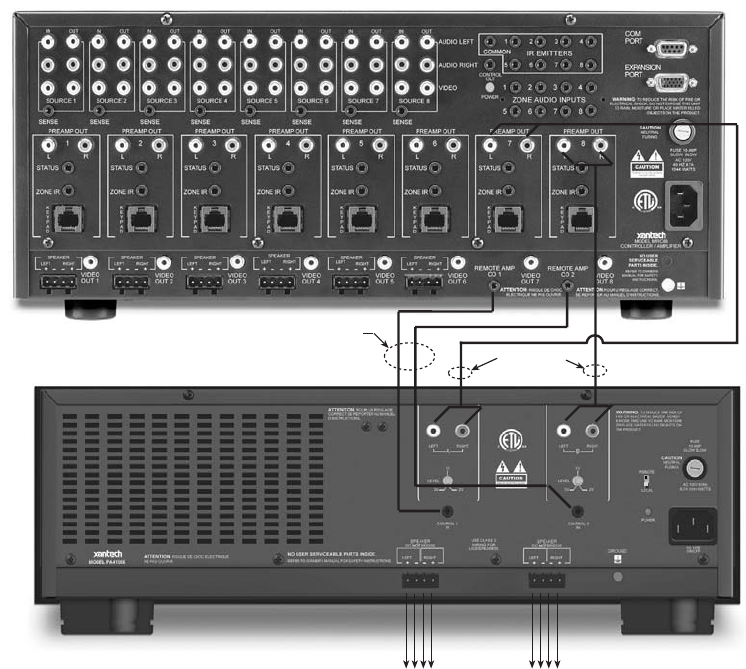
A Multi-Zone System Diagram Using The PA4100X and MRC88
Fig. 8, following, shows the PA4100X in a typical multi-room system with a Xantech MRC88 eight-zone preamp.
ZONE 7
ZONE 8
To Speakers in Rooms
Use 3.5mm
Stereo Mini Plug
Cables
RCA Type
Patch Cords
Figure 8: Interfacing the PA4100X with an MRC88 Zones 7 & 8
In this case:
1. Using good quality RCA Stereo Patch Cords, connect the Preamp Outputs of Zone 7 on the MRC88 to
the Left and Right Audio Inputs labeled ‘A’ on the rear of the PA4100X.
2. Similar to step 1, connect the Preamp Outputs of Zone 8 on the MRC88 to the Left and Right Audio
Inputs labeled ‘B’ on the rear of the PA4100X.
3. Using two 3.5mm Stereo Mini Plug cables, connect the Remote Amp CO1 jack on the rear of the
MRC88 to the CI1 jack on the rear of the PA4100X
4. Similar to step 3, connect the Remote Amp CO2 jack on the rear of the MRC88 to the CI2 jack on the
rear of the PA4100X.
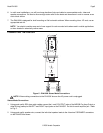
5. Set the CI Switch (Item #14) to the ON (UP) position.
The Remote Amp CO1 & CO2 (Remote Control Jack) from the MRC88 allows for individual Zone control
directly from the Zone 7 & 8 keypads of the MRC88 system. When any one of the zones is turned on, the
PA4100X is powered ON. Similarly, when either Zone is powered down, the associated amplifier pair on the
PA4100X is put into STANDBY Mode. When both Zones (7 & 8) are powered down, the PA4100X will either
go into STANDBY Mode on both amplifier pairs or will be POWERED OFF depending upon the position of the
front panel POWER/STANDBY button (IN = STANDBY; OUT = ON/OFF).