20
Operations cont.
Adding Bass and Treble to the Mic 1 and 2 Channels
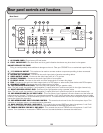
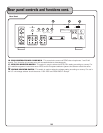
The Bass and Treble controls for microphones 1 and 2 are located on the rear panel of the CDG-X3P II. Turn the con-
trols clockwise to increase the Bass or Treble level and counter-clockwise to decrease the Bass or Treble level.
NOTE: The Bass and Treble controls do not affect the microphone that is connected to the 3rd Mic input on the
rear panel of the CD
X3P II.
Adding Echo to the Mic 1 and 2 Channels
The Echo for microphones 1 and 2 is located on the rear panel of the CDG-X3P II. Turn the controls clockwise to in-
crease the Echo level and counter-clockwise to decrease the Echo level.
NOTE: The Echo control does not affect the microphone that is connected to the 3rd Mic input on the rear
panel of the CDG-X3P II.
Changing the Key of the Music
Sometimes a singer would like to sing a particular song but will find it may not be written within a key or range comfort
-
able for the singer. In this case you can raise or lower the pitch or key of the music to make it easier to sing, both on a
CD/CDG or cassette.
NOTE: When raising or lowering the key of the music the tempo will remain the same.
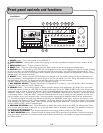
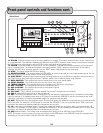
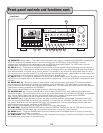
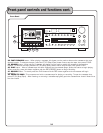
1. First locate the Key Control buttons on the front of the CDG-X3P II player. You will find them below the “POWER” button
on the face of the machine. There are three buttons under which are the words “KEY CONTROL”.
There is a button for each of the following three functions.
a. Sharp # - Used to raise the pitch or key of the music.
b. Natural - Used to return the music to it’s “natural” or “original” pitch or key.
c. Flat b - Used to lower the pitch or key of the music.
Raising or Lowering the Pitch (Key) of the Music
1. To raise the pitch or key of the music press the “sharp” (#) sign once for each ½ step you would like the music raised.
2. To lower the pitch or key of the music press the “flat” (b) sign once for each ½ step you would like the music lowered.
3. To return the music to its “natural” or “original” key, simply press the “natural” key button once.
NOTE: The digital display will show how many half steps a song is raised or lowered by indicating a (+) or (-) before a num-
ber to indicate raised (+) or lowered (-). It will display (+0) if the current song selection is being played in the natural key.
Using the Cassette Deck to Play or Playback
1. Locate the “CASSETTE” button under the CD tray on the front of the unit (See diagram) NOTE: When recording, this
button should be set to “CDG”.
2. Press once to change to cassette mode for playing and recording cassette tapes.
3. Locate the “ST/EJ” (Stop/Eject) button on the front of the cassette deck and press to open cassette door.
4. Insert the cassette tape with the side you want to play facing you and carefully close the cassette door, never force.
5. To rewind the cassette press the ”REW’ button until the tape rewinds to the desired location.
6. To advance the cassette press the “F-FWD” button until the tape advances to the desired location.
7. To stop either function locate the “STOP” button and press once. This will stop advancing, rewinding or playing the
cassette tape.
8. To play the desire selection locate the “PLAY” button and press once.
NOTE: The graphics function will not work with cassette tapes.
Changing the Key of the Music Using the Cassette Deck
Follow the same instructions for changing the key or pitch with the cassette deck as for changing the key for the CD/
CDG player.


