15
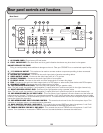
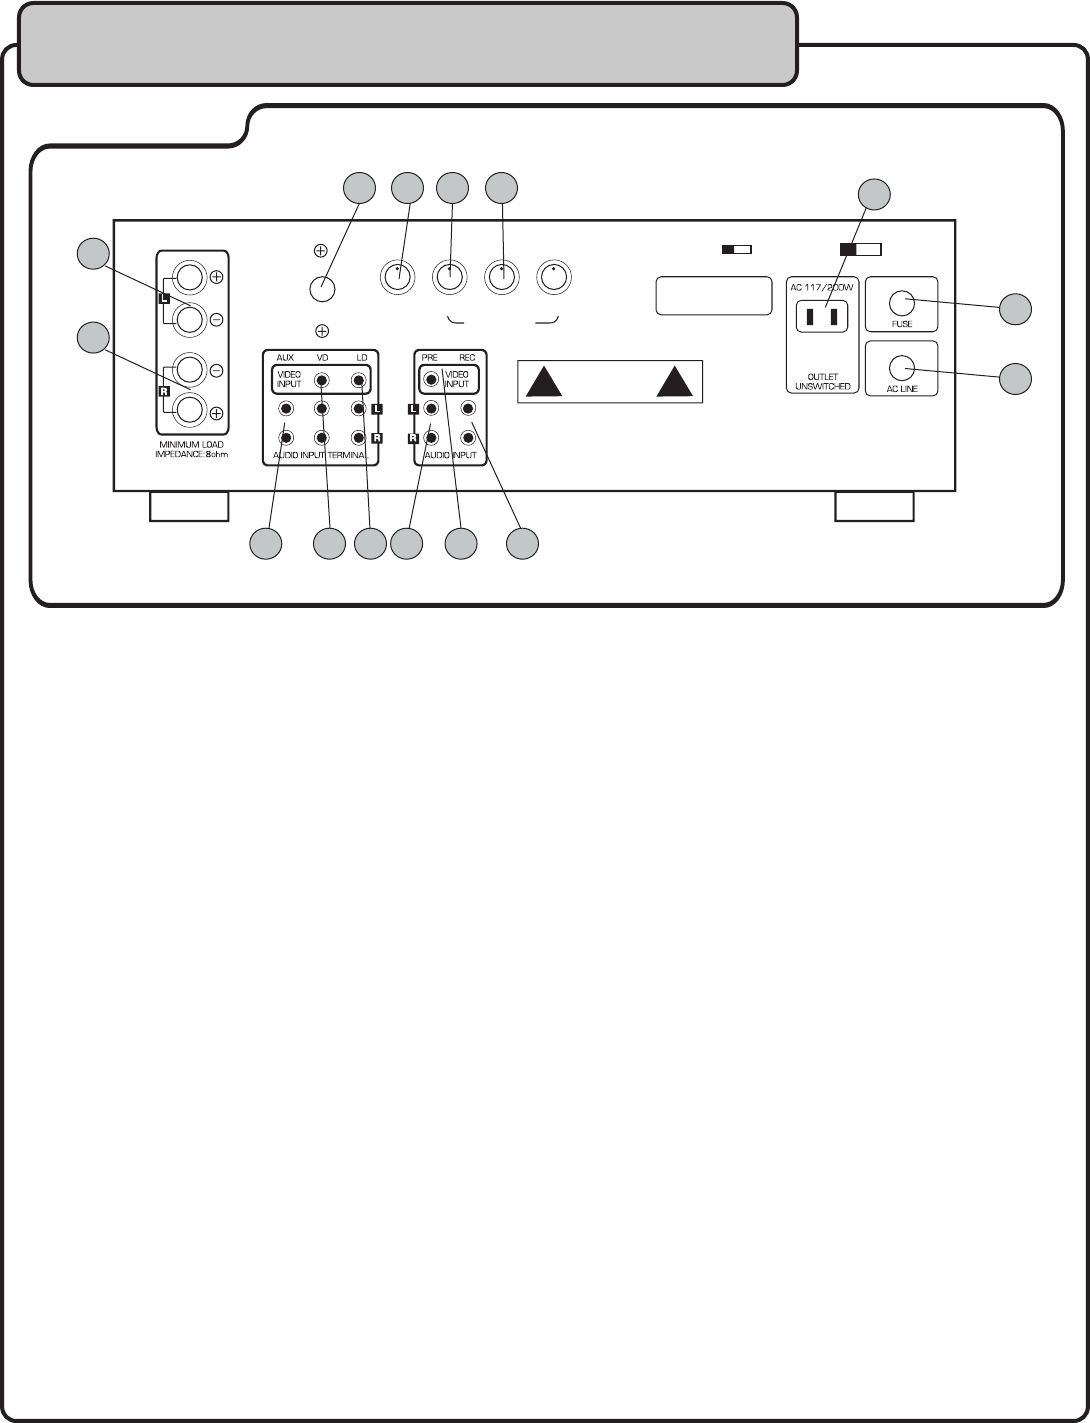
Rear panel controls and functions
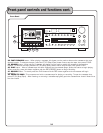
1. AC POWER CORD - Plugs into any AC wall outlet.
2. FUSE - IMPORTANT! If the fuse blows out it’s a good indication that there may be a short in the system.
DO NOT REPLACE THE FUSE!
Doing so could possibly cause additional damage to the unit. Take your CDG-X3P II to an authorized repair facillity.
3. 117/200W AC OUTLET - This outlet can be used to connect another component providing it does not exceed
200 watts maximum power consumption.
4. RECORD OUT TERMINAL – Connect to the audio input jacks of another recording device.
5. VIDEO OUTPUT JACKS - Connect to the video input jacks of a TV monitor.
6. PRE-OUT TERMINAL - Connect to the audio input jacks of an amplifier.
7. LD INPUT JACKS - Connect to the audio and video output jacks of a laser disc player.
8. DVD - Connect to the audio and video output jacks of a DVD player or other audio/video device with RCA outputs.
9. AUX INPUT JACKS - Connect to the audio output jacks of a player.
10. LEFT SPEAKER OUTPUT JACK - Connect to the left speaker using a speaker cable.
Note: The jack is split into positive (+) and negative (-) output jacks but is used as one jack for the right channel only.
11. RIGHT SPEAKER OUTPUT JACK - Connect to the right speaker using a speaker cable.
Note: The jack is split into positive (+) and negative (-) output jacks but is used as one jack for the left channel only.
12. 3RD MICROPHONE/DJ/KJ INPUT JACK - This microphone input “bypasses” the echo feature and the bass and
treble tones are “preset”. Therefore it is considered to produce a “dry” signal and there are no separate bass or treble
controls. It is best used for announcements by the KJ or DJ. The volume control for the 3rd microphone input is located
just to the right of the input jack.
13. 3RD MICROPHONE INPUT VOLUME CONTROL - This controls the volume for the 3rd microphone input. Turn
clockwise to increase volume, counterclockwise to decrease.
14. BASS CONTROL FOR MIC-1 AND MIC-2 - This controls the amount BASS tone that microphones 1 and 2 will
receive. Turn clockwise to increase bass tone and counterclockwise to decrease the bass tone.
15. TREBLE CONTROL FOR MIC-1 AND MIC-2 - This controls the amount TREBLE tone microphones 1 and 2 will
receive. Turn clockwise to increase the TREBLE tone and counterclockwise to decrease the treble tone.
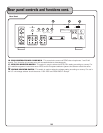
VIDEO SYSTEM VOLTAGE SELECT
ECHO
NTSC
SWITCH TO
NTSC FOR U.S. TV SYSTEM
PAL FOR EUROPE TV SYSTEM
PAL 110-120V 220-240V
TREBLE
MIC 1-2 CONT
BASSDJ MIC VO
L
DJ MIC
ECHO BYPASS
Rear Panel
1
2
3
5 7 8
11
4 6
10
9
12 13 14 15


