


9
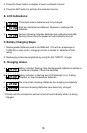
Cautions Before Using the System
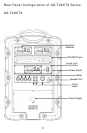
1. There is a universal AC switching power supply/charger built into the system
that will operate on voltages of 100~240V,50/60Hz. Verify that the voltage to
which you are connecting is in that range and then connect the AC power
cord from the AC IN (G1) Pg. 7 to the wall outlet.
2. Charge the battery for at least 8 hours with the Power Switch OFF prior to first
time use to maintain the quality of the battery and provide maximum operation
time. When charging, the charging indicator (C2) Pg. 7 lights RED. When
charging is almost complete, the indicator will flash RED and GREEN. After the
battery is fully charged, the indicator lights GREEN. After the initial charge the
Traveler may be operated on either AC or Battery power. When operating on
AC power the Traveler will simultaneously recharge its internal batteries.
3. This system has auto protection circuitry for the battery that will protect the
battery from being overcharged or overused. When running on battery power
and the power switch LED (C1) Pg. 7 lights RED, the battery power is down to
30%. When the power switch flashes repeatedly, the battery is nearly
exhausted and the system will turn off automatically to protect the battery.
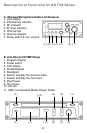
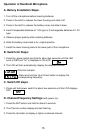
Installation and Operation of Portable Sound System
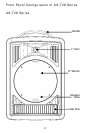
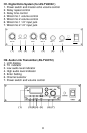
A. Wireless Mic/Audio link Receiver (see page 6)
This system includes one or two receivers with selectable PLL 96 channel
operation. These modules receive signals from wireless Mics or from another
Traveler equiped with an Audio Link Transmitter.
1. Turn the power switch (A7) pg. 6 clockwise to turn on the receiver.
2. The LCD display (A1) will show "On" and the channel that was last in use
when the unit was turned off.
3. To select a different channel, press the set button (A5). The channel number
will flash in the in LCD display. Press the up or down button (A6) to select a
channel to use, and then press the set button. After a channel has been set,
press either the up or down button to display the frequency of the selected
channel.
4. Adjust the volume control to a usable level.
5. When receiving signal, the A/B diversity indicator (A2) will light RED or
Green to show the normal condition. The RF indicator (A3) will light to show
RF received and the AF indicator (A4) will show audio received.