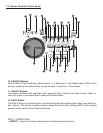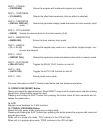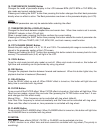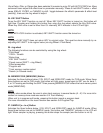
Pressing and holding the SHIFT then pressing SAMPLE changes the sampler playback mode (o—
/o-o) between single play (o—) and loop play (o-o). When sampler loop is engaged, “LOOP” indica-
tor in the LCD will light.
28. LOOP [REPEAT/DEL] Button
Enters the three buttons (1/IN, 2/OUT, and 3/RELOOP) ready for LOOP mode. When these three
buttons are set to LOOP mode, this button will light. When loop play is engaged, pressing this but-
ton exits the loop play. Pressing and holding SHIFT then pressing this LOOP changes the repeat
mode on or off. When repeat mode is set to single repeat, “SGL” and “RPT” indicators in the LCD
will light. When repeat mode is set to all repeat, only “RPT” indicator will light. When unit is in pro-
gram edit mode, pressing this button deletes a program (track).
29. 1/IN Button
30. 2/OUT Button
31. 3/RELOOP Button
These three buttons have the following three functions:
CUE mode: Store the in CUE points or play them seamlessly.
SAMPLER mode: Create the IN & OUT points of a Sample, and play it.
LOOP mode: Create the IN & OUT points of a Loop, and re-loop.
32. BRAKE Button
Turns the brake function on and off.
Pressing and holding this Button then using the Jog wheel adjusts the brake time.
33. AUTO SYNC Button
Turns the AUTO SYNC function on and off. When AUTO SYNC is activated, this button will light and
effect time is synchronized with current BPM and BEAT RANGE that is set.
34. BPM/TAP Button
Set the tempo in BPM by tapping this button. When you press this button, the parameter counter
mode momentarily changes to TAP BPM display mode. Pressing this button more than 1.5 seconds
erases the tapped BPM. Pressing and holding this button then using Jog wheel adjusts the BPM in
0.1% increments. When the unit recognizes the BPM, this button will flash synchronized with the
BPM.
40. Pitch Fader
Changes the playback pitch, according to the range set by PITCH RANGE button. When playback
pitch is set to 0% or PITCH LOCK is turned on, the LED will light.


