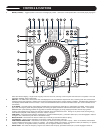
the order that you choose. For example, if you have all four banks loaded, press the SAMPLER (#20) button to enter this mode. Press the
RECORD button in the SAMPLER SEQUENCER section (#30) and it will light red. Then press the BANK buttons in the desired sequence.
Up to 12 steps can be stored in this sequence. Then press the PLAY button in the SAMPLER SEQUENCER section and the sequence will
play. Press MODE to switch between ONE SHOT or LOOP mode. ONE SHOT will play the sequence once, then end. LOOP MODE will
continue to play the sequence over and over. The SAMPLER SEQUENCER feature works in CUE, PLAY, OR PAUSE modes.
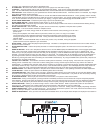
31. REVERSE BUTTON – When engaged (illuminated) playback will occur in the opposite direction (backwards). This function works for normal
playback, sample playback and loop playback.
32. AUDIO OUT – This analog output signal requires a pair of RCA cables (left and right) to be connected to a line or aux input.
33. DIGITAL OUT – This digital output signal requires one SP/DIF (75 Ohm) cable to be connected to a SP/DIF input on your mixer or computer.
34. FADER START / RELAY – This connection allows two CD players to be linked for relay play. This can also be connected to a mixing board
that supports automatic fader start.
35. VENT SLITS – These openings are used for the proper ventilation of the unit. In order to prevent overheating and to insure proper opera-
tion, do not cover or block these slits.
36. POWER BUTTON – Turns the unit on and off.
37. AC IN – Plug in the power supply cable here. The plug can only be inserted in one direction, so do not force it.
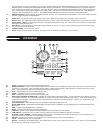
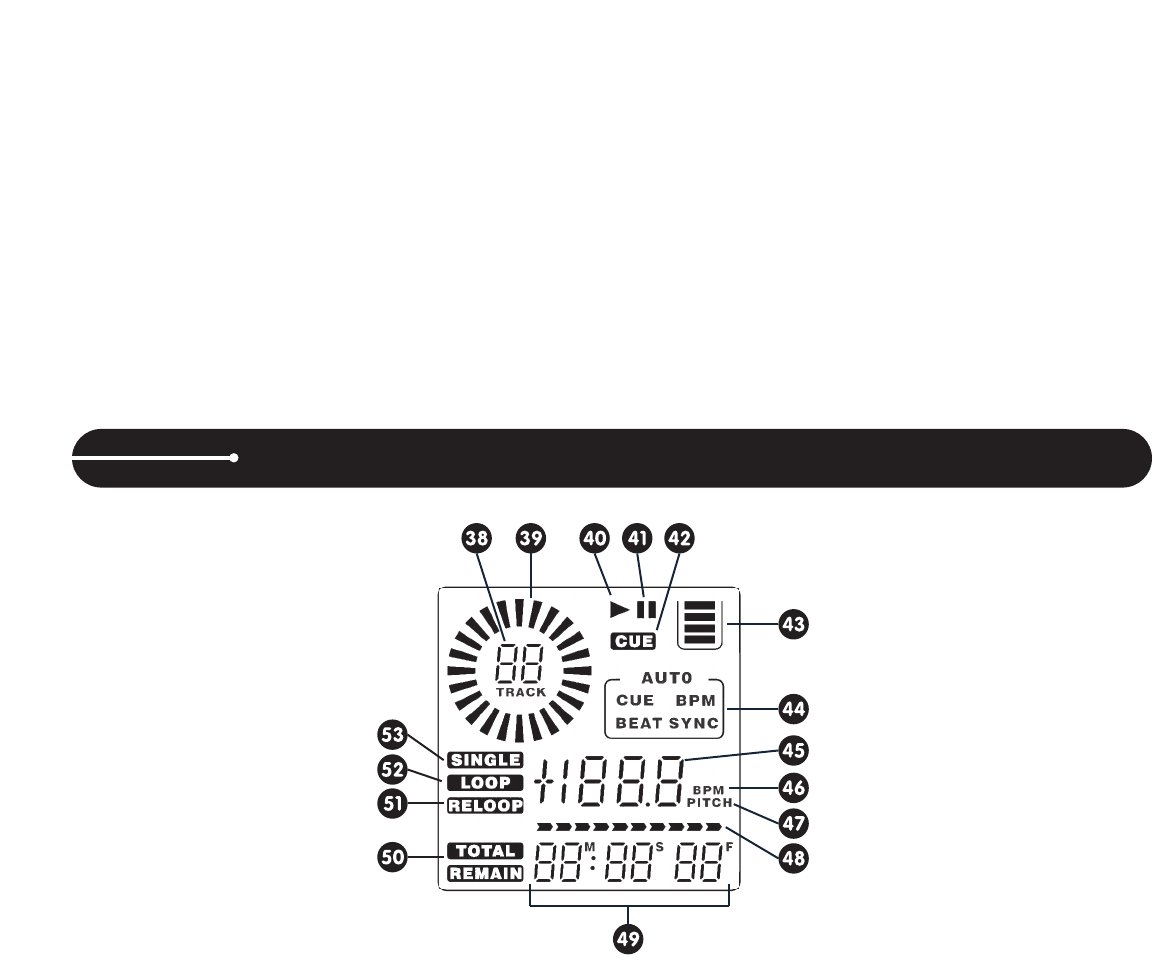
38.
TRACK
– Indicates the current track selected or being played.
39. WHEEL INDICATOR – This is a visual representation of a vinyl marker, which is traditionally used to mark the location of a certain sound or
cue point on a vinyl record. Here, it indicates the play position, rotates during playback in either direction, and stops during cue or pause
mode. It also indicates the speed of the forward and reverse search operation.
40. PLAY – Indicates when the unit is currently playing a CD.
41.
P
AUSE
– Indicates the unit is in CUE or P
AUSE mode.
42. CUE – Indicates the unit is at a cue point and is ready to play.
43. ANTI SHOCK AND BUFFER INDICATOR – Indicates the current status of the buffer memory. This is represented on the display by a buck-
et being filled or emptied. The bucket itself represents the instant start function (which works by buffer memory). If the bucket is flashing, the
instant start is not available. Each bar within the bucket represents 2 seconds of anti shock protection.
There is up to 10 seconds of anti
shock protection available.
44. AUTO INDICATORS – Indicates when Auto Cue, Auto BPM or Beat Sync modes are active.
45. PITCH / BPM VALUE – Shows either the percentage of the pitch slider or the BPM of the track depending on the mode selected with the
BPM button.
46.
BPM
– Indicates when the BPM button is engaged.
47. PITCH – Indicates when the pitch percentage is displayed.
48.
TIME BAR
– Shows a proportionate visual representation of the time remaining or time elapsed.
49. TIME DISPLAY – Displays the time of track(s) currently selected in increments of Minutes, Seconds, and Frames.
50. ELAPSED / TOTAL / REMAIN – Indicates whether the time shown on the display refers to total remaining time or track remaining time. If
either of these are not illuminated, this indicates elapsed track time.
51. RELOOP – Indicates when there is a previously set loop, and that the loop is ready to be played again.
52. LOOP – Indicates when the CD is in loop mode.
53. SINGLE – Controlled by the CTN/SGL
button, this indicates when the unit is set to play just one track at a time. When this is not illuminated,
the CD will play continuously through all tracks.
LCD DISPLAY


