


Starlet Owner’s Manual Page 9
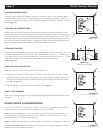
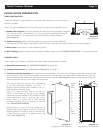
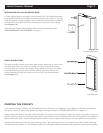
INSTALLATION IN A 2x6 OR DEEPER WALL
A Foam Support Block is provided in the Accessory Pack. This simple block helps
keep the Back Box/Driver Assembly from falling into the wall cavity of a 2x6 wall
while the speaker is being installed. Peel the tape off the foam block and place it
onto the back of the Back Box/Driver Assembly on any location near the top.
(See Diagram 18)
With the Foam Support Block installed, follow the steps described under
“INSTALLATION IN A 2x4 STUD WALL” on page 7.
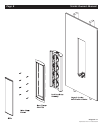
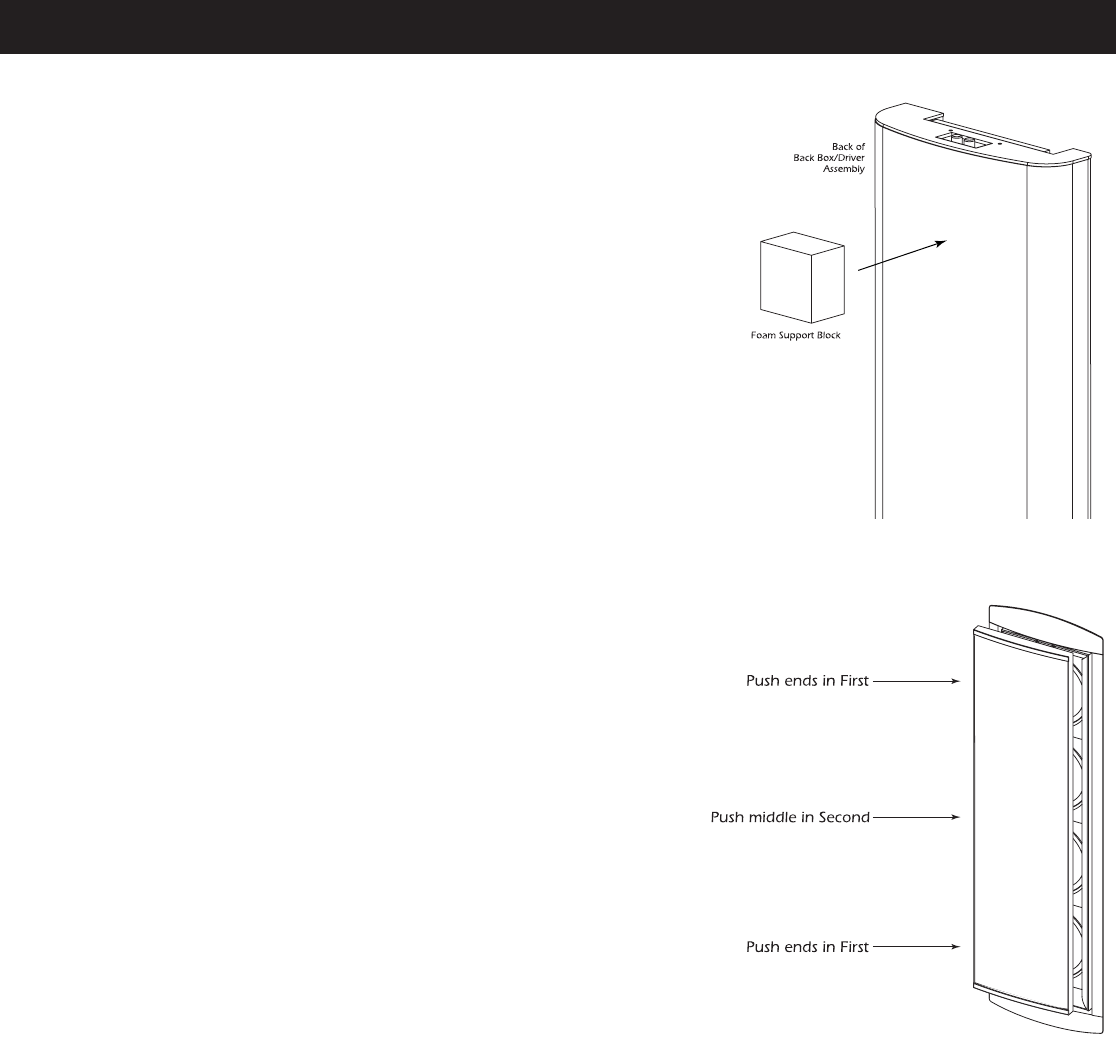
GRILLE INSTALLATION
The grille assembly consists of the metal grille section, backed by a “scrim” cloth,
and two plastic end caps. Due to its length, it is best to carefully and slowly
push the grille as it is eased into position. When applying pressure, we highly
recommend starting at the ends and then working your way towards the
center. Inserting the grille from one end to the other is not recommended.
(See Diagram 19)
PAINTING THE STARLETS
If you plan to paint your Starlets, we recommend that it be done prior to installation. If you decide to paint them sometime in
the future, it is best to remove the Starlets by simply reversing the steps for “SPEAKER INSTALLATION” on pages 6-9.
When painting the Starlets, the paint masks provided in the carton must be installed in place of the grille. The grilles can also be
painted, however, great care should be taken not to clog the holes, as this will greatly reduce the sound quality of the speakers.
Before painting the grilles, remove the under grille material. Put this material back into place once the grille has been painted.
SpeakerCraft recommends only light spray painting, using 5 parts thinning agent to 1 part paint. Do not paint grilles while they
are attached to the speaker. If it is necessary to paint the under grille material, follow the same procedure used to paint the grilles.
Diagram 18:
Foam Block Installation
Diagram 19:
Grille Installation