


11
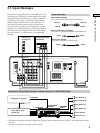
Hooking Up the Components
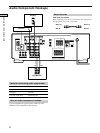
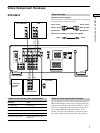
CONTROL S hookup (STR-DE625 only)
If you have a CONTROL S-compatible Sony TV, DBS
tuner, monitor, or VCR, use an audio/video/control S
connecting cord (supplied) or a control S connecting cord
(supplied) to connect the CTRL S (STATUS) IN (for TV,
DBS tuner, or monitor) or OUT (for VCR etc.) jack on the
receiver to the appropriate S-LINK jack on the respective
component. Refer to the operating instructions supplied
with your TV, DBS tuner, monitor, VCR, etc., for details.
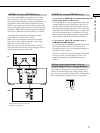
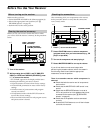
An example of a CONTROL S hookup between the
receiver and TV or VCR is shown below.
When your TV is connected to the receiver as shown
below, the TV input mode will change to video input
whenever you turn on the receiver.
When you connect the VCR to the receiver as shown
below, the input mode of the receiver changes to video 1
(or 2) whenever you turn on the VCR.
*
*
***
MONITOR
VIDEO
OUT
CTRL S
IN
VIDEO
IN
CTRL S
STATUS IN
AUDIO
IN
MONITOR
TV / DBS
AUDIO
OUT
IN OUT
S-LINK
L
R
L
R
VIDEO
IN
VIDEO
OUT
R
AUDIO
OUT
OUTPUT
L
OUT
S-LINK
VIDEO
IN
VIDEO
OUT
CTRL S
OUT
AUDIO
IN
L
R
AUDIO
OUT
VIDEO 1
S-LINK
* Audio/video/control S connecting cord
** Control S connecting cord
TV
Receiver
VCR
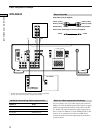
CONTROL A1 hookup (STR-DE625 only)
• If you have a CONTROL A1-compatible Sony CD
player, tape deck, or MD deck
Use a CONTROL A1 cord (not supplied) to connect the
S-LINK CTRL A1 jack on the CD player, tape deck, or
MD deck to the S-LINK CTRL A1 jack on the receiver.
See “Displaying the operating status of the component
connected to the S-LINK CTRL A1 jack” on page 36 and
refer to the separate manual “CONTROL-A1 Control
System” and the operating instructions supplied with
your CD player, tape deck, or MD deck for details.
• If you have a Sony CD changer with a
COMMAND MODE selector
If your CD changer’s COMMAND MODE selector can
be set to CD 1, CD 2, or CD 3, be sure to set the
command mode to “CD 1” and connect the changer to
the CD jacks on the receiver.
If, however, you have a Sony CD changer with VIDEO
OUT jacks, set the command mode to “CD 2” and
connect the changer to the VIDEO 2 jacks on the
receiver.
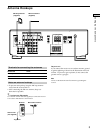
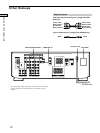
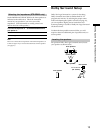
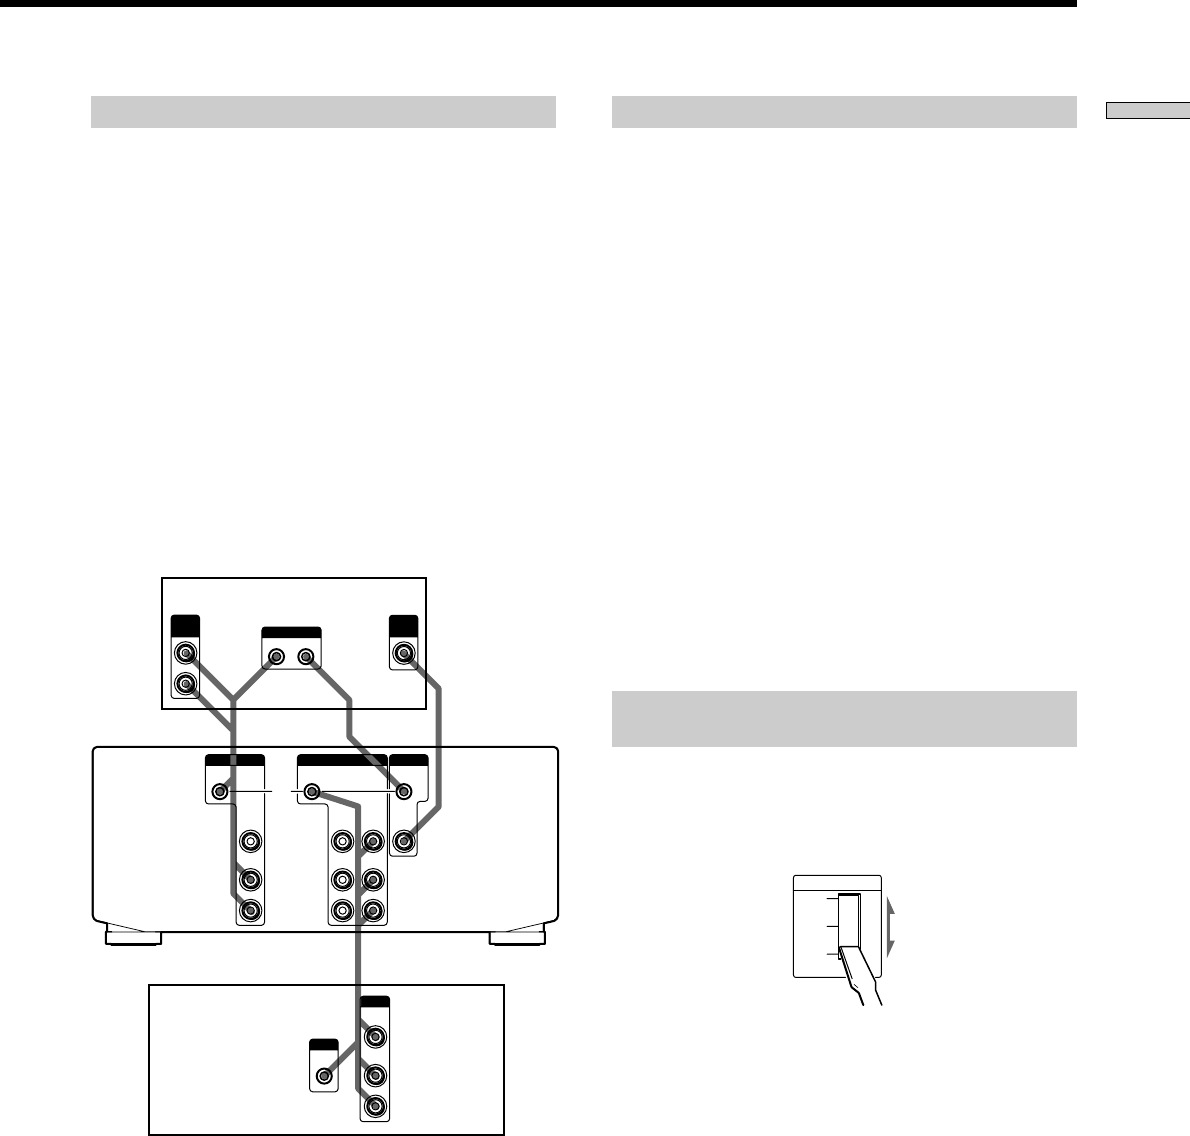
Setting the voltage selector (only on
models supplied with a voltage selector)
Check that the voltage selector on the rear panel of the
receiver is set to the local power supply voltage. If not,
use a screwdriver to set the selector to the correct position
before connecting the AC power cord to a wall outlet.
220V
240V
120V
VOLTAGE SELECT