12
CTRL S (STATUS) IN/OUT
2ND ROOM OUT
CONTROL A1
HH
PHONO
CD/SACD
MD/DAT TAPE
IN IN
OUT
IN
MULTI CH IN 2
OUT
IN
SIGNAL
GND
U
CONTROL
A1
FRONT
SURROUND
CENTER
SUB
WOOFER
L
R
L
R
L
R
MONITOR
AUDIO
IN
IN
VIDEO
CTRL S
OUT
OUT
VIDEO
CTRL S
OUT
CTRL S
STATUS IN
CTRL S
IN
AUDIO
OUT
VIDEO 1
AUDIO
IN
TV/SAT
AUDIO
IN
DVD/LD
AUDIO
IN
AUDIO
OUT
VIDEO 2
S-VIDEO
IN
VIDEO
S-VIDEO
OUT
VIDEO
S-VIDEO
IN
VIDEO
S-VIDEO
IN
VIDEO
S-VIDEO
OUT
VIDEO
MULTI CH IN 1
FRONT
SURROUND
CENTER
SURROUND
BACK
SUB
WOOFER
OUT
2ND ROOM
L
R
DIGITAL ANTENNA
MD/DAT
OPTICAL
IN
TV/SAT
OPTICAL
IN
DVD/LD
OPTICAL
IN
FM
75
Ω
COAXIAL
DVD/LD
COAXIAL
IN
MD/DAT
OPTICAL
OUT
AM
U
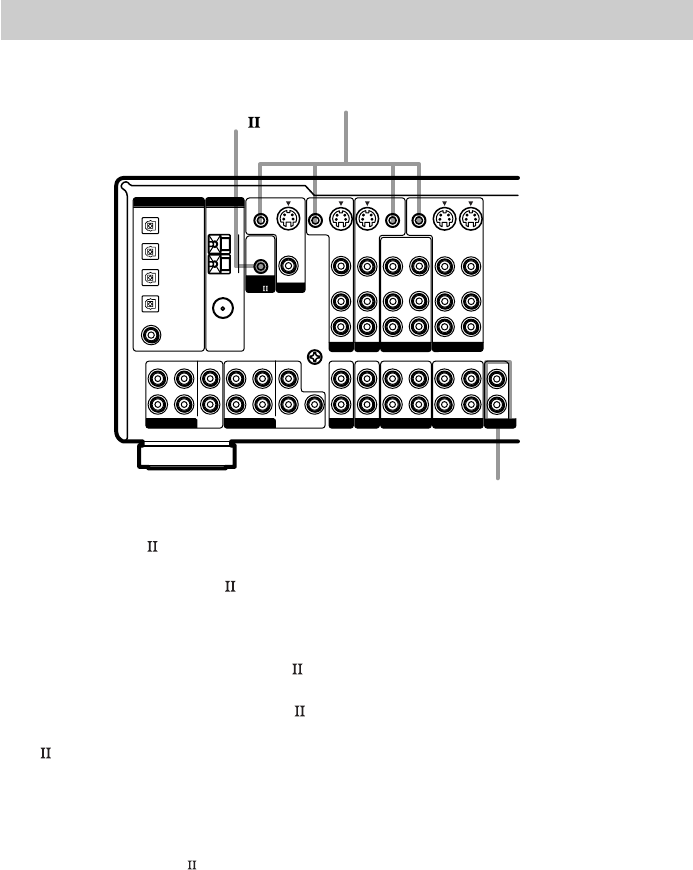
Other hookups
CONTROL A1 hookup
• If you have a CONTROL A1 compatible
Sony CD player, SACD player, tape
deck, or MD deck
Use a CONTROL A1 cord (mini jack) (not
supplied) to connect the CONTROL A1
jack on the CD player, SACD player, tape
deck, or MD deck to the CONTROL A1
jack on the receiver. Refer to “CONTROL
A1
control system” on page 41 and the
operating instructions supplied with your CD
player, SACD player, tape deck, or MD deck
for details.
Note
If you make CONTROL A1 connections from
the receiver to an MD deck that is also connected
to a computer, do not operate the receiver while
using the “Sony MD Editor” software. This may
cause a malfunction.
• If you have a Sony CD changer with a
COMMAND MODE selector
If your CD changer’s COMMAND MODE
selector can be set to CD 1, CD 2, or CD 3,
be sure to set the command mode to “CD 1”
and connect the changer to the CD jacks on
the receiver.
If, however, you have a Sony CD changer
with VIDEO OUT jacks, set the command
mode to “CD 2” and connect the changer to
the VIDEO 2 jacks on the receiver.


