


4
Getting Started
R
L
5.1CH OUT
ANALOG
CONTROL
A1
ΙΙ
OUT
DIGITAL (CD)
OPTICAL
CENTER
SUB
WOOFER
SURRFRONT
L
R
2CH OUT
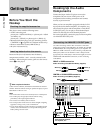
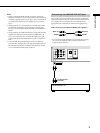
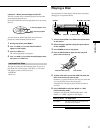
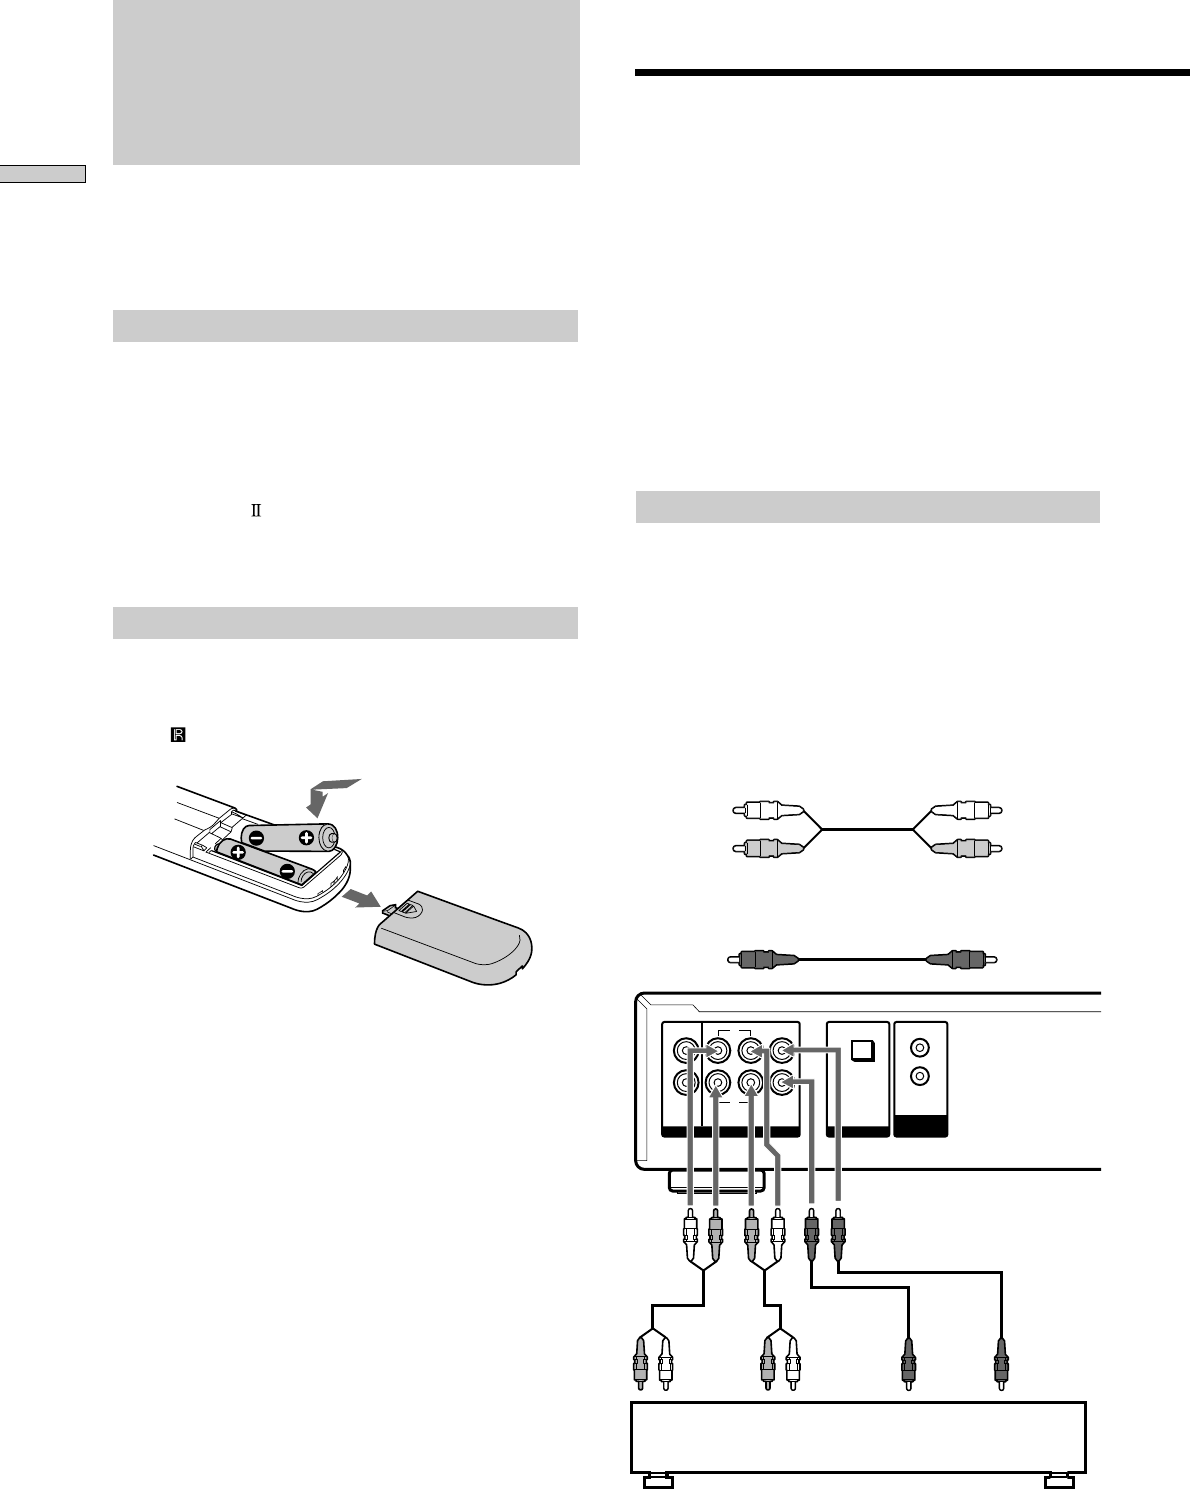
Hooking Up the Audio
Components
Connect the Super Audio CD player to an audio
component. Be sure to turn off the power of all
components before making connections and connect
securely to prevent noise.
When you have an amplifier equipped with the 5.1CH
input jacks (multi-channel amplifier, AV amplifier, etc.)
and connect the player and the amplifier via ANALOG
5.1CH OUT jacks, you can play a multi-channel Super
Audio CD and enjoy the multi-channel playback.
For normal playback, connect the player and an amplifier
via ANALOG 2CH OUT jacks.
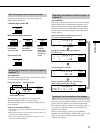
Connecting via ANALOG 5.1CH OUT jacks
Use audio connecting cords for this connection. Connect the
ANALOG 5.1CH OUT jacks (FRONT L/R, SURR L/R, CENTER,
SUBWOOFER) to the corresponding jacks of your amplifier. For
FRONT or SURR connection, use the connecting cords (Red and
White jacks) and be sure to match the colour-coded pin to the
appropriate jacks: white (left) to white and red (right) to red. For
CENTER and SUB WOOFER connection, use the connecting
cords (Black).
FRONT or SURR connection
Audio connecting cords (Red and White) (supplied)
CENTER or SUB WOOFER connection
Audio connecting cords (Black) (supplied)
White (L)
Red (R)
White (L)
Red (R)
Black
Black
To FRONT
IN jacks
(L/R)
To
SURROUND
or REAR IN
jacks (L/R)
To
CENTER
IN jack
To SUB
WOOFER
IN jack
Multi-channel amplifier,
AV amplifier, etc.
Getting Started
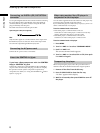
Before You Start the
Hookup
Checking the supplied accessories
This player comes with the following items:
• Audio connecting cord
phono jack × 2 (Red and White) y phono jack × 2 (Red
and White) (2)
phono jack × 1 (Black) y phono jack × 1 (Black) (2)
• Monaural (2P) mini-plug cord (1) (Connecting cord for
CONTROL A1
) (supplied for Canadian models only)
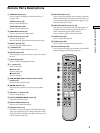
• Remote commander (remote) RM-SC500 (1)
• R6 (size-AA) batteries (2)
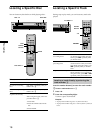
Inserting batteries into the remote
Insert two R6 (size-AA) batteries into the battery
compartment with the + and – correctly oriented to the
markings. When using the remote, point it at the remote
sensor
on the player.
z
When to replace the batteries
Under normal conditions, the batteries should last for about six
months. When the remote no longer operates the player, replace
both batteries with new ones.
Notes
• Do not leave the remote in an extremely hot or a humid place.
• Do not drop any foreign object into the remote casing,
particularly when replacing the batteries.
• Do not use a new battery with an old one.
• Do not expose the remote sensor to direct sunlight or lighting
apparatus. Doing so may cause a malfunction.
• If you do not intend to use the remote for an extended period
of time, remove the batteries to avoid possible damage from
battery leakage and corrosion.