Editing Recorded MDs
filename[D:\Data Folder\sem\4238553111MDSJE480CEL\GB05OPE-CEL.fm]
model name1[MDS-JE480]
[4-238-553-11(1)]
masterpage:Left
(3 column)
19
GB
4
While monitoring the sound, press
PUSH ENTER or YES at the starting
point of the portion to be erased (point
A).
“-Rehearsal-” and “Point A ok?” alternate in
the display and the deck repeatedly plays a
few seconds of the track before the point A.
5
Press PUSH ENTER or YES again if
point A is correct.
“Point B set” appears in the display and
playback for setting the ending point of the
portion to be erased (point B) starts.
If point A is not correct, adjust point A by
turning AMS (or by pressing ./>
repeatedly) while monitoring the sound , and
then press PUSH ENTER or YES when you
locate the desired starting point. You can
shift the point by 1-frame
2)
intervals
(1 frame = 1/86 second).
6
Continue playing the track or press M
to locate the ending point of the portion
to be erased (point B), then press PUSH
ENTER or YES.
“A-B Ers” and “Point B ok?” alternate in the
display and a few seconds of the track before
point A and after point B play back
repeatedly.
7
Press PUSH ENTER or YES again if
point B is correct.
“Complete!” appears in the display for a few
seconds and then the portion between point
A and point B is erased.
If point B is not correct, adjust point B by
turning AMS (or by pressing ./>
repeatedly) while monitoring the sound, and
then press PUSH ENTER or YES when you
locate the desired ending point. You can
shift the point by 1-frame
2)
intervals
(1 frame = 1/86 second).
2) You can shift the point by 2-frame intervals on
the track recorded in Monaural mode or LP2
Stereo mode, and by 4-frame intervals on the
track recorded in LP4 Stereo mode.
Tip
In step 5 and 7, if you want to shift point A or point B
by a certain number of seconds or minutes, press
m/M repeatedly. You can change the unit by
which the counter advances when you turn AMS (or
press ./> repeatedly).
Note
If “Impossible” appears in the display, you cannot
erase a portion of a track. This happens when you have
edited the same track many times.
This is due to a technical limitation of the MD system
and is not a mechanical error.
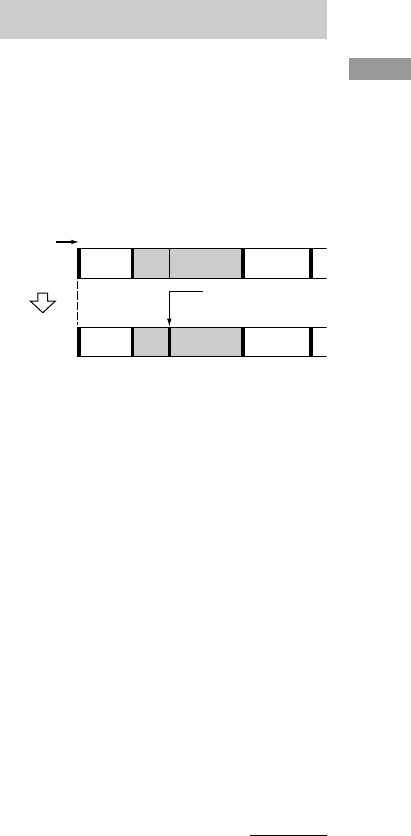
You can use this function to mark track
numbers after recording. The total number of
tracks increases by one and all the tracks
following the divided ones are renumbered.
Example: Dividing track 2 into two tracks.
Dividing a track after
selecting the track
1
While the deck is stopped, playing, or
paused, press MENU/NO.
“Edit Menu” appears in the display.
2
Turn AMS (or press ./>
repeatedly) until “Divide?” appears,
then press PUSH ENTER or YES.
Play starts.
3
Turn AMS (or press ./>
repeatedly) until the number of the track
you want to divide appears
4
While monitoring the sound, press
PUSH ENTER or YES at the dividing
point.
“-Rehearsal-” appears in the display and the
deck repeatedly plays a few seconds of the
track before the dividing point.
Dividing recorded tracks
— Divide Function
continued
12 3
123 4
AB C D
AB C D
Tr ack
number
Original
tracks
After
DIVIDE
Divide track 2 into
track B and C
