


masterpage:Left
filename[\\Nas-data-server\SONY Current jobs\SONY CMT-HPX10W-HPX9-
HPX7\DTP\4255291112\425529111CMTHPX10WCEL\GB06CDP-CEL.fm]
10
GB
model name[CMT-HPX10W/CMT-HPX9/CMT-HPX7]
[4-255-291-11(2)]
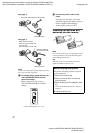
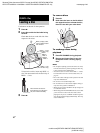
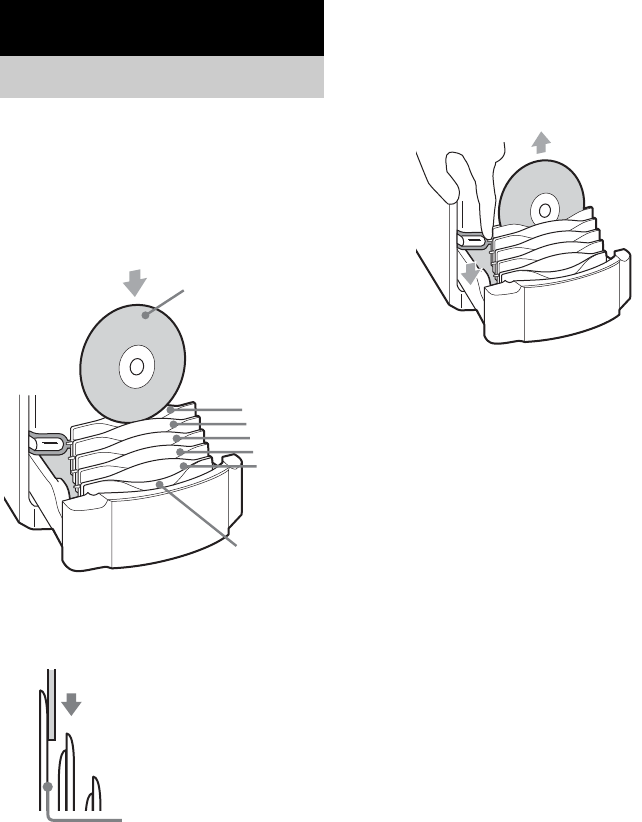
Use buttons on the unit for the operation.
1 Press Z.
2 Insert discs with the label side facing
forward.
Check that the lever on the left side of the
respective slot raises.
To load an 8 cm disc, insert only DISC +1
slot. You cannot store an 8 cm disc in any of
DISC 1 – 5 slot.
3 Press Z.
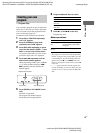
To remove discs
1 Press Z.
2 Hold down the lever on the left side of
the respective slot to elevate the disc,
then lift it out with your other hand.
To exchange discs during
playback
1 Press EX-CHANGE during playback.
2 Remove and insert discs in any slot
except that of the currently playing
disc.
Notes
• Do not place anything (such as the remote or cords)
in front of the disc tray. When opening the disc tray,
it may catch and cause malfunction.
• You cannot store 8 cm discs in the DISC 1 – 5 slots.
For instructions on how to remove these discs, see
page 27.
• Do not use a disc with tape, seals or paste on it as this
may cause malfunction.
• Do not use a non-standard shape disc.
• Do not load an 8 cm disc with an adaptor. Doing so
may cause the system to malfunction.
• When you eject a disc, handle the disc by its edge. Do
not touch the surface.
• When using the EX-CHANGE function, be sure that
you do not insert a disc in the slot of the current
playing disc. If you do, “CHECK” and the respective
disc number will be displayed alternately. This may
cause malfunction.
CD/MP3 – Play
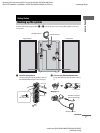
Loading a disc
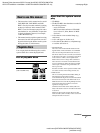
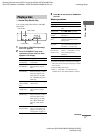
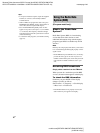
When you play a disc,
insert it with the label
side forward.
DISC 1 – 5 slot
(for 12 cm disc only)
DISC 1
DISC 2
DISC 3
DISC 4
DISC 5
DISC +1 slot
(for 8 cm disc only)
Place the disc so that it is
flush with the gray side of the
slot, then insert it vertically.