— 6 —
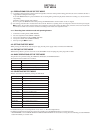
RETRY CAUSE DISPLAY MODE
• In this test mode, the causes for retry of the unit during recording can be displayed on the fluorescent display tube.
This is useful for locating the faulty part of the unit.
• The data amount stored in DRAM, number of retries, and retry cause are displayed. Each is displayed in hexadecimal number.
• The display of the DRAM data amount enables data reading, accumulation, ejection, and writing to be performed smoothly. If writing is
not smooth, data may decrease considerably.
Method:
1. Load a recordable disc whose contents can be erased into the unit.
2. Press the EDIT/NO button several times to display “All Erase?” on the fluorescent display tube.
3. Press the YES button.
4. When “All Erase??” is displayed on the fluorescent display tube, the numbers on the music calendar will start blinking.
5. Press the YES button to display “Complete”, and press the p button immediately and continue pressing for about 10 seconds.
6. When the “TOC” displayed on the fluorescent display tube goes off, release the p button.
7. Press the r REC and · PLAY buttons to start recording.
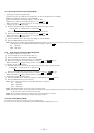
8. Press the DISPLAY/CHAR button to display the test mode (Fig. 1), and check the display.
9. The Rt value increases with each retry. If an error occurs after a retry, “Retry Error” will be displayed, and the number of retries counted
will be set back to 0.
10. To exit the test mode, press the 1/u button. Turn OFF the power, and after “TOC” disappears, disconnect the power plug from the outlet.
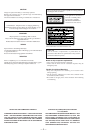
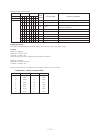
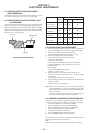
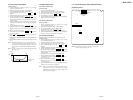
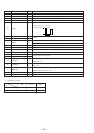
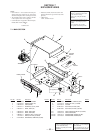
Fig. 1 Reading the Test Mode Display
Fluorescent Display Tube Signs
SC @@ Rt # # ∗ ∗
@@ : Displays the DRAM memory amount when at all times.
# # : Displays the number of retries. When a retry error occurs, the number will be set back to 0.
* * : Cause of retry
All three displays above are in hexadecimal numbers.