Getting Started
33
GB
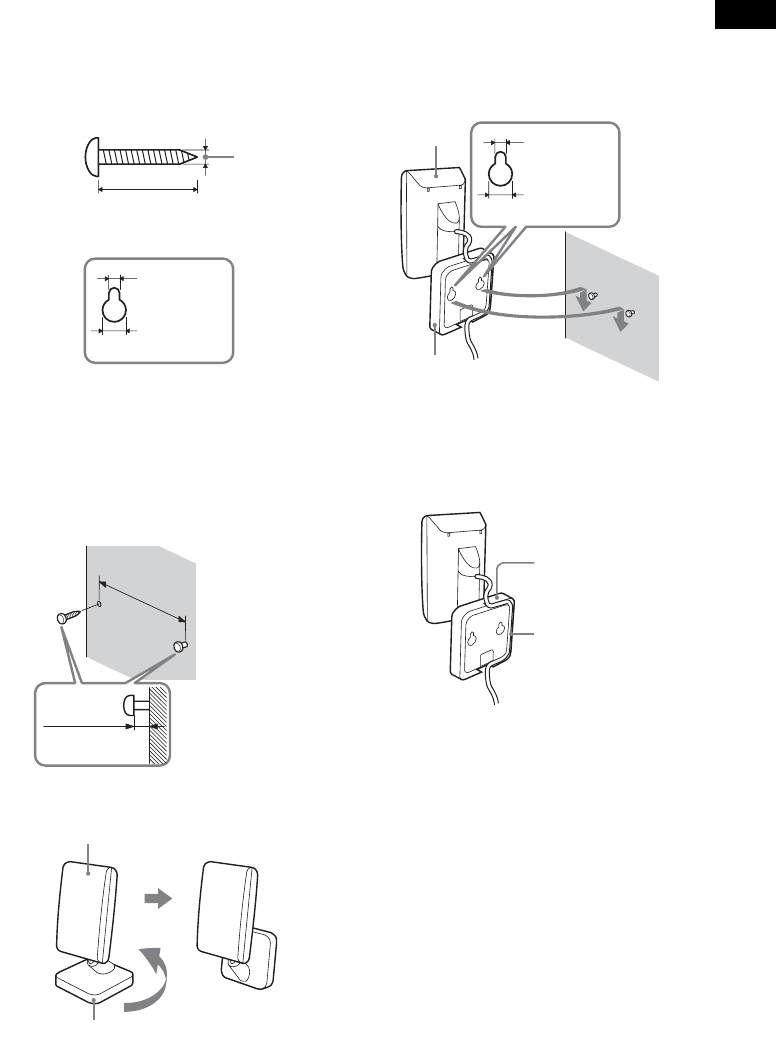
To hang the IR transmitter on a
wall
1 Prepare two screws (not supplied) that
are suitable for the holes on the back of
the IR transmitter. See the illustrations
below.
2 Fasten the screws to the wall. The
screws should protrude 4 mm (
3
/
16
inch).
Install the screws 30 mm (1
3
/
16
inches)
apart.
3 Rotate the stand of the IR transmitter.
4 Hang the IR transmitter via hole on the
bottom of the stand on the screw.
Make sure that the IR transmitter does not
move after installation.
Tip
You can store the cords in the troughs in the bottom of
the stand.
Notes
• Use screws suitable for the material and strength of
the wall.
• Do not install the IR transmitter or IR receiver to a
wall of low strength.
• Sony is not liable for any damage or accident incurred
by incorrect installation (i.e. low strength wall, etc.),
incorrect use of this product, or natural disaster.
• When connecting/disconnecting cords, detach the IR
transmitter or IR receiver from the wall first.
more than 20 mm
(
13
/
16
inch)
3 mm
(
1
/
8
inch)
3.8 mm
(
5
/
32
inch)
8 mm
(
11
/
32
inch)
Holes on the back of
the IR transmitter
4 mm
(
3
/
16
inch)
30 mm
(1
3
/
16
inches)
Stand
IR transmitter
IR transmitter
Stand
3.8 mm
(
5
/
32
inch)
8 mm
(
11
/
32
inch)
Holes on the back of
the IR transmitter
Troughs
Stand


