


18
Tape – Recording
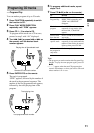
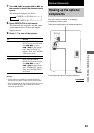
Recording a CD on a tape
— CD-TAPE Synchro Recording
1 Load a blank tape.
2 Load a CD you want to record.
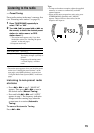
3 Press CD SYNC.
The tape deck stands by for recording and
the CD player pauses for play.
When you want to record on the bottom
side, press TAPE nN.
4 Press PLAY MODE/DIRECTION
repeatedly until g appears to record
on one side or h (or j) to record on
both sides.
5 Press REC PAUSE/START.
Recording starts.
To stop recording
Press x.
Tips
• When you record on both sides, be sure to start
from the top side. If you start from the bottom side,
recording stops at the end of the bottom side.
• If you select both sides recording and the tape
reaches the end of the top side part-way through a
track, the entire track is recorded again from the
beginning of the bottom side.
• You can record only your favorite CD tracks with
Program Play. After step 2, follow the same
procedures as step 1 to 6 in “Programing CD
tracks” on page 11. Then go to step 4.
Selecting tape length
automatically
— Tape Select Edit
You can check the most suitable tape length for
recording a CD. Note that you cannot use Tape
Select Edit for discs containing over 20 tracks.
1 Load a CD.
2 Press FUNCTION repeatedly to switch
the function to CD.
3 Press EDIT.
“EDIT” starts flashing.
The required tape length for the currently
selected CD appears, followed by the total
playing time for side A and side B.