


21
GB
Getting Started
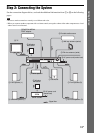
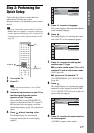
Step 3: Performing the
Quick Setup
Follow the Steps below to make the basic
adjustments for using the system.
Displayed items vary depending on the country
model.
Note
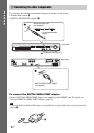
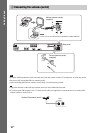
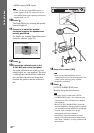
• When you connect the system and the TV with the
HDMI cable (not supplied), you need to set the type
of video output for matching your TV. For details, see
“Setting the type of video output to match your TV”
(page 23).
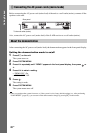
1 Turn on the TV.
2 Press [/1.
Note
• Make sure that the function is set to “DVD”
(page 24).
3 Switch the input selector on your TV so
that the signal from the system
appears on the TV screen.
[Press [ENTER] to run QUICK SETUP.]
appears at the bottom of the TV screen. If
this message does not appear, recall the
Quick Setup display (page 23) and perform
again.
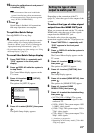
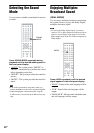
4 Press without inserting a disc.
The Setup Display for selecting the
language used in the on-screen display
appears.
5 Press X/x to select a language.
The system displays the menu and subtitles
in the selected language.
6 Press .
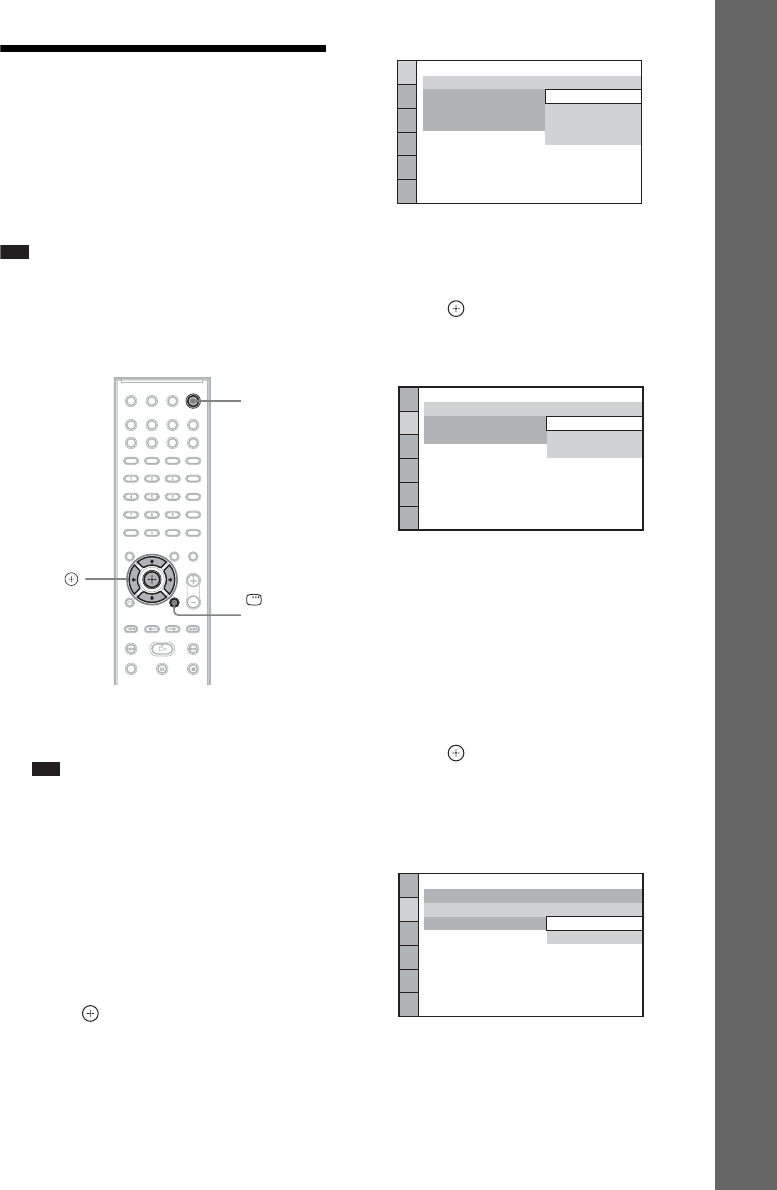
The Setup Display for selecting the aspect
ratio of the TV to be connected appears.
7 Press X/x to select the setting that
matches your TV type.
x If you have a wide-screen TV or a 4:3
standard TV with a wide-screen mode
[16:9] (page 48)
x If you have a 4:3 standard TV
[4:3 LETTER BOX] or [4:3 PAN SCAN]
(page 48)
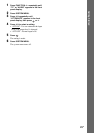
8 Press .
The Setup Display for selecting the output
method for video signals from the EURO
AV T OUTPUT (TO TV) jack on the rear
panel of the unit appears.
9 Press X/x to select the output method
for video signals.
• [VIDEO]: outputs video signals.
"/1
DISPLAY
C/X/x/c,
LANGUAGE SETUP
MENU:
OSD:
AUDIO:
SUBTITLE:
ENGLISH
ENGLISH
FRENCH
SPANISH
PORTUGUESE
VIDEO SETUP
LINE:
TV TYPE:
PAUSE MODE:
16:9
16:9
4:3 LETTER BOX
4:3 PAN SCAN
VIDEO SETUP
LINE:
TV TYPE:
PAUSE MODE:
16:9
VIDEO
VIDEO
VIDEO
VIDEO
RGB