04/1/28 XL-DH10N 20H_EN
8
Listening to the iPod (continued)
Notes:
● The unit is installed with the iPod adaptor No. A.
● Remove and insert the recommended iPod adaptor if
required (refer table on page 7).
Simply remove the iPod from the iPod dock. It is safe to do
so even during playback.
Note:
When navigating the iPod menus with remote control, do
not operate any of the buttons on the iPod unit. The volume
level is adjusted by pressing the VOL (+ or –) button on the
main unit or the remote control. Adjusting the volume on
the iPod unit gives no effect.
iPod operation:
The operations described below depend on the generation
iPod you are using.
System on operation:
When the main unit is powered on, the iPod unit will
automatically power on when docked in the unit (including
TIMER function).
System off (stand-by) operation:
When the main unit is turned to stand-by mode, the docked
iPod unit will automatically turn to charging mode.
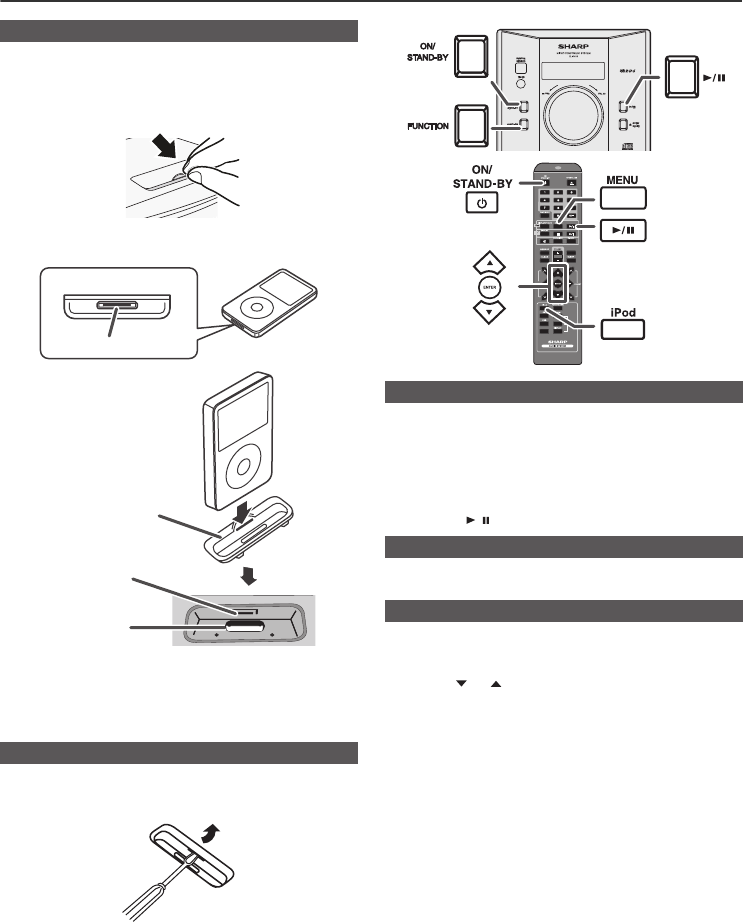
■ To insert iPod adaptor
1
Press the ON/STAND-BY button to turn the power on.
2 Open the iPod cover by pulling up the tip.
3 Insert the iPod adaptor into the iPod dock and connect
your iPod.
■ To remove iPod adaptor
Insert the tip of a screwdriver (“–” type, small) into the iPod
adaptor hole as shown and lift upward to remove.
pull up
iPod
Dock connector
iPod (bottom)
iPod dock
iPod
connector
iPod adaptor
■ iPod playback
1
Press the ON/STAND-BY button to turn the power on.
2 Press the iPod button on the remote control or
FUNCTION button on the main unit repeatedly to
select iPod function.
3 Insert iPod unit in iPod dock of main unit.
4 Press the / button to start playback.
■ To disconnect iPod
■ Navigating the iPod menus
1
Press the MENU button to view the menu on iPod unit.
Press it again to go back to previous menu.
2 Use the or button to select an item on the menu
and then press ENTER button.
CD
USB
MUTE
CLOCK/TIMER
TUNING/
FOLDER
AUX
PTY
RDS


