


04/1/28 XL-DH10N 20H_EN
7
9
8
7
6
5
4
3
2
1
9
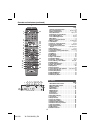
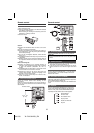
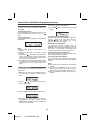
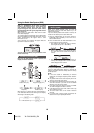
Setting the clock (Remote control
only)
In this example, the clock is set for the 24-hour (00:00)
display.
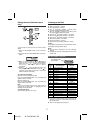
To confirm the time display:
[When the unit is in the stand-by mode]
Press the CLOCK/TIMER button. The time display will
appear for about 5 seconds.
[When the power is on]
Press the CLOCK/TIMER button. The time display will
appear for about 5 seconds.
Note:
The “00:00” will appear when the AC power supply is
restored after a power failure or unplugging the unit.
Readjust the clock as follows.
To readjust the clock:
Perform “Setting the clock” from step 1.
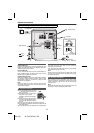
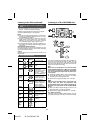
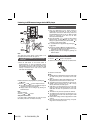
Listening to the iPod
Supported iPod models:
●
iPod nano (software 1.2 above)
●
iPod mini (software 1.2 above)
●
iPod (5
th
generation) (software 1.3 above) (Dock
connector equipped Click Wheel model)
●
iPod (4
th
generation) (software 3.0.2 above) (Dock
connector equipped Click Wheel model)
●
iPod nano (2
nd
generation) (software 1.0.0 above)
●
iPod nano (3
rd
generation) (software 1.0.3 above)
●
iPod nano (4
th
generation) (software 1.0.3 above)
●
iPod classic (software 1.0.3 above)
●
iPod touch (software 1.1 above)
●
iPod touch (2
nd
generation) (software 2.1 above)
Caution:
Please update your iPod unit to the latest software version
from Apple’s homepage before using it.
Notes:
●
Once the iPod is connected to the unit it will begin
charging.
●
The iPod unit cannot be charged whilst the main unit is
in USB mode.
Notes:
●
If you have an iPod that does not have an iPod 30 Pin
connector, you can use an audio cable to connect it to
the AUX IN socket.
●
iPhone is not supported by this system.
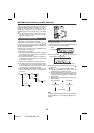
1
Press the ON/STAND-BY button to turn to stand-by
mode.
2 Press and hold the CLOCK/TIMER button until “00:00”
appear.
3 Within 10 seconds, press the or button to
adjust the hour and then press the CLOCK/TIMER
button. Press the or button once to advance
the time by 1 hour. Hold it down to advance
continuously.
4 Press the or button to adjust the minutes and
then press the CLOCK/TIMER button. Press the or
button once to advance the time by 1 minute. Hold
it down to advance continuously.
CD
USB
MUTE
MUTE
CLOCK/TIMER
CLOCK/TIMER
TUNING/
FOLDER
AUX
AUX
PTY
PTY
RDS
RDS
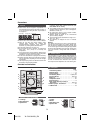
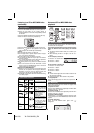
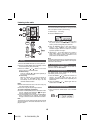
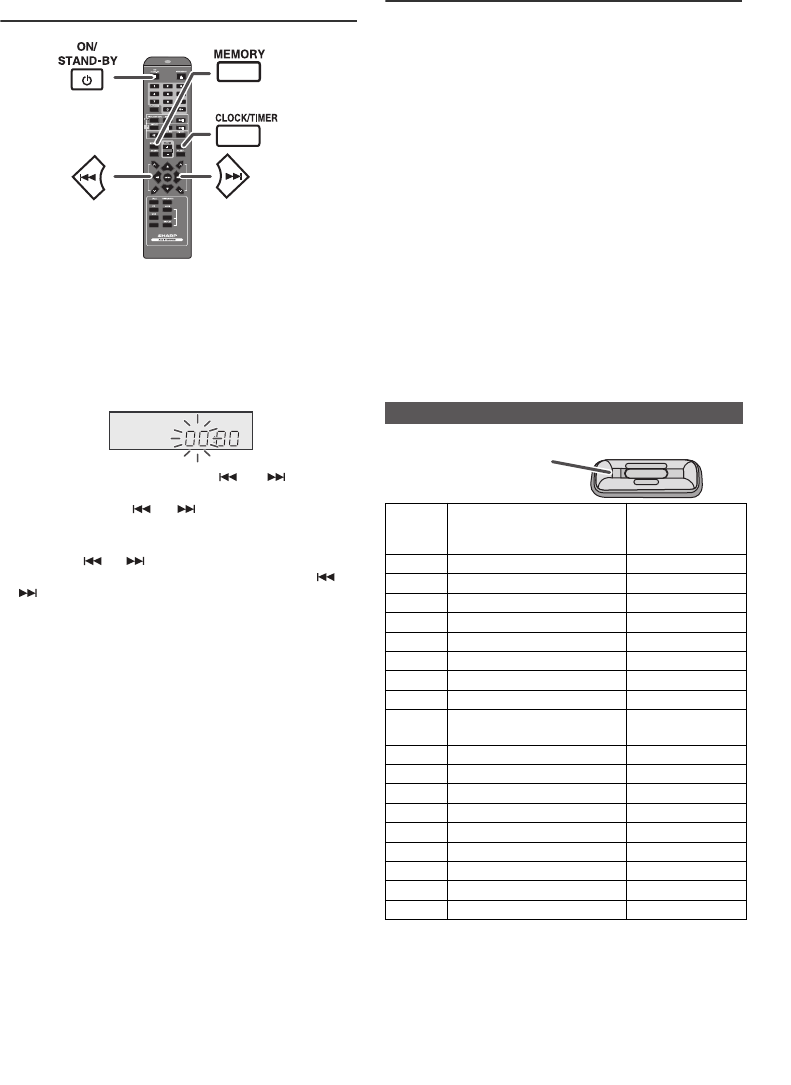
■ iPod adaptor connection
iPod
Adaptor
No.
iPod Description Capacity
A 5G iPod (with video) 30GB
A U2 iPod with video 30GB
A iPod classic 80GB & 120GB
A 4G iPod & U2 iPod 20GB
A 4G iPod 40GB
A iPod photo 40GB & 60GB
A iPod with colour display 60GB
A iPod Touch 8GB & 16GB
A iPod Touch (2nd Gen.) 8GB, 16GB &
32GB
B iPod nano 2GB & 4GB
B iPod nano (2nd Gen.) 2GB, 4GB & 8GB
B iPod nano (3rd Gen.) 4GB & 8GB
B iPod nano (4th Gen.) 8GB & 16GB
C iPod mini 4GB & 6GB
D iPod photo & colour U2 iPod 20GB & 30GB
D iPod with colour display 20GB, 60GB
E 5G iPod with video 60GB & 80GB
E iPod classic 160GB
A
The marking shows
which iPod fits