


E-6
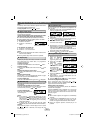
iPhone and iPod operations
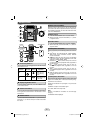
Made for:
iPhone 4
O
iPhone 3GS
O
iPhone 3G
O
iPhone
O
iPod touch (4
O
th
generation)
iPod touch (3
O
rd
generation)
iPod touch (2
O
nd
generation)
iPod touch (1
O
st
generation)
iPod classic
O
iPod nano (6
O
th
generation)
iPod nano (5
O
th
generation)
iPod nano (4
O
th
generation)
iPod nano (3
O
rd
generation)
iPod nano (2
O
nd
generation)
Caution:
Please update your iPod unit to the latest software version
from Apple’s homepage before using it.
Notes:
Once the iPod or iPhone is connected to the unit it will O
begin charging.
The iPod or iPhone unit cannot be charged while O
the main unit is in the stand-by mode or during USB
mode.
The message “This accessory is not made to work with O
iPhone” or similar, may appear on the iPhone screen
when:
- battery is low.
- the iPhone is not properly docked (eg. slanting).
If this occurs, remove and re-dock the iPhone.
This product is made for iPhone. To prevent random O
interference when iPhone is docked, the headphone
output is disabled, and “HP INVALID” will be displayed.
You may also experience brief audio interference
during incoming calls.
iPod and iPhone adaptor connection Q
Notes:
Please use the adaptor supplied with your iPod or O
iPhone unit.
You can use an audio cable to connect your iPod to the O
AUDIO IN jack if:
1. your iPod adaptor does not fi t into the iPod dock on
the main unit.
2. you have an iPod that does not have an iPod
adaptor.
3. you have an iPod that does not have an iPod 30 pin
connector.
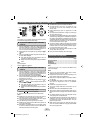
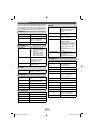
iPhone
Adaptor No.
iPhone
Description
Capacity
12
iPhone 4GB & 8GB & 16GB
15
iPhone 3G 8GB & 16GB
15
iPhone 3GS 16GB & 32GB
19
iPhone 4 16GB & 32GB
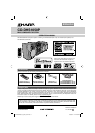
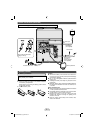
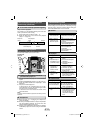
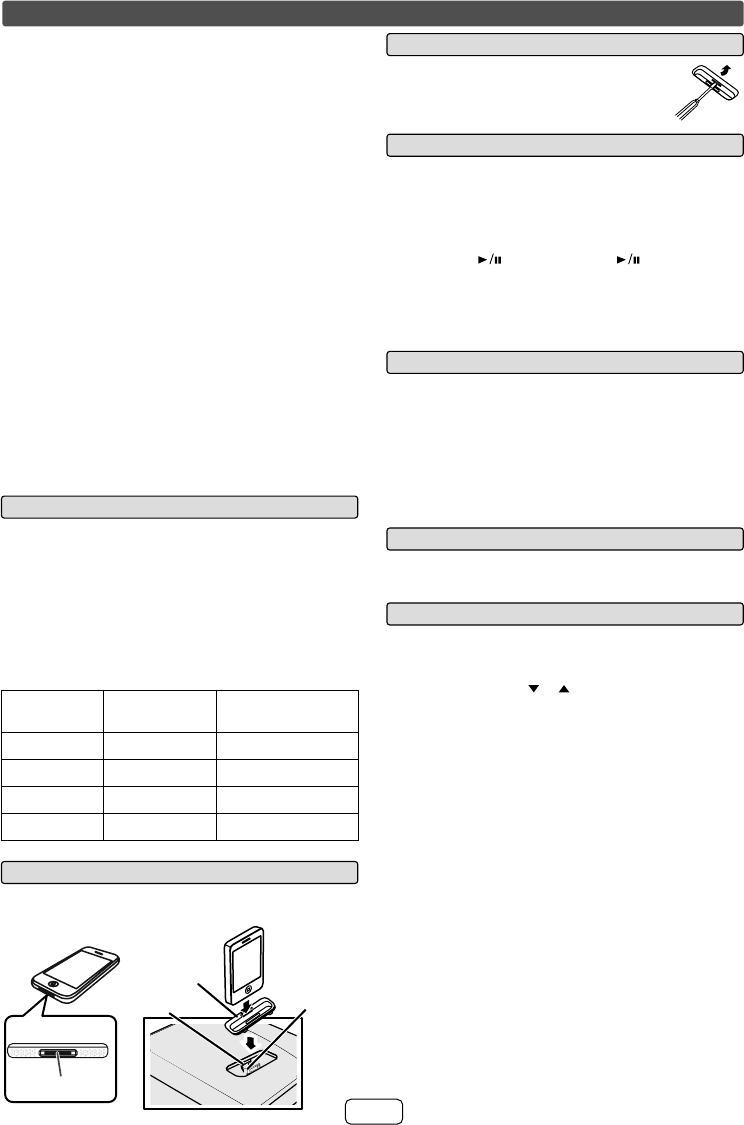
To insert iPod or iPhone adaptor Q
Insert the iPod or iPhone adaptor into the unit and connect
your iPod or iPhone.
iPhone
iPhone
(
bottom
)
Dock connector
iPhone
connector
iPhone dock
iPhone
adaptor
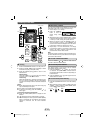
Listening to the iPod or iPhone
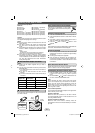
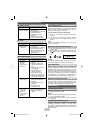
To remove iPod or iPhone adaptor Q
Insert the tip of a screwdriver (“-” type, small)
into the adaptor hole as shown and lift upward
to remove.
iPod or iPhone playback Q
Press the ON/STAND-BY button to turn the power on.1
Press the iPod/iPhone button to select iPod or iPhone 2
function.
Insert iPod or iPhone unit in iPod or iPhone dock of
3
main unit. “DOCK OK” will be displayed.
Press the
4 (iPod or iPhone ) button to start
playback.
Note:
iPod and iPhone cannot be played back via USB cable and
connection, “NO SUPPORT” will be displayed.
iPhone playback Q
Sound will only switch from iPhone to the main unit after O
authentication process is completed in approximately
10 seconds.
Incoming calls will pause the playback. O
Once the calls are answered, the conversation can O
only be heard through the built-in iPhone speaker. Turn
on the iPhone speaker or undock the iPhone to start
conversation.
To disconnect iPod or iPhone Q
Simply remove the iPod or iPhone from the iPod or iPhone
dock. It is safe to do so even during playback.
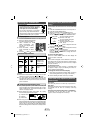
Navigating the iPod or iPhone menus Q
Press the MENU button to view the menu on iPod 1
or iPhone unit. Press it again to go back to previous
menu.
Use the PRESET (
2 or ) button to select an item on
the menu and then press ENTER button.
Note:
When navigating the iPod or iPhone menu with remote
control, do not operate any of the buttons on the iPod or
iPhone unit. The volume level is adjusted by turning the
volume knob on main unit or pressing the VOL (+ or –)
button on the remote control. Adjusting the volume on the
iPod unit gives no effect.
iPod or iPhone operation
The operations described below depend on the generation
iPod or iPhone you are using.
System on operation
When the main unit is powered on, the iPod or iPhone
unit will automatically power on when docked in the unit
(including TIMER function).
System off (stand-by operation)
When the main unit is turned to stand-by mode, the
docked iPod or iPhone unit will automatically turn to stand-
by mode.
CD-DHS1050P_US_EN.indd 6CD-DHS1050P_US_EN.indd 6 2/10/2011 3:32:22 PM2/10/2011 3:32:22 PM