


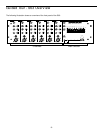

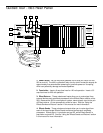

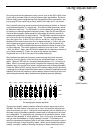

17
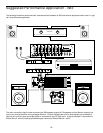
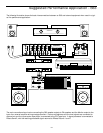
Setting up your S83/S63 is a simple procedure which takes only a few minutes:
1. Remove all packing materials (save them in case of need for future service)
and decide where the unit is to be physically placed—it can be mounted in any
standard 19” rack, requiring four rack spaces. Be careful when handling the
S83/S63—the rear heat sink fins and side rack panels have sharp edges. Make
sure that the rear heat sink fins are unobstructed and that there is good ventila-
tion around the entire unit. If your rack contains multiple amplifiers, we recom-
mend that you avoid potential overheating problems by using spacer panels to
ensure that the amps are not directly on top of one another.
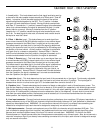
2. Before even plugging the unit into an AC socket, begin by making the speak-
er connections. It is never a good idea to power up any amplifier that is not con-
nected to loudspeakers. Any loudspeakers with a minimum impedance load of
2 ohms (that is, 2 ohms or greater) can be used. However, we recommend the
use of 4 ohm speakers for long-term usage. In order to ensure correct phase
correlation, be sure that the connection from the tip of the S83/S63 speaker jack
goes to the “+” (hot) input of your loudspeaker, and that the sleeve of the
S83/S63 speaker jack is connected to the “-” (ground) input of your loudspeaker.
3. Next, make the signal input connections to the mic or line inputs of the vari-
ous channels. WARNING: Do not connect a channel’s line input if you already
have something connected to its microphone input, or vice versa; each channel
is designed to accept only one source or the other.
4. Turn all channel Trim and Level controls as well as the Main Level control
fully counterclockwise, to their “∞” setting. Then plug the unit into any grounded
AC socket. Because of the special relay protection circuitry built into the
S83/S63, you can even plug it into the same power strip that other audio devices
(such as a mixing console) are connected to. You can then turn on all devices at
once with the single power strip on-off switch, with no danger of damaging con-
nected speakers by generating “thumps.”
5. Press the rear panel Power switch in order to turn on the unit. The Protection
LED will go on for approximately five seconds, and then switch off (you’ll hear a
click when it does).
Setting Up and Using the S83/S63