


14
HOW - Cutting Wall/Ceiling Opening for Speakers
HOW - CUTTING WALL/CEILING OPENING FOR
SPEAKER
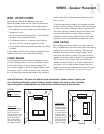
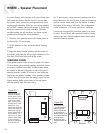
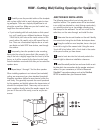
The following steps outline how to locate a section of
wall between two studs, mark the outer boundaries of
the hole, drill a small hole in the center to verify the
location and then cut the main hole.
Determine the location of the studs so the speaker
can be centered approximately between them. There are
several ways to go about this:
• Use a stud finder, a simple electronic device which
works by locating changes in wall density. Many stud
finders can also indicate the presence of live AC wiring.
• Tap on the ceiling and listen to the resulting
“THUMP.” When it’s deeper and hollow sounding,
you’re between studs. When it’s sharper and more
flat sounding, you’re close to or over a stud.
• Identify studs by the position of electrical outlets or
switches. There may be a stud directly to the left or right
of such electrical fixture. This gives you a point of meas-
urement since studs are either 24 or 16 inches on cen-
ter in newer houses, 12 inches apart on older homes.
When you’re reasonably sure of where the ceiling
studs are (and are completely sure there isn’t an electri-
cal cable, water pipe, or heating duct in that vicinity of
wall), position the cardboard mounting template, and
draw around its outer perimeter with a pencil. If you
don’t trust your eye, use a level to make sure the hole
will be straight.
Drill a 1-inch hole in the center of the pencil out-
line which you have just drawn, just deep enough to
fully penetrate the wallboard.
Obtain a length of stiff wire such as a straightened
wire coat hanger. Bend it so that the last 6 or 8 inches
is at a right angle to the rest.
Insert the angled part into the 1-inch hole you just
drilled and probe to left and right to confirm that a stud
is not too close on either side. Move the wire around in
a circular motion to check clearances above and below
the hole as well.
• If there is a stud too close on one side, reposition the
cardboard template a few inches in the opposite direc-
tion, and re-draw your pencil outline, keeping the 1-inch
hole within the pencil outline’s inner boundaries.
5
4
3
2
1
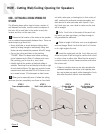
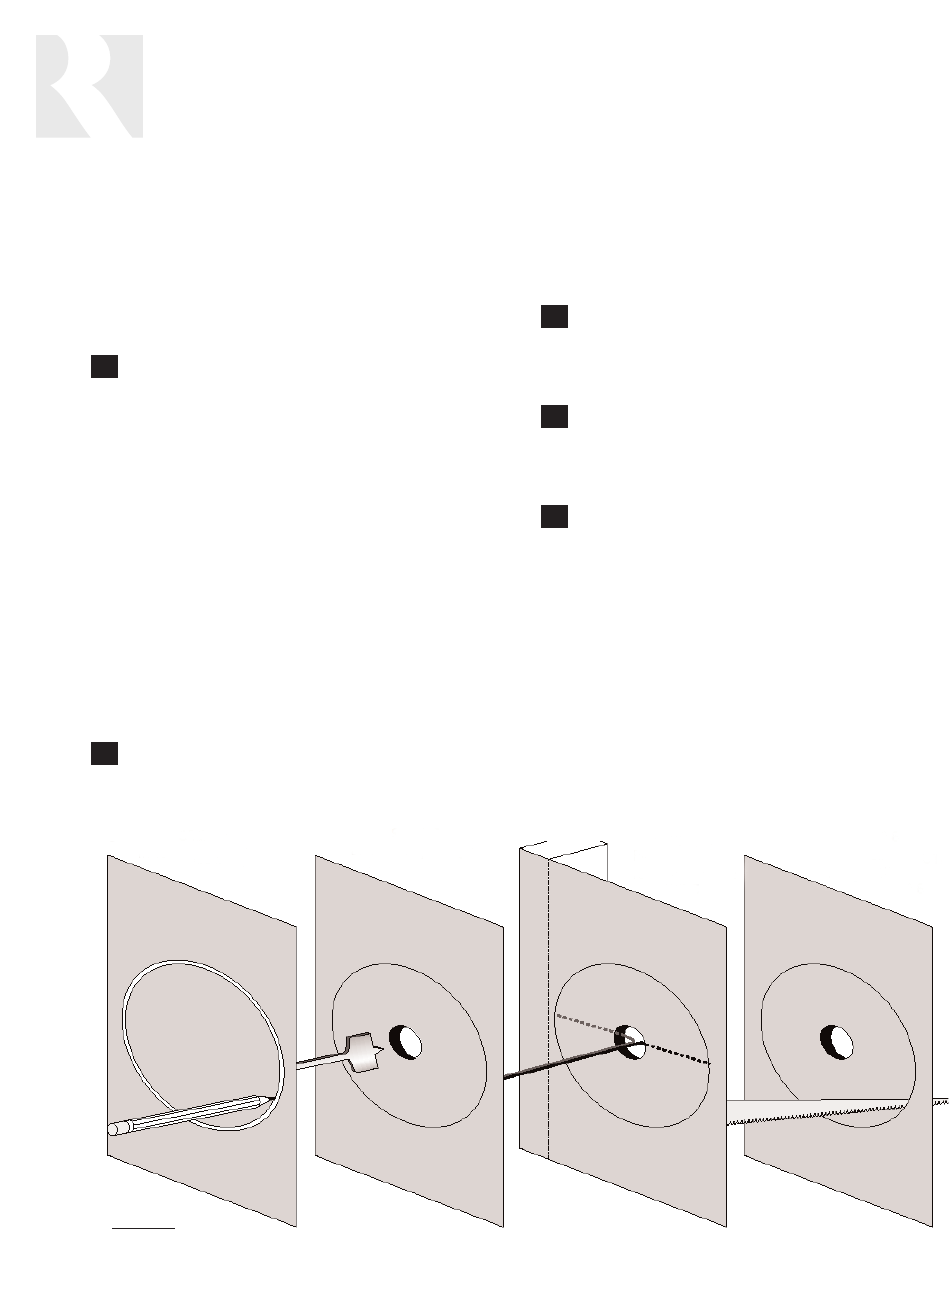
Figure 8
STEP 2
Trace template outline
STEP 3
Drill 1-inch pilot hole
STEP 5
Probe with wire
for stud
clearance
STEP 6
Cut Speaker hole
along outline