


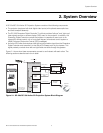
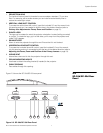
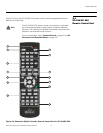
System Overview
Runco SC-30d/SC-35d Installation/Operation Manual 7
PRE
L
IMINAR
Y
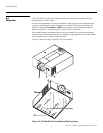
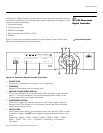
1. PROJECTION LENS
The inside of the lens barrel is threaded to accommodate a standard, 72-mm lens
filter. For example, with a smaller screen you can install a neutral-density filter to
reduce the overall light output.
2. VERTICAL LENS SHIFT CONTROL
To access the vertical lens shift control, insert the included 5.0-mm Hex wrench into
this opening and turn it as needed to shift the lens in the desired direction (refer to
Primary Lens Adjustments: Focus, Zoom and Position on page 51).
3. RUNCO LOGO
The logo can be rotated to match the projector orientation: inverted (ceiling-mounted)
or upright. To rotate the logo, grip it at the sides, pull it away from the projector and
rotate it 180 degrees.
4. EXHAUST VENT
Warm air exits the projector through this vent. Ensure that it is not blocked.
5. HORIZONTAL LENS SHIFT CONTROL
To access the horizontal lens shift control, insert the included 5.0-mm Hex wrench
into this opening and turn it as needed to shift the lens in the desired direction (refer to
Adjusting the Focus, Zoom and Position of the Primary Lenses on page 54).
6. INTAKE VENT
Internal fans draw cool air into the projector through this vent.
7. CEILING MOUNTING HOLES
Use these to attach the ceiling bracket (if needed) to the projector.
8. CABLE OPENING
Pass cables through this opening.
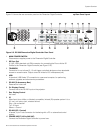
2.2
SC-30d/SC-35d Rear
Panel
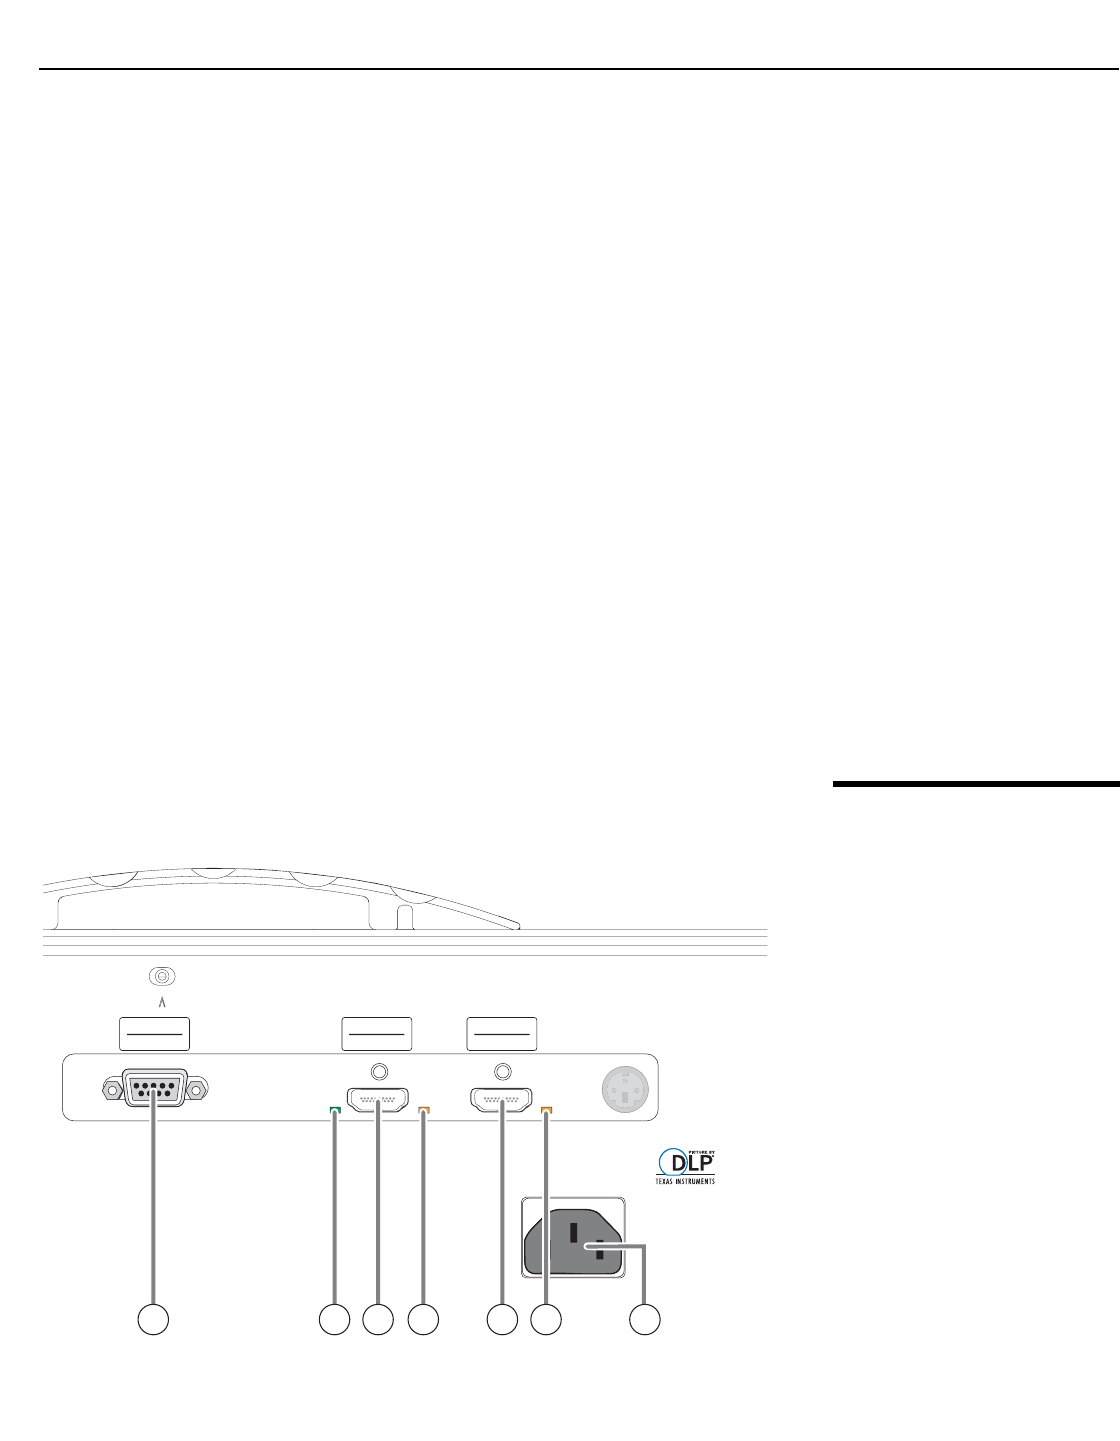
Figure 2-3 shows the SC-30d/SC-35d rear panel.
Figure 2-3. SC-30d/SC-35d Rear Panel
RS232
RS232
PRIMARY
PRIMARY
SECONDARY
SECONDARY
1 2 3 4 65 7