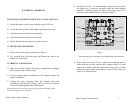
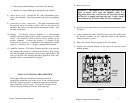
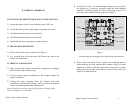
⇒ Place polyurethane tubing on the 8-ohm wire and lug.
⇒ Replace nut onto binding post and tighten with wrench.
8) Attach Power Cord - Connect the IEC end of detachable power
cord to the amplifier, and plug opposite end into corresponding
outlet.
9) Connections to other components -. The input connections from
the musical source are made via RCA jacks on the rear of the
amplifier. Be sure to use high quality interconnect cables - they
do make a difference.
10) Polarity - The Rogue Tempest amplifier is a non-inverting
amplifier (positive signal in gives positive signal out) so, for best
sound, care should be taken to ensure correct polarity at the
speaker terminals. Connect the positive (+) outputs of the
Tempest to the positive (+) terminals of the loudspeakers and the
negative (-) outputs to the (-) negative loudspeaker terminals.
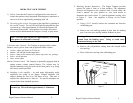
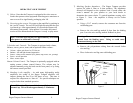
11) Amplifier Location - The Rogue Tempest amplifier is an enclosed
tube design with forced air ventilation and cooling. This cooling
has been designed and tested to ensure long term reliability and
safety of the unit. The amplifier should be placed in such a way
that this airflow is not impeded. See Figure 7.
USING AN EXTERNAL PREAMPLIFIER
The Tempest offers the flexibility of adding an external
preamplifier should the user wish to do so. In the external preamp
mode the Tempest preamp is completely bypassed and only the
power amplifier section is used. To set up the Tempest for use
with an external preamp perform the following steps.
1) Remove the cover
WARNING - This amplifier uses voltages that could cause
injury or death. Never open the amplifier while it is
plugged in, and always wait at least one hour after turning
the unit off to unplug and open the unit. Lethal voltages
can remain in the electronics after the unit is unplugged
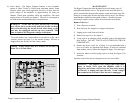
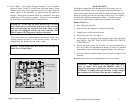
2) Locate the four small shunts on the control circuit board as shown
in figure 4.
3) Using a needle nose pliers carefully remove the four shunts from
the locations marked “int pre” and move them to the adjacent
locations marked “ext pre.”
4) Rotate the selector knob to preamp on the front panel.
5) Connect the external preamp to the inputs on the rear panel
marked preamp.
Rogue Tempest Owners Manual 6
Rogue Tempest Owners Manual 7
External /
Internal
Preamp
Shunts
Figure 4


