35
9
Additional Information
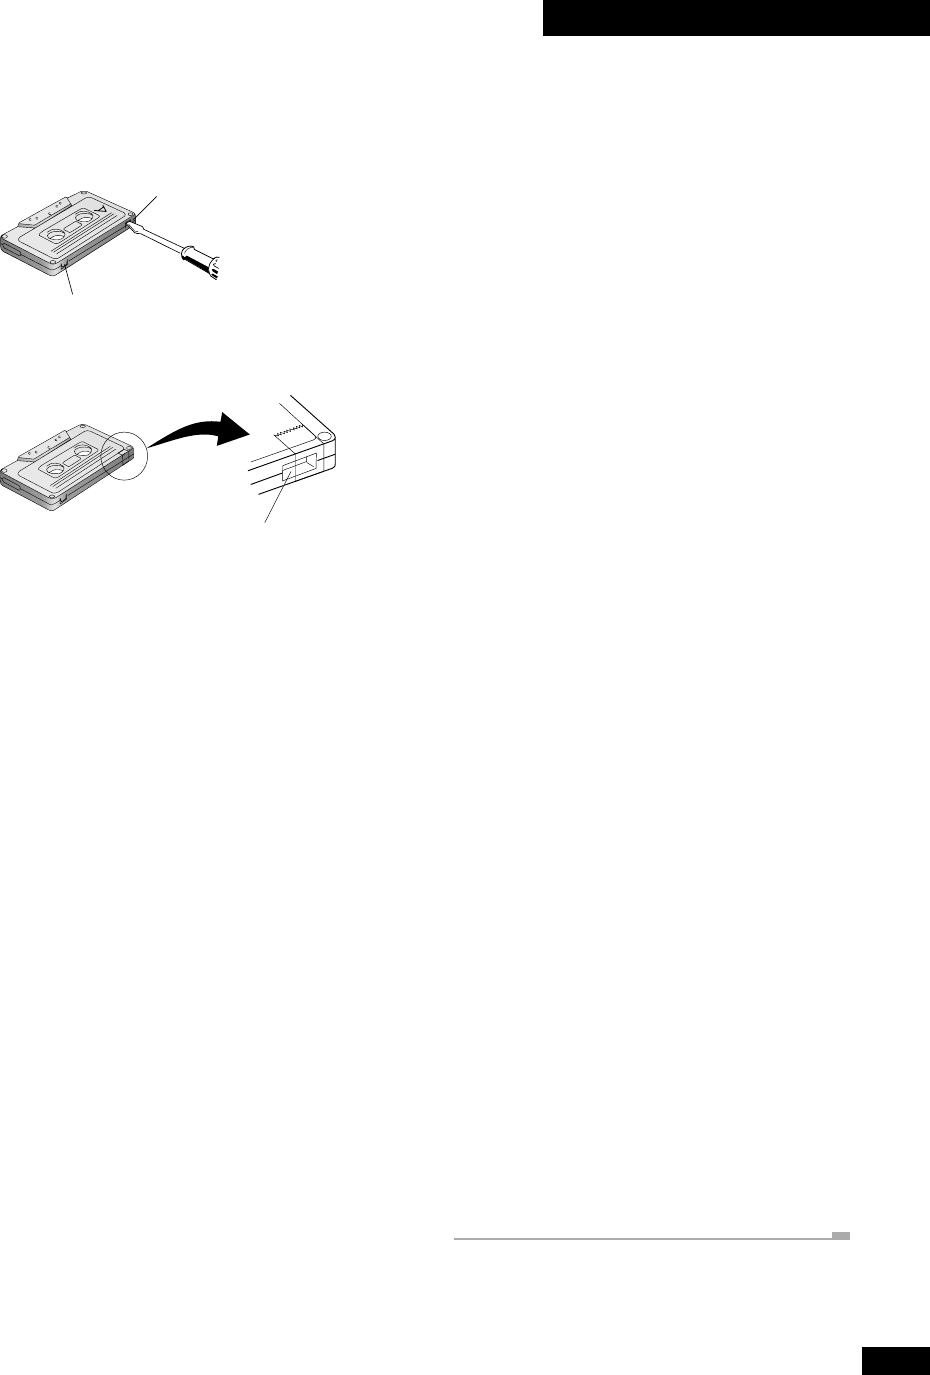
Erase protection
You can protect an important recording against accidental
erasure by breaking the erase-protect tab(s) with a small
screwdriver.
Erase-protect tab
Erase-protect tab
If you want to re-record on an erase-protected cassette, cover
the space left by the broken tab with self-adhesive tape.
Tape-type hole
Note: If you're using Type II (High/CrO2) tapes, make sure
you don't also cover the tape-type detection holes.
Cleaning external surfaces
To clean this unit, wipe with a soft, dry cloth. For stubborn
dirt, wet a soft cloth with a mild detergent solution made by
diluting one part detergent to 5 or 6 parts water, wring well,
then wipe off the dirt. Use a dry cloth to wipe the surface dry.
Do not use volatile liquids such as benzene and thinner which
may damage the surfaces.
Moving the unit
If you need to move the unit, first switch it off and unplug
from the wall outlet. Avoid lifting or moving the unit during
playback or recording.
CD lens cleaner
The CD pickup lens should not become dirty in normal use,
but if for some reason it should malfunction due to dirt or
dust, consult your nearest Pioneer authorized service center.
Although lens cleaners for CD players are commercially
available, we do not recommend using them since some may
damage the lens.
Tape head cleaner
To maintain the recording/playback quality of the tape deck,
use a commercially available wet-type cassette head cleaner.
Avoid using dry-type cassette head cleaners.
Be careful: Some cassette head cleaners are not designed
to work with auto-reverse decks and may become jammed in
the mechanism—ask your Pioneer authorized service centre
for details.
After using the head cleaner, leave the unit for 2–3 minutes
before playing a tape. This will give any excess cleaning fluid
a chance to dry.
Demagnetizing the tape head
The recording/playback head in the tape deck gradually
becomes magnetized after long periods of use. Playback and
recording quality will suffer as a result, with a lack of treble
and increased noise. To avoid the problem, we recommend
using a head demagnetizer at regular intervals. These are
available from any good audio dealer.
When using a head demagnetizer, be sure to turn the volume
right down and unplug any headphones to avoid damaging
the unit or the speakers. For further details, refer to the
instructions that came with the head demagnetizer.
Magnetic shielding of speakers
The satellite speakers are magnetically shielded. This means
that they can safely be placed near a TV or monitor without
distorting the picture.
The subwoofer is not magnetically shielded. If it is placed very
near a TV or monitor, you may see color distortion in the
picture. Switch off the TV for about 30 minutes and move the
subwoofer further away from the television to solve the
problem.
Removing/replacing the satellite
speaker grilles
You can use the satellite speakers with or without the grilles.
To remove:
1 Gently pull the bottom half of the grille away
from the speaker.
2 Pull away the top half to completely remove
the grille.
To put back on:
1 Line up the grille with the holes in each corner
of the speaker
2 Push the grille back on.


