


10
• While changing or inserting discs, be careful not to press
any buttons on the main unit or the remote control. The
rack may move suddenly, and then your fingers may be
caught between discs and the side of door.
• When changing or inserting discs, make sure the rack is
stopped. Do not attempt to put a disc in when the rack is
moving.
• Do not put anything other than CDs inside the rack.
• Load only one disc into each disc slot.
• Do not apply force to the rack. This can cause a malfunction.
• 8-cm (3-in.) discs cannot be played as they are. First attach the
8-cm (3-in.) disc adapter to each 8-cm (3-in.) disc and load them
together in the player.
• Never start playback by placing the 8-cm (3-in.) disc adapter
alone, without attaching it to a disc.
• The unit will not operate if the hood is opened during playback.
Be sure to close the hood before attempting any operation.
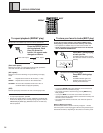
• To load or remove a disc in or from the slot which is seen
through the hood, press OPEN/CLOSE. The hood is opened,
“HOLD” is displayed and the disc can be loaded in or ejected
from the slot seen through the hood. Even while “HOLD” is
being displayed, the rack can be rotated by pressing DISC (–/+).
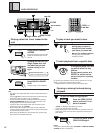
To remove the discs...
Press UNLOAD.
Select the number of the disc you want to unload
by turning the jog dial or pressing DISC (–/+) on
the remote control unit.
• The rack rotates until the selected disc comes to the front
of the unit.
Remove from the rack.
Press OPEN/CLOSE.
• The hood will close.
Press OPEN/CLOSE.
The hood will close.
When the hood closes, the rack is
revolved once for disc detection
(disc loaded/not loaded detection
function).
Tip:
Difference between OPEN/CLOSE and UNLOAD
OPEN/CLOSE: The hood is simply opened or closed.
UNLOAD: The slot corresponding to the disc No. being displayed
rotates to the center position then the hood is opened.
Notes!!
• Do not attempt to open the hood with your hand.
• Be careful not to pinch your fingers when opening and closing
the hood.
• If PLAY operation (PLAY, BEST, Hi-LITE, PREVIOUS) is carried
out before disc detection finishes, PLAY operation will pro-
ceeded to without detection. In this case, detection will operate
after PLAY is finished. Detection may not function properly
depending on the color or shape etc., of the disc.
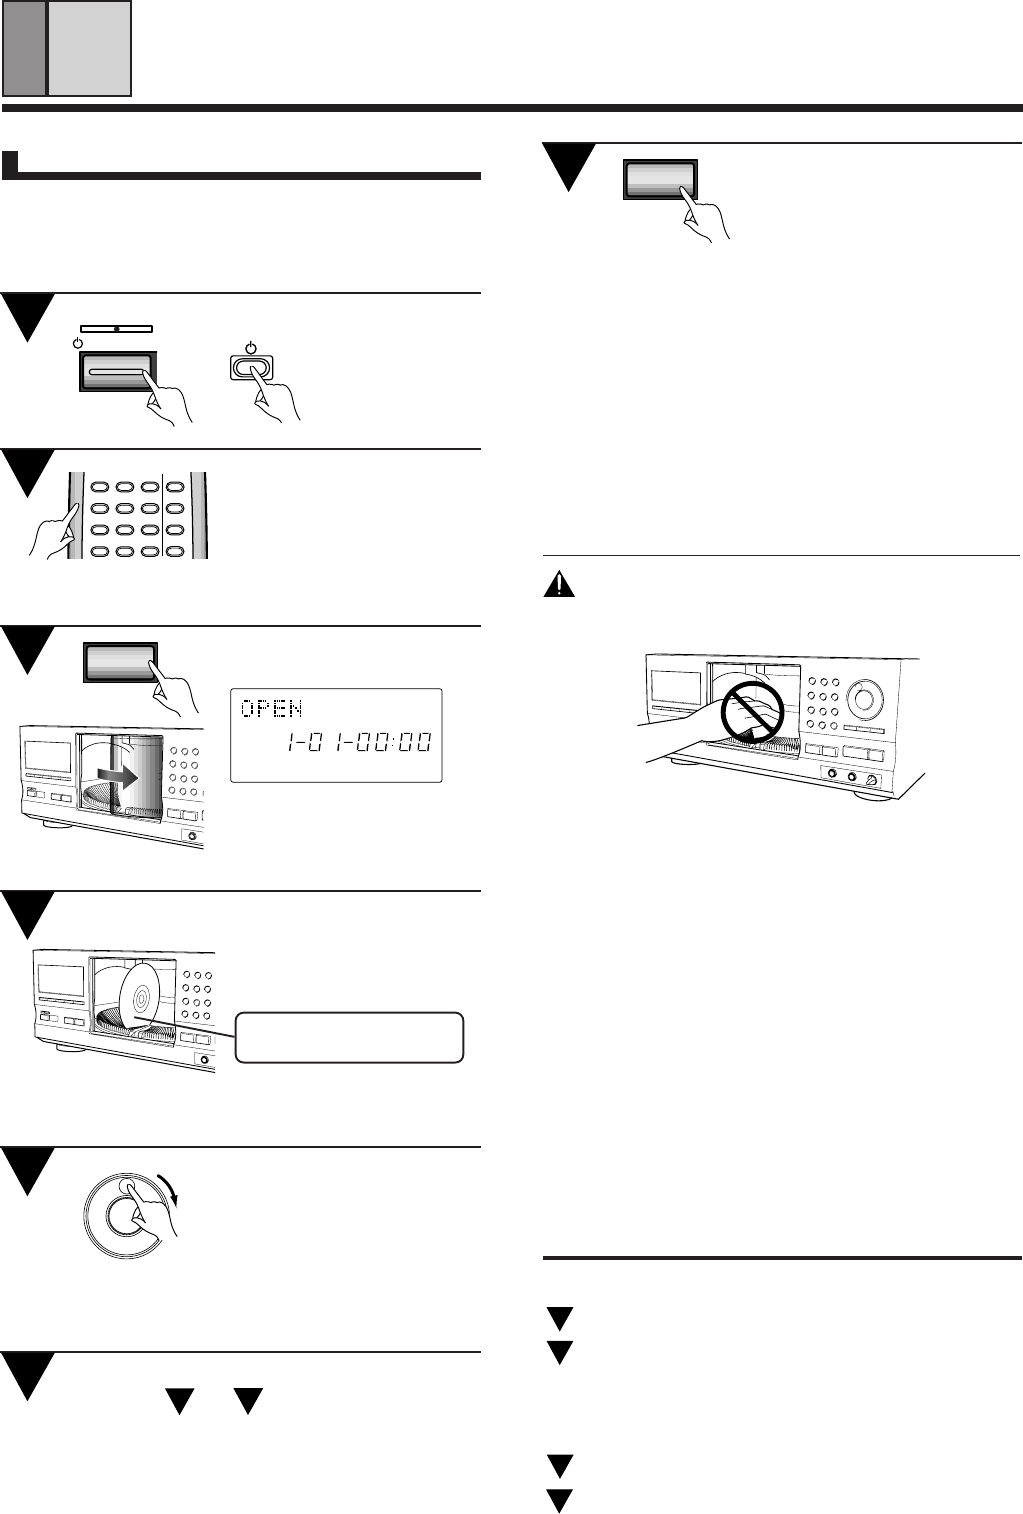
WARNING:
Do not put your hand or any other object inside
the rack, otherwise injury or part damage may
result.
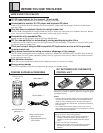
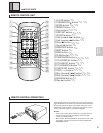
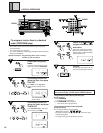
DISC
SET
MARK
0
TRACK
SET
PQRS
7
TUV
8
WXYZ
9
TITLE
SEARCH
TITLE
INPUT
GHI
4
JKL
5
MNO
6
TITLE
DISPLAY
1
ABC
2
DEF
3
TIME/
CHARA
OPEN/
CLOSE
DISC/
CHARA
PUSH ENTER
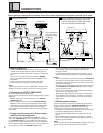
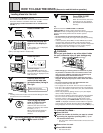
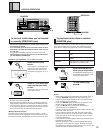
HOW TO LOAD THE DISCS (Be sure to read this before operation)
STANDBY
STANDBY/ON
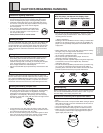
1
2
3
4
301–DISC
CDF
ILE
1
2
UNLOAD
3
4
5
6
7
Loading discs into the rack
• You can load up to 300 discs in the rack.
The numbers marked on the rack are used as the disc numbers.
These are marked in a clockwise order from 1 to 300.
• The following procedure describes how to load discs from
disc No. 1.
Press STANDBY/ON.
Ensure that the disc No.
shown on the display is
"1".
If disc number "1" is not displayed,
press digit button 1 .
(Carry out step 3 within 5 seconds.)
Press UNLOAD.
«
RENTAL DISC TRACK REMAIN MIN SEC
ALL RANDOM REPEAT - 1 BEST ADLC CUSTOM
SINGLE CD TEXT PREVIOUS SCAN PROGRAM
The hood will open.
When UNLOAD is pressed, the
hood opens to the disc correspond-
ing to the disc No. displayed on the
front of the unit.
Load the disc into the
rack with the label side
(printed surface) facing to
the right.
Label side faces right.
(Side to be played faces left.)
Note!!
•
Inserting more than one disc into the slot will damage the discs
and cause the unit to malfunction.
Turn the jog dial clock-
wise to rotate the rack.
When the jog dial is turned
clockwise, the rack turns in the
direction in which the disc number
increases (1, 2, 3 ...).
When turned counterclockwise,
the rack turns in the opposite
direction.
Load other discs into the rack by repeat-
ing steps
4
and
5
for each of them.